Remove Water Spots from Car Paint in Under 30 Mins (2025 Guide)
The most effective method to remove stubborn water spots from car paint in under 30 minutes involves a two-step process using specialized acidic cleaners or vinegar solutions followed by proper sealing, ensuring a pristine, damage-free finish.
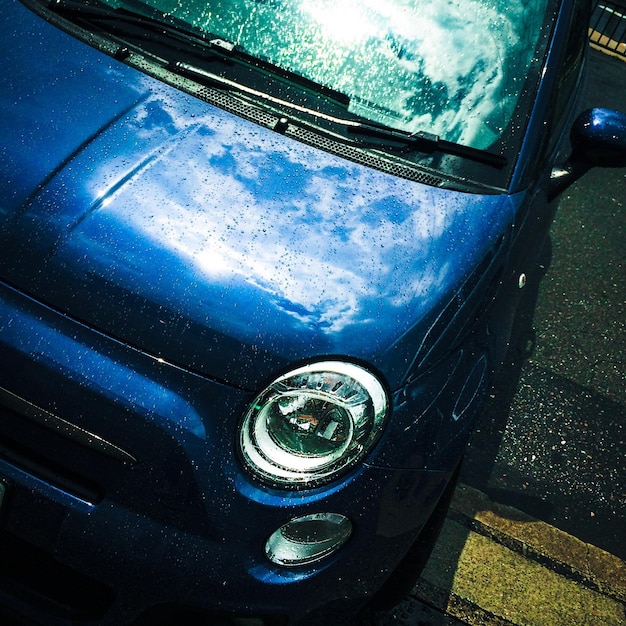
Few things diminish a car’s pristine appearance faster than stubborn water spots, those chalky, opaque rings that cling tenaciously to the paintwork. These blemishes aren’t merely cosmetic; they can etch into your vehicle’s clear coat, causing permanent damage if left untreated. This How to Remove Stubborn Water Spots from Your Car’s Paint in Under 30 Minutes (2025 Guide) will equip you with the knowledge and techniques to tackle these unsightly marks efficiently, restoring your car’s showroom shine without extensive time or effort.
Understanding Water Spots: Types and Formation
Before diving into removal techniques, it’s crucial to understand what water spots are and why they form. Not all water spots are created equal; recognizing their type will help you choose the most effective removal strategy. At their core, water spots are mineral deposits left behind when water, often hard water, evaporates from your car’s surface.
Water, whether from rain, sprinklers, or a car wash, contains dissolved minerals like calcium, magnesium, and bicarbonates. When this water dries, especially under sunlight or heat, the H2O evaporates, leaving these mineral residues hardened onto your car’s clear coat. This process can be accelerated by warmer temperatures, which promote quicker evaporation and more concentrated mineral deposits.
Type 1: Mild or Hard Water Spots
These are the most common and easiest to remove. They appear as faint rings or smudges on the paint surface. They typically form from rain or tap water with moderate mineral content, drying quickly before the minerals have a chance to bond strongly with the clear coat.
- Formation: Rapid evaporation of water with low to moderate mineral content.
- Appearance: Faint, hazy rings or spots on the surface.
- Removal Difficulty: Generally easy with mild solutions.
Type 2: Etched or Bonded Mineral Deposits
These spots are more problematic. They occur when minerals are left on the paint for an extended period, or when the water contains higher concentrations of acids (like acid rain) or harsh chemicals. The minerals begin to bond with, and eventually etch into, the clear coat, creating a concave impression. You can often feel a slight indentation if you run your fingernail over them.
- Formation: Prolonged exposure or highly mineralized/acidic water causing chemical bonding.
- Appearance: Deeper, more defined rings, sometimes with a ‘pitted’ look.
- Removal Difficulty: Requires more aggressive treatment, sometimes professional help.
Understanding these distinctions is the first step toward effective removal. Mild spots can often be addressed with simple household solutions, while etched spots demand more specialized products and techniques to avoid further damage to your car’s finish. Always start with the least aggressive method and escalate only if necessary.
Essential Tools and Materials for Water Spot Removal
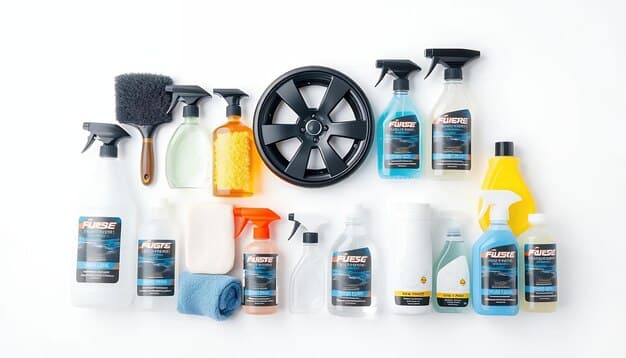
Having the right arsenal of tools and materials is paramount for efficient and safe water spot removal. Using incorrect products or abrasive materials can cause more harm than good, leading to scratches or further clear coat damage. This section outlines the necessities, ensuring you’re well-prepared before you begin.
Preparation is key. Gather all your supplies before starting, ensuring they are clean and accessible. Working methodically will prevent unnecessary delays and potential errors, especially when you’re aiming to complete the task in under 30 minutes.
Required Cleaning Agents and Solutions
The choice of cleaning agent depends heavily on the severity of the water spots. For general, mild spots, a simple white vinegar solution is often highly effective due to its mild acidity. For more stubborn or slightly etched spots, specialized water spot removers are designed to safely dissolve mineral deposits without harming the clear coat.
- White Vinegar: Mix a 1:1 ratio with distilled water. This acid helps dissolve mineral deposits effectively.
- Dedicated Water Spot Remover: Products like CarPro Spotless, Meguiar’s Water Spot Remover, or Gyeon Q2M WaterSpot are formulated to safely break down minerals.
- Mild Car Wash Soap: For pre-cleaning the affected area.
- Isopropyl Alcohol (IPA) Solution (1:1 with water): For final wipe-down and surface prep, sparingly used.
Applicators and Microfiber Towels
The type of applicators and towels you use is as important as the cleaning agents themselves. High-quality, clean microfiber towels are essential to prevent scratching your paint. Always use separate towels for applying solution and for wiping it off to avoid cross-contamination.
- Soft Microfiber Towels: Several clean, high-quality towels. Dedicate separate towels for application, wiping, and buffing.
- Foam Applicator Pads: Ideal for applying liquid water spot removers evenly.
- Detailing Brushes (Optional): For intricate areas or around badges.
Protective Gear and Miscellaneous Items
While often overlooked, protective gear and auxiliary items ensure your safety and contribute to a more efficient process. Gloves protect your skin from chemicals, and a drying aid can help prevent new water spots from forming during the final rinse.
- Nitrile Gloves: Protect your hands from chemical irritation.
- Spray Bottles: For diluting and applying vinegar solution or IPA.
- Garden Hose with Filter (Optional but Recommended): For rinsing, especially if your tap water is hard.
- Drying Aid (e.g., Quick Detailer or Drying Spray): Helps water sheet off, preventing new spots.
By having all these items ready, you can streamline the removal process and focus solely on the task at hand, significantly increasing your chances of completing the job within the 30-minute timeframe. Remember, quality tools lead to quality results.
Step-by-Step Guide: Attacking Water Spots in Under 30 Minutes
Time is of the essence when tackling water spots, especially if you aim to complete the task quickly. This step-by-step guide is designed for efficiency, ensuring you address the problem effectively without sacrificing thoroughness. Follow these instructions precisely for optimal results.
Before you begin, ensure your car is out of direct sunlight and the paint surface is cool to the touch. Working on a hot surface will cause products to dry too quickly, leaving new streaks or making the removal process more challenging.
Step 1: Wash the Area Thoroughly (5-7 minutes)
Begin by washing the affected area of your car with a mild car wash soap and clean water. This step is crucial for removing any loose dirt, dust, or contaminants that could scratch the paint during the water spot removal process. Use a separate clean wash mitt dedicated to this initial cleaning.
Rinse thoroughly after washing, ensuring no soap residue remains. While drying, be mindful of any remaining water, as it can, ironically, form new spots. Use a soft, clean microfiber towel or forced air (like a leaf blower) to quickly dry the surface.
Step 2: Apply Water Spot Remover (5-10 minutes)
Once the area is clean and dry, it’s time to apply your chosen water spot remover. For mild spots, start with a 1:1 mixture of white vinegar and distilled water in a spray bottle. For more severe spots, use a dedicated commercial water spot remover, following the manufacturer’s instructions carefully.
- For Vinegar Solution: Spray a generous amount onto a clean microfiber towel, then gently wipe the affected area in small sections. Overlap your passes to ensure even coverage.
- For Commercial Removers: Apply a small amount onto a foam applicator pad or directly onto a dedicated microfiber towel. Work in small sections, gently rubbing in straight lines or small circles, applying light pressure.
Allow the product to dwell for the recommended time (usually 30 seconds to 1 minute for commercial products, slightly longer for vinegar), but never let it dry on the paint. This is critical for preventing etching or further damage.
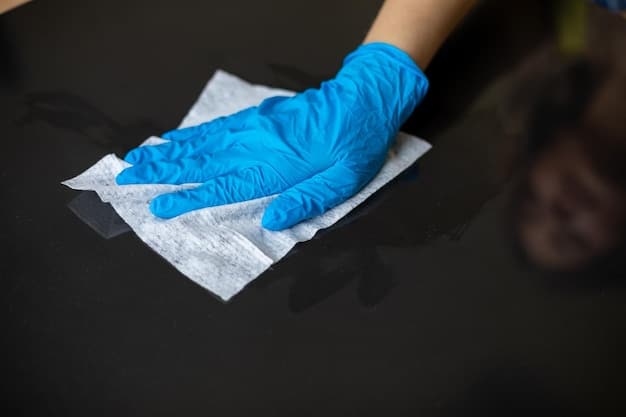
Step 3: Wipe Off and Inspect (3-5 minutes)
Immediately after the dwell time, use a clean, dry microfiber towel to wipe away the water spot remover. Buff gently until the surface is dry and free of any residue. Flip your towel frequently to a clean side to avoid simply spreading the dissolved minerals back onto the paint.
Inspect the treated area carefully under good lighting. If stubborn spots remain, you may need to repeat Step 2, focusing on those specific areas. Be patient but quick. Multiple light applications are better than one heavy application that could potentially damage the clear coat.
Step 4: Rinse and Dry (3-5 minutes)
After successfully removing the water spots, rinse the entire treated area with clean water to remove any lingering chemical residue. This neutralizes any remaining acids from the remover and prepares the surface for the next step. Dry the area immediately using a high-quality drying towel or forced air methods to prevent new spot formation.
Step 5: Protect the Paint (5-8 minutes)
This final step is crucial for long-term protection and preventing future water spots. Apply a high-quality sealant, wax, or ceramic coating to the treated area. This creates a sacrificial layer over your car’s clear coat, making it harder for minerals to bond and easier for water to bead and roll off.
Applying a protective layer not only enhances the shine but also acts as a barrier, making your next cleaning job considerably easier. Ensure you follow the product’s instructions for application and curing times to maximize its effectiveness.
By adhering to these steps, you can effectively remove most water spots in under 30 minutes, restoring your car’s finish and protecting it for the future. Consistency and attention to detail are your best allies in this process.
Advanced Techniques for Stubborn, Etched Water Spots
When milder methods fail, you’re likely dealing with etched water spots, which have chemically bonded with or corroded the clear coat. These require a more aggressive, yet careful, approach. It’s important to understand that removing deep etches without altering the paint can be challenging, sometimes requiring professional attention.
Always proceed with caution when using advanced techniques. The goal is to remove the etched mineral without damaging the underlying clear coat further. Start with the least aggressive option and work your way up.
Clay Bar Treatment
Before resorting to abrasive compounds, try a clay bar. A detailing clay bar can effectively pull out contaminants and some light etching from the clear coat. It’s a non-abrasive method that mechanically removes particles from the surface.
- How to Use: After thoroughly washing and drying the car, spray a clay lubricant onto a small section of the paint. Gently glide the clay bar across the lubricated surface using light pressure. The clay will pick up contaminants. Knead and fold the clay frequently to expose a clean surface.
- Benefits: Non-abrasive, removes embedded contaminants, can improve paint smoothness.
If the spots are still visible after claying, it indicates deeper etching, and you’ll need to move to the next level of treatment.
Machine Polishing (Compound/Polish)
For more severe etching, machine polishing with a cutting compound, followed by a lighter polish, might be necessary. This process abrades a microscopic layer of the clear coat, effectively leveling the surface and removing the etch marks.
- Products Needed: Dual-action (DA) polisher, cutting compound (e.g., Meguiar’s M105), polishing compound (e.g., Meguiar’s M205), appropriate foam pads (cutting and finishing).
- Procedure:
- Apply a small amount of cutting compound to a cutting pad on your DA polisher.
- Work in a small section (e.g., 2×2 feet), slowly moving the polisher over the etched area until the spots diminish. Do not apply excessive pressure.
- Wipe off residue with a clean microfiber towel.
- Switch to a finishing pad and apply polishing compound to refine the finish and remove any hazing left by the cutting compound.
- Wipe off residue.
Machine polishing requires a degree of skill and practice. If you are not comfortable using a polisher, it’s highly recommended to seek professional detailing services to avoid potential damage to your paint.
Wet Sanding (Extremely Stubborn Etches)
This is the most aggressive method and should only be considered as a last resort, typically by experienced professionals. Wet sanding involves using very fine-grit sandpaper (e.g., 2000-3000 grit) with water to manually abrade the clear coat surface, removing deep etches. This must always be followed by compounding and polishing to restore the shine.
Wet sanding carries a high risk of burning through the clear coat or causing permanent damage if not done correctly. It is not recommended for an at-home quick fix and should generally be left to professional detailers who know how to gauge clear coat thickness and use this technique safely.
Regardless of the advanced technique used, always reapply a protective layer (sealant, wax, or coating) after the process to safeguard your newly restored paint. Prevention, after all, is better than having to resort to these intensive restoration methods.
Preventing Future Water Spots: Long-Term Solutions
Removing water spots is only half the battle; preventing their return is key to maintaining a flawless finish. Incorporating proactive habits and using protective products can significantly reduce the likelihood of these stubborn marks reappearing on your vehicle’s paintwork. Prevention is always less time-consuming and less damaging than correction.
Developing good car care habits is perhaps the most effective long-term strategy. It’s about being mindful of how and when your car gets wet, and how it dries.
1. Wash and Dry Immediately
The simplest and most effective prevention method is to wash your car regularly and dry it immediately and thoroughly after contact with water. This applies to rain, sprinkler systems, or car washes. Never let water air dry on your paint, especially in direct sunlight or warm conditions.
- Use a Leaf Blower: A powerful leaf blower can quickly remove most water from surfaces, especially intricate areas, before mineral deposits can form.
- High-Quality Drying Towels: Invest in super-absorbent microfiber drying towels that can soak up large amounts of water efficiently without streaking or scratching.
- Drying Aids: Use a quick detailer or a dedicated drying aid spray during the drying process. These products often contain polymers that enhance water sheeting and lubricate the surface, making drying safer and faster.
2. Apply and Maintain Paint Protection
A sacrificial layer of protection on your paint is a critical barrier against water spots. This layer, whether it’s wax, sealant, or a ceramic coating, makes the surface more hydrophobic (water-repellent), causing water to bead up and roll off easily, reducing dwell time for minerals.
- Wax: Offers good protection and shine, typically lasting a few weeks to a few months. Regular reapplication is necessary.
- Paint Sealant: More durable than wax, often polymer-based, providing several months of protection.
- Ceramic Coating: The most durable option, forming a semi-permanent bond with the clear coat. Offers superior hydrophobicity and chemical resistance, lasting years. While an initial investment, it significantly reduces water spot etching over time.
Regularly check the condition of your protection layer. If water no longer beads effectively, it’s time to reapply or top up your protection.
3. Use De-Ionized or Filtered Water
For ultimate prevention, consider using de-ionized (DI) or filtered water for your car washes, especially for the final rinse. DI water has had minerals removed, meaning there’s nothing left behind to form water spots, even if it air dries.
Home de-ionization systems are available, though they represent a more significant investment. For simpler solutions, some car wash facilities use filtered water, or you can use spot-free rinse services.
4. Avoid Parking Near Sprinklers or Under Trees
Be mindful of where you park. Sprinkler systems are notorious for leaving mineral and chemical-laden water on cars. Trees can drip sap and other contaminants that mix with water and exacerbate spotting. Opt for shaded areas or a garage when possible, especially after rain or a wash.
By integrating these preventative measures into your car care routine, you will spend less time correcting water spots and more time enjoying your car’s pristine, protected finish.
Common Mistakes to Avoid During Water Spot Removal
While removing water spots might seem straightforward, several common mistakes can lead to suboptimal results or, worse, irreversible damage to your car’s paint. Being aware of these pitfalls will help you achieve a professional-looking finish while preserving your vehicle’s clear coat integrity.
The goal is always effective removal without introducing new problems. Patience and attention to detail are crucial during this process.
1. Working on a Hot Surface
One of the most frequent and detrimental errors is attempting to remove water spots on a hot car or in direct sunlight. Heat causes cleaning solutions to evaporate almost instantly, leaving behind new streaks, residue, or even etching the chemicals into the paint. This can make the problem significantly worse and much harder to correct.
- Solution: Always work in a shaded area, a garage, or during cooler parts of the day. Ensure the paint surface is cool to the touch before applying any products.
2. Using Abrasive Materials
Using rough sponges, paper towels, or dirty microfiber cloths can introduce scratches, swirl marks, and marring to your clear coat. These abrasions are often more noticeable and harder to correct than the initial water spots.
- Solution: Always use only clean, high-quality, soft microfiber towels and foam applicator pads. Dedicate separate towels for different stages of the process (application, wipe-off, buffing). Wash towels regularly and separately from other household laundry to avoid contamination.
3. Letting Products Dry on the Paint
Whether it’s a vinegar solution, a dedicated water spot remover, or even car wash soap, allowing these products to dry on the paint can cause new etching, staining, or residue that is incredibly difficult to remove safely. Many water spot removers are acidic and designed for short contact times.
- Solution: Work in small sections (e.g., 2×2 feet) at a time. Apply the product, allow the recommended dwell time, and wipe away thoroughly before moving to the next section. Never walk away from the car when a product is on the paint.
4. Over-Using or Improperly Using Acids/Compounds
While acids are effective at dissolving mineral deposits, over-reliance or improper application can lead to clear coat damage. Similarly, over-polishing with abrasive compounds can thin out your clear coat, reducing its protective capabilities and making it more susceptible to future damage.
- Solution: Start with the least aggressive method possible. If using acidic removers, follow manufacturer instructions precisely for dilution and dwell time. For polishing, use a DA polisher with proper technique and only when necessary for etched spots. If unsure, consult a professional.
5. Neglecting Post-Treatment Protection
Failing to apply a protective layer (wax, sealant, or ceramic coating) after removing water spots leaves your paint vulnerable to immediate re-spotting. The removal process often strips existing protection, leaving the clear coat exposed.
- Solution: Always finish the water spot removal process by applying a fresh layer of protection. This not only prevents future spots but also enhances the shine and makes future maintenance easier.
By consciously avoiding these common mistakes, you’ll significantly improve your efficiency and the quality of your water spot removal efforts, ensuring a gleaming, undamaged finish.
When to Call a Professional: Recognizing Limitations
While many water spots can be effectively removed at home, there are instances where professional intervention becomes necessary. Recognizing these limitations is crucial to prevent further damage to your car’s paintwork and to ensure the most effective restoration. Attempting DIY solutions beyond your skill level or the severity of the damage can lead to costly repairs.
A professional detailer possesses specialized tools, products, and most importantly, the experience to tackle complex paint defects safely and effectively. Knowing when to step back and seek expert help can save you time, frustration, and potential financial loss.
Deeply Etched or Corroded Spots
If, after attempting the advanced techniques like clay bar treatment and milder polishing, the water spots remain visibly etched into the clear coat, they may be too deep for safe DIY removal. These types of spots often require machine compounding and polishing by someone who understands paint thickness, product application, and safe clear coat removal.
- Signs: You can feel the imperfection with your fingernail, or the spots appear as significant depressions in the clear coat that don’t respond to surface treatments.
- Why Professional: Professionals use precise tools, measure clear coat thickness, and have the experience to remove minimal layers of clear coat to level the surface without burning through it.
Widespread Damage
If a large portion of your car’s paint is covered in severe water spots, or if the damage extends to multiple panels, tackling it yourself can be an overwhelming and excessively time-consuming task. A professional can execute the job much more efficiently, often with superior results.
- Benefits: Comprehensive treatment, consistent results across all affected areas, and generally a faster process due to specialized equipment.
Lack of Proper Tools or Experience
Advanced water spot removal, especially methods involving machine polishing or wet sanding, requires specific tools (like a dual-action polisher) and a learning curve. If you lack the necessary equipment or hands-on experience, attempting these processes can easily lead to swirl marks, hazing, or even clear coat failure.
- Risk vs. Reward: The cost of professional detailing is often far less than attempting to repair paint damage caused by improper DIY techniques.
Paint Defects Beyond Water Spots
Sometimes, what appears to be a water spot problem might be compounded by other paint defects like oxidation, clear coat failure, or significant scratching. A professional detailer can accurately diagnose all paint issues and recommend a holistic treatment plan that addresses all problems, not just the water spots.
- Expert Assessment: Professionals can differentiate between various defects and understand their underlying causes, leading to a more effective and lasting solution.
Ultimately, investing in professional detailing for severe water spot issues is an investment in your vehicle’s appearance and longevity. Don’t hesitate to seek expert help when the problem is beyond your comfort zone or capabilities.
| Key Point | Brief Description |
|---|---|
| 🧽 Quick Wash | Always wash the area thoroughly before treatment to avoid scratching. |
| 💧 Targeted Solutions | Use vinegar for mild spots, specialized removers for tougher ones. |
| ✨ Protect Afterward | Apply wax, sealant, or coating to prevent future spots and maintain shine. |
| ☀️ Work in Shade | Avoid direct sunlight and hot surfaces to prevent product drying too quickly. |
Frequently Asked Questions About Water Spot Removal
While some household cleaners might seem to work initially, they are generally not recommended for car paint. Windex contains ammonia which can damage clear coats, especially on tinted windows. Dish soap can strip waxes and sealants, leaving your paint unprotected and more prone to new spots. Stick to automotive-specific products or a diluted white vinegar solution.
Mild water spots typically sit on the surface and appear as hazy rings that can be wiped away with a mild acidic cleaner. Etched spots, conversely, feel rough or slightly indented when you run your fingernail over them. They often don’t disappear easily with surface cleaners, indicating a chemical bond or corrosion into the clear coat.
Yes, any abrasive process like polishing or compounding will remove a ceramic coating. These processes work by abrading the top layer of your vehicle’s finish, which includes the ceramic coating. After removing etched water spots with polishing, you will need to reapply a ceramic coating to that specific area to restore protection.
The time it takes for water spots to etch varies widely depending on factors such as water hardness, mineral concentration, ambient temperature, and sunlight exposure. In hot, sunny conditions with hard water, etching can begin within hours. In milder conditions, it might take days or even weeks for etching to become significant.
A leaf blower is an excellent tool for quickly removing the majority of water from your car’s surface and certainly helps prevent water spots. However, it often doesn’t remove all water, especially from crevices or when water is very cold. For absolute spot prevention, always follow up with a high-quality drying towel or a drying aid.
Conclusion
Effectively addressing water spots on your car’s paint is a crucial aspect of maintaining its aesthetic appeal and preserving its long-term value. By understanding the types of water spots, employing the right tools and techniques, and diligently implementing preventative measures, you can consistently achieve and maintain a showroom-quality finish. While most common spots are readily tackleable within 30 minutes, prioritizing proper drying and proactive paint protection will minimize future struggles and keep your vehicle looking its best for years to come. Remember, consistency in care is the ultimate secret to a pristine automotive finish.


