Troubleshooting Car Noises: Your DIY Guide to Fixing Top 5 Sounds
Troubleshooting Common Car Noises: A DIY Guide to Identifying and Fixing the Top 5 Sounds offers practical advice for car owners to diagnose and resolve common vehicle sounds, saving time and money on professional repairs.
Is your car making strange noises? Don’t panic! Many common car sounds can be diagnosed and even fixed at home with a little know-how. This guide to troubleshooting common car noises: A DIY guide to identifying and fixing the top 5 sounds will empower you to become your own car doctor, saving you time and money on unnecessary mechanic visits.
From squeaks and rattles to clunks and whines, we’ll break down the most frequent culprits behind those irritating noises, offering step-by-step instructions to help you identify the problem and implement effective solutions. Let’s get started on troubleshooting common car noises: A DIY guide to identifying and fixing the top 5 sounds.
Troubleshooting Common Car Noises: A DIY Guide
Taking a proactive approach to car maintenance sometimes involves more than just regular check-ups; it also means paying attention to the sounds your vehicle makes. Troubleshooting Common Car Noises: A DIY Guide to Identifying and Fixing the Top 5 Sounds provides the tools for you to figure out what your car is telling you.
Different noises can indicate various issues, some minor and others more serious. With a little investigation, you can often identify the source of the sound and determine whether it’s something you can fix yourself or if it requires professional attention. This article will delve into common car sounds, their potential causes, and how to address them effectively. Taking the initiative in troubleshooting common car noises: A DIY guide to identifying and fixing the top 5 sounds can help to avoid bigger issues down the road.
Tools You’ll Need
Before diving into diagnosing and fixing noises, gather these essential tools:
- Wrench set
- Screwdriver set
- Jack and jack stands
- Penetrating oil
- Gloves and safety glasses
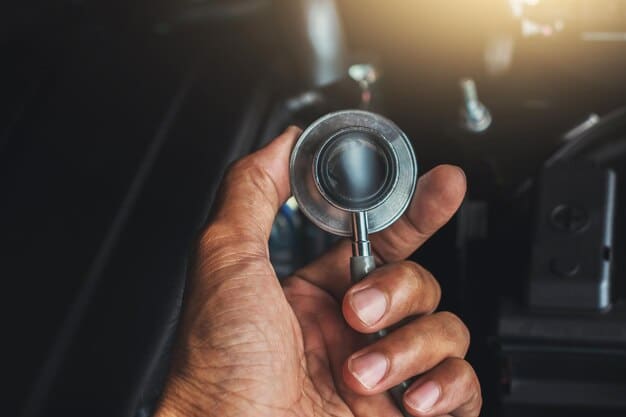
- A listening device (mechanic’s stethoscope or a long screwdriver)
Having these tools on hand ensures you’re prepared to tackle most common noise-related issues. Remember to always prioritize safety when working on your vehicle.
Safety First
Before you start any repairs, remember these safety tips:
- Always work in a well-ventilated area.
- Use jack stands when lifting your car. Never work under a car supported only by a jack.
- Disconnect the negative battery cable before working on electrical components.
- Wear safety glasses and gloves to protect yourself.
By following these safety precautions, you can minimize the risk of injury while working on your car.
In summary, this section set the foundation by providing an overview of troubleshooting common car noises: A DIY guide to identifying and fixing the top 5 sounds. By gathering necessary tools and following safety tips, you’re preparing to diagnose and address those noises effectively.
Sound 1: Squealing Brakes
One of the most common and potentially alarming car noises is the squealing of brakes. This sound often indicates worn brake pads, but it can also be caused by other factors. Proper troubleshooting common car noises: A DIY guide to identifying and fixing the top 5 sounds will lead to a safer driving experience.
Understanding the possible causes and knowing how to inspect your brakes can help you determine the necessary steps to resolve the issue. Let’s see what causes Squealing Brakes and how to troubleshoot this.
Possible Causes of Squealing Brakes
Several factors can cause brakes to squeal:
- Worn brake pads: This is the most common cause. As brake pads wear down, a metal indicator rubs against the rotor, creating a squealing noise.
- Glazed brake pads: Overheating can cause brake pads to become glazed, resulting in a high-pitched squeal.
- Debris: Dirt, dust, or small stones can get lodged between the brake pad and rotor, causing noise.
- Worn rotors: Grooves or rust on the rotors can cause the pads to squeal.
Identifying the specific cause is the first step in addressing the problem.
How to Inspect Your Brakes
Follow these steps to inspect your brakes:
- Loosen the lug nuts on the wheel.
- Jack up the car and secure it with jack stands.
- Remove the wheel.
- Inspect the brake pads: Check the thickness of the brake pads. If they are less than 1/4 inch thick, they need to be replaced.
- Inspect the rotors: Look for grooves, rust, or uneven wear. If the rotors are damaged, they may need to be resurfaced or replaced.
This inspection will give you a clear picture of the condition of your brakes.
By following these steps, this section delivered practical advice on identifying causes and conducting useful inspections related to troubleshooting common car noises: A DIY guide to identifying and fixing the top 5 sounds.
Sound 2: Clicking While Turning
A clicking sound that occurs while turning is often a sign of a failing Constant Velocity (CV) joint. This is a crucial component in your car’s drivetrain, so it’s important to address this issue promptly. Learning to use troubleshooting common car noises: A DIY guide to identifying and fixing the top 5 sounds is a worthwhile investment.
Understanding how CV joints work and how to identify a failing one can save you from more extensive and costly repairs. Let’s see how to troubleshoot a clicking while turning.
Understanding CV Joints
CV joints allow your car’s drive shafts to transmit power to the wheels at a constant speed, even when the suspension is moving or the car is turning. They are protected by a rubber boot filled with grease. If the boot tears, the grease can leak out, and dirt and moisture can get in, causing the joint to wear out and click.
Here’s a summary of how CV Joints operate:
- Transmits power smoothly
- Allows for wheel movement
- Protected by a rubber boot
- Vulnerable to damage if the boot tears
Maintaining the integrity of the CV joint boots is essential for the longevity of the CV joints.
Diagnosing a Failing CV Joint
To diagnose a failing CV joint, perform the following steps:
- Inspect the CV joint boots: Look for tears or cracks in the rubber boots. If you see any damage, the joint is likely failing.
- Listen for the clicking sound: Drive the car in a tight circle at low speed. If you hear a clicking sound, the CV joint is likely the culprit.
Early detection is crucial in preventing further damage.
In conclusion, this section has provided a detailed guide to troubleshooting common car noises: A DIY guide to identifying and fixing the top 5 sounds related to clicking sounds while turning, arming you with the knowledge to diagnose and address a failing CV joint.
Sound 3: Knocking Noise From the Engine
A knocking noise coming from the engine is a serious concern and should be addressed immediately. It could indicate a problem with the engine’s internal components, such as the connecting rods or bearings. Using troubleshooting common car noises: A DIY guide to identifying and fixing the top 5 sounds will come in handy with this issue.
Ignoring this sound can lead to significant engine damage, so it’s essential to understand the possible causes and take appropriate action. Let’s see what causes a knocking noise from the engine.
Possible Causes of Engine Knocking
Several factors can cause engine knocking:
- Low oil pressure: Insufficient oil can cause the connecting rods or bearings to knock against the crankshaft.
- Worn bearings: Over time, engine bearings can wear out, creating excessive play and causing a knocking sound.
- Detonation (pinging): This occurs when the air-fuel mixture in the cylinders ignites improperly, causing a knocking or pinging sound.
- Rod knock: This is a severe condition where the connecting rod bearings are severely worn, causing a loud, deep knocking sound.
Each of these causes requires a different approach to diagnosis and repair.
Diagnosing Engine Knocking
To diagnose engine knocking, follow these steps:
- Check the oil level: Ensure that the oil level is at the proper mark on the dipstick. If it’s low, add oil.
- Listen to the engine: Try to pinpoint the location of the knocking sound. Is it coming from the top or bottom of the engine?
- Use an OBD-II scanner: Check for any engine codes that could provide clues about the cause of the knocking.
If the knocking persists or worsens, it’s best to consult a professional mechanic for further diagnosis and repair.
In short, this section delivered guidelines on troubleshooting common car noises: A DIY guide to identifying and fixing the top 5 sounds, particularly the ominous knocking noise coming from the engine. By understanding the causes and diagnostic steps, you can quickly assess the severity of the issue and take appropriate action.
Sound 4: Hissing Sound From Under the Hood
A hissing sound coming from under the hood often indicates a leak in the vacuum, coolant, or air conditioning system. While not always critical, these leaks can affect your car’s performance and efficiency. Implementing troubleshooting common car noises: A DIY guide to identifying and fixing the top 5 sounds to this is important.
Identifying the source of the hiss is the first step in addressing the problem. Let’s see how to troubleshoot a hissing sound from under the hood.
Possible Sources of a Hissing Sound
Common sources of hissing sounds include:
- Vacuum leaks: Hoses or connections in the vacuum system can crack or become loose, causing a hissing sound. These leaks can affect engine performance.
- Coolant leaks: A leak in the cooling system can cause coolant to spray onto a hot engine surface, creating a hissing sound as it vaporizes.
- Air conditioning leaks: Refrigerant leaks in the AC system can also produce a hissing sound, along with reduced cooling performance.
Knowing the location of the hiss can help narrow down the possible causes.
How to Locate the Leak
To locate the leak, perform these steps:
- Listen carefully: Try to pinpoint the location of the hissing sound.
- Inspect the hoses: Check all hoses for cracks, leaks, or loose connections.
- Check the coolant level: If the coolant level is low, look for signs of leaks around the radiator, hoses, and water pump.
Once you find the leak, you can either repair it yourself or take your car to a mechanic.
In summary, this section has provided info on troubleshooting common car noises: A DIY guide to identifying and fixing the top 5 sounds, specifically focusing on the hissing sound coming from under the hood. Understanding the sources and how to locate them could lead to getting it properly diagnosed.
Sound 5: Rumbling Exhaust
A rumbling or roaring sound coming from the exhaust system often indicates a leak in the muffler or exhaust pipes. While not immediately dangerous, exhaust leaks can reduce fuel efficiency and increase emissions. Using the tips included in troubleshooting common car noises: A DIY guide to identifying and fixing the top 5 sounds here is a valuable asset.
Addressing this issue can help maintain your car’s performance and reduce its environmental impact. Let’s see how to troubleshoot a rumbling exhaust.
Possible Causes of a Rumbling Exhaust
Several factors can cause a rumbling exhaust:
- Rust: Rust is the most common cause of exhaust leaks. Over time, rust can weaken the metal in the muffler and pipes, leading to holes and leaks.
- Damage: Physical damage from road debris or accidents can also cause exhaust leaks.
- Loose connections: The connections between exhaust components can loosen over time, creating leaks.
Identifying the cause is the first step in planning the repair.
How to Inspect the Exhaust System
To inspect the exhaust system, follow these steps:
- Start the car: Let the engine run for a few minutes to warm up the exhaust system.
- Listen for leaks: Carefully listen for rumbling or hissing sounds coming from under the car.
- Inspect the components: Check the muffler, exhaust pipes, and connections for rust, damage, or loose connections.
Small leaks can sometimes be temporarily patched with exhaust tape, but a permanent repair usually involves replacing the damaged components.
In conclusion, this section has walked you through troubleshooting common car noises: A DIY Guide to Identifying and Fixing the Top 5 Sounds from a rumbling exhaust. This will help for a better understanding the reasons and solutions.
| Key Point | Brief Description |
|---|---|
| 🛠️ Squealing Brakes | Often indicates worn brake pads; inspect thickness and rotor condition. |
| ⚙️ Clicking While Turning | Sign of a failing CV joint; check for torn boots and listen for clicking in turns. |
| 🔥 Engine Knocking | Serious; could indicate low oil or worn bearings. Professional inspection advised. |
| 💨 Hissing Under Hood | Likely vacuum, coolant, or AC leak; inspect hoses and fluid levels. |
Frequently Asked Questions
Addressing car noises promptly can prevent minor issues from escalating into major, costly repairs. Early detection often allows for simpler fixes and helps maintain your vehicle’s overall health.
Essential tools include a wrench set, screwdriver set, jack and jack stands, penetrating oil, gloves, and safety glasses. A mechanic’s stethoscope or long screwdriver can also help in locating sounds.
Many basic car noise issues can be diagnosed and sometimes fixed at home with the right tools and guidance. However, complex problems should always be referred to a professional mechanic.
To check your brake pads, remove the wheel and inspect the pad thickness. If they are less than 1/4 inch thick, they need replacing. Check at least every 6 months or with every oil change.
If you suspect a serious engine issue, like knocking, stop driving the car immediately and consult a qualified mechanic. Continuing to drive with a serious engine problem can cause extensive damage.
Conclusion
Troubleshooting Common Car Noises: A DIY Guide to Identifying and Fixing the Top 5 Sounds empowers you to take control of your car’s maintenance by helping you identify and address common sounds, potentially saving you money and time. Remember to prioritize safety and consult a professional when in doubt.
By staying informed and proactive, you can keep your car running smoothly and avoid major repairs down the road.


")

