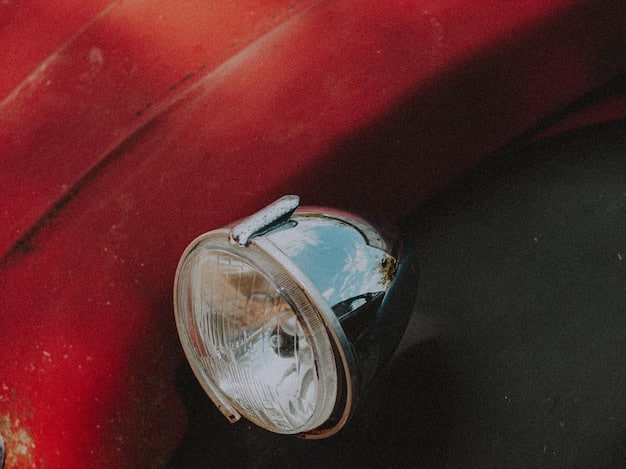
Headlight Restoration: Get 80% Brighter Lights in 1 Hour (DIY)
Headlight restoration is a DIY process to remove the cloudy or yellowed oxidation from headlight lenses, improving visibility by up to 80% in under an hour using readily available tools and materials.
Is your car’s visibility suffering from dull, hazy headlights? Don’t replace them just yet! Headlight restoration: Get 80% brighter lights in under 1 hour (DIY guide) provides a simple, cost-effective solution to dramatically improve your headlights’ performance and your driving safety.
Understanding Headlight Oxidation
Before diving into the restoration process, it’s important to understand why headlights become cloudy in the first place. This cloudiness is primarily caused by oxidation, the result of prolonged exposure to UV rays from the sun.
The outer layer of most headlight lenses is made of polycarbonate plastic, which is susceptible to UV damage. Over time, this exposure leads to a chemical breakdown of the plastic, creating a hazy, yellowed surface.
The Science Behind Headlight Clouding
The process isn’t just cosmetic; it significantly reduces the amount of light that can pass through the lens. This directly impacts nighttime visibility, making it harder to see the road and potential hazards. Furthermore, oxidized headlights can diminish the overall appearance of your vehicle.
Factors Contributing to Oxidation
Several factors accelerate headlight oxidation, including intense sunlight, extreme temperature fluctuations, road debris, and harsh chemicals from car washes. Where you live and how often you drive can also play a significant role.
- UV Exposure: Constant exposure to sunlight is the primary culprit.
- Environmental Pollutants: Smog, acid rain, and road salt can contribute to the breakdown of the plastic.
- Abrasion: Small impacts from road debris create microscopic scratches that accelerate oxidation.
- Chemicals: Harsh cleaning products and waxes can strip away protective coatings, leaving the plastic vulnerable.
By understanding the causes of headlight oxidation, you can better prevent and address the issue, ensuring your headlights remain clear and effective for years to come.
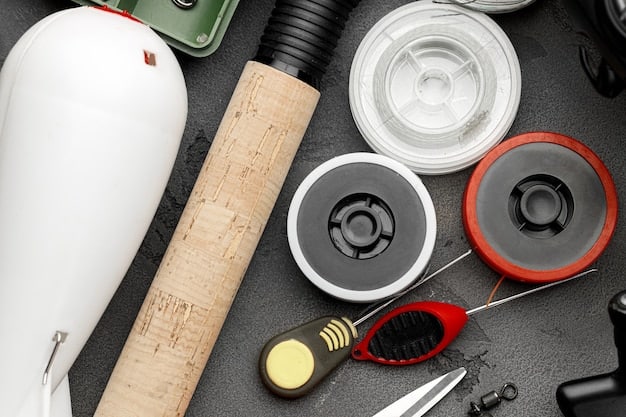
Essential Tools and Materials for Headlight Restoration
Restoring your headlights at home is an affordable and accessible project. However, achieving professional-quality results requires having the correct tools and materials on hand. This section outlines everything you’ll need to get started.
Gathering these items beforehand will make the restoration process smoother and more efficient, allowing you to focus on achieving the best possible clarity for your headlights.
Required Tools
First, you’ll need the essential tools for the job. These will help you prepare the surface and apply the necessary treatments effectively.
- Masking Tape: To protect the paint around the headlights.
- Spray Bottle: For applying water during sanding.
- Microfiber Cloths: For cleaning and polishing.
Materials for Headlight Restoration
The materials you choose are crucial for the effectiveness and longevity of the restoration. Opt for high-quality products designed specifically for headlight restoration.
- Variety of Sandpaper Grit: Usually ranging from 400 to 3000 grit.
- Headlight Cleaning Solution: Some kits include a specific cleaning solution, or you can use a mixture of soap and water.
- Polishing Compound: Designed for automotive plastics, to restore clarity.
- UV Protectant Sealant: Essential for protecting the restored headlights from future oxidation.
With the right tools and materials from the start, you’ll find restoring your headlights to be a satisfying and straightforward DIY project.
Step-by-Step Guide to Headlight Restoration
Now that you’ve gathered the necessary tools and materials, it’s time to start the headlight restoration process. This step-by-step guide will walk you through each stage, ensuring you achieve optimal results. It’s essential to follow these instructions carefully to avoid damaging your headlights or your car’s paint.
This process might seem a little tedious, but remember, the payoff of brighter headlights and improved visibility is well worth the effort.
Step 1: Cleaning and Taping
Start by thoroughly cleaning the headlights with soap and water to remove any dirt or debris. Once clean and dry, use masking tape to carefully protect the paint around the headlights. This will prevent any accidental damage from sanding or polishing.
- Preparation: Proper preparation is key to a successful restoration.
- Masking: Take your time to tape off the surrounding areas meticulously.
- Cleanliness: Ensure the headlights are free from any contaminants.
Step 2: Sanding the Headlights
Begin sanding the headlights with the coarsest grit sandpaper (e.g., 400 grit). Wet the sandpaper and the headlight lens, and sand in a consistent, back-and-forth motion. Apply even pressure and ensure the entire surface is evenly covered. Gradually move to finer grits (e.g., 800, 1000, 2000, 3000), repeating the process with each grit. Remember to keep the surface wet at all times.
Step 3: Polishing and Sealing
Once you’ve finished sanding, it’s time to polish the headlights. Apply a small amount of polishing compound to a microfiber cloth or polishing pad and buff the lens in a circular motion. If using a drill with a polishing pad attachment, use a low speed to avoid overheating the plastic.
Finally, apply a UV protectant sealant to the headlights. This will protect the restored lenses from future oxidation and keep them looking clear for longer. Follow the instructions on the sealant product for best results.
Common Mistakes to Avoid During Headlight Restoration
While headlight restoration is a straightforward DIY project, there are several common mistakes that can lead to unsatisfactory results or even damage your headlights. Knowing these pitfalls can help you avoid them and achieve a professional-quality finish.
Being aware of these common missteps is the first step to ensuring a successful and long-lasting headlight restoration.
Skipping Sandpaper Grits
One of the most common mistakes is skipping sandpaper grits. Progressing gradually from coarse to fine sandpaper is essential to remove the oxidized layer evenly and create a smooth surface for polishing. Skipping grits can leave deep scratches that are difficult to remove.
Applying Too Much Pressure
Applying excessive pressure while sanding can damage the headlight lens or create uneven surfaces. Let the sandpaper do the work and use consistent, moderate pressure. Overheating the lens can also cause warping or cracking, so avoid prolonged sanding in one spot.
- Even Pressure: Consistent pressure leads to the best results.
- Avoid Overheating: Keep the lens and sandpaper wet to prevent overheating.
- Patience is Key: Don’t rush the sanding process; take your time to achieve a smooth surface.
Neglecting UV Protection
The final step of applying a UV protectant is crucial for the longevity of the restoration. Without UV protection, the headlights will quickly re-oxidize and become cloudy again. Choose a high-quality UV sealant and apply it according to the manufacturer’s instructions.
Maintaining Your Restored Headlights
Once you’ve successfully restored your headlights, it’s important to take steps to maintain their clarity and prevent future oxidation. Regular maintenance can significantly extend the life of your restoration and ensure optimal visibility while driving.
With the right maintenance practices, you can keep your headlights looking clear and bright for years to come.
Regular Cleaning
Wash your headlights regularly with soap and water to remove dirt, debris, and environmental pollutants. Avoid using harsh chemicals or abrasive cleaners, as these can damage the UV protectant layer and accelerate oxidation.
Applying UV Protectant
Reapply a UV protectant sealant every few months to maintain a protective barrier against UV rays. This is especially important if you live in an area with intense sunlight or extreme weather conditions. Follow the instructions on the sealant product for best results.
- Periodic Reapplication: Reapply UV protectant regularly to maintain the protective barrier.
- Choose the Right Products: Use cleaners and protectants specifically designed for automotive plastics.
- Gentle Cleaning: Avoid abrasive materials that can scratch the lens.
Park in the Shade
When possible, park your car in the shade or in a garage to minimize exposure to sunlight. This can significantly reduce the rate of oxidation and keep your headlights looking clear for longer.
When to Consider Professional Headlight Restoration
While DIY headlight restoration can be effective for mild to moderate oxidation, there are situations where professional restoration may be the better option. Knowing when to seek professional help can save you time, effort, and potential frustration.
Understanding the limitations of DIY methods will help you assess whether professional restoration is the right choice for your headlights.
Severe Oxidation
If your headlights are severely oxidized or cracked, DIY restoration may not be sufficient to achieve satisfactory results. Professional restorers have access to specialized equipment and stronger chemicals that can address more severe damage.
Time Constraints
If you’re short on time or simply don’t want to invest the effort required for DIY restoration, professional services can provide a convenient solution. They can typically restore your headlights in a few hours, saving you valuable time.
- Specialized Equipment: Professionals use advanced tools and chemicals for superior results.
- Expertise: Professionals have the experience to handle complex restoration cases.
- Convenience: Save time and effort by hiring a professional service.
Cost vs. Benefit
Consider the cost of DIY materials and your time investment compared to the cost of professional restoration. In some cases, the cost difference may be minimal, and the professional service may offer better results and a longer-lasting solution.
| Key Point | Brief Description |
|---|---|
| 💡 Oxidation Removal | Sanding removes the cloudy, yellowed outer layer. |
| 🛡️ UV Protection | Applying a sealant prevents re-oxidation. |
| 🛠️ DIY vs. Professional | Choose based on oxidation level and time constraints. |
| 💰 Cost Savings | DIY restoration is cheaper than replacement. |
Frequently Asked Questions
▼
The longevity of headlight restoration depends on several factors, including the quality of the UV protectant used and environmental conditions. Typically, a DIY restoration can last from six months to a year with proper maintenance.
▼
A good starting point is 400 grit for heavily oxidized headlights. Progress through 800, 1000, 2000, and finish with 3000 grit. Ensure to wet sand with each grade for best results and to avoid damaging the lens.
▼
While some household products might seem appealing, it’s best to stick with cleaners designed for automotive plastics. Household cleaners can contain harsh chemicals that damage the lens or strip away protective coatings, leading to future cloudiness.
▼
Yes, headlight restoration is generally worth the effort and cost. It’s a cheaper alternative to replacing headlights and can dramatically improve nighttime visibility. This enhances driving safety and can improve the overall appearance of your vehicle.
▼
The frequency depends on environmental factors and the quality of the restoration. If you notice your headlights becoming cloudy again, typically after 6-12 months, it’s time for another restoration. Regular maintenance helps extend the clarity.
Conclusion
Restoring your headlights is a simple and effective way to improve your car’s visibility and safety, especially at night. By following this DIY guide, you can achieve professional-quality results in under an hour and save money compared to replacing your headlights.


