DIY Car Detailing: Get a Showroom Shine for Under $50

DIY car detailing allows you to achieve a showroom shine for under $50 by using cost-effective techniques and readily available cleaning supplies, saving you money while maintaining your vehicle’s appearance.
Want to make your car look like it just rolled off the showroom floor without breaking the bank? DIY car detailing: achieve a showroom shine for under $50. It’s easier than you think, and we’re here to show you how.
The Essentials of DIY Car Detailing
DIY car detailing is about more than just washing your car. It’s a comprehensive process that involves cleaning, polishing, and protecting your vehicle’s surfaces. Getting started requires understanding the basic steps and gathering the right supplies.
Gather Your Supplies
Before you begin, make sure you have everything you need. Having the right tools and products will make the process smoother and more effective.
Basic Cleaning Supplies
You don’t need expensive equipment to get started. Many household items can be used or adapted for car detailing.
- Microfiber Towels: Essential for washing, drying, and polishing.
- Car Wash Soap: Specifically designed for automotive paint.
- Buckets: Use two buckets – one for washing and one for rinsing.
- Wheel Cleaner: Removes brake dust and grime from wheels.
Understanding the Two-Bucket Method
The two-bucket method is a simple yet effective technique to prevent scratching your car’s paint during washing.
The two-bucket method significantly reduces the risk of transferring dirt and grime back onto your car’s paint. This simple practice keeps your wash water clean and your car’s finish looking its best.
By gathering the right supplies and understanding basic techniques, you set the stage for DIY car detailing success. These initial steps are crucial for achieving professional-quality results while keeping costs low.
Exterior Washing: The Foundation of a Great Detail
The first step in any DIY car detailing project is a thorough exterior wash. This removes dirt, grime, and other contaminants that can damage your car’s paint over time.
Pre-Rinse Your Car
Start by rinsing your car with water to loosen any surface dirt and debris. This makes the washing process more effective and reduces the risk of scratching.
Washing Your Car
Use your car wash soap and a microfiber wash mitt to gently wash your car, panel by panel. Work from top to bottom to ensure all surfaces are cleaned.
- Use a microfiber wash mitt: This is gentler on your car’s paint than a sponge.
- Work panel by panel: This ensures you don’t miss any spots.
- Rinse frequently: This prevents soap from drying on the paint.
Drying Your Car
After washing, dry your car with a clean, dry microfiber towel. This prevents water spots and streaks from forming on the paint.
Proper washing and drying techniques are essential for achieving a flawless finish. By following these steps, you can ensure your car’s exterior is clean and ready for the next stage of detailing.
Paint Correction: Removing Swirl Marks and Scratches
Over time, your car’s paint may develop swirl marks, scratches, and other imperfections. Paint correction is the process of removing these blemishes to restore your car’s finish.
Assessing the Damage
Before you begin, carefully inspect your car’s paint to identify any areas that need attention.
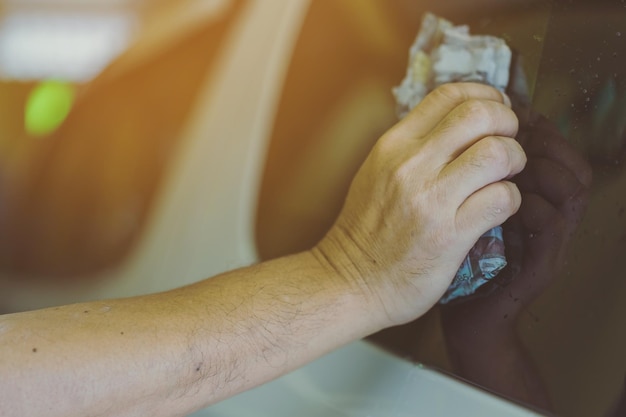
Using a Clay Bar
A clay bar is a detailing tool that removes embedded contaminants from your car’s paint. These contaminants can’t be removed by washing alone and can leave your paint feeling rough.
Paint correction can significantly improve the appearance of your car’s paint. By carefully removing swirl marks and scratches, you can restore your car’s finish to its original glory.
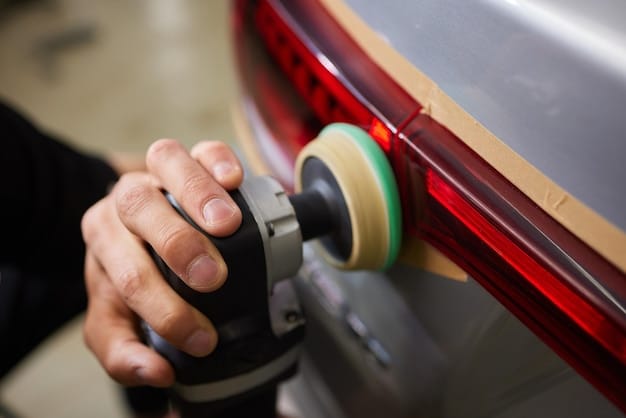
Polishing: Enhancing Shine and Depth
Polishing is the process of refining your car’s paint to enhance its shine and depth. It removes any remaining imperfections and prepares the paint for waxing or sealing.
Applying Polish
Apply a small amount of polish to a polishing pad and work it into the paint using overlapping motions. Use light pressure and avoid applying too much product at once.
Buffing the Paint
Use a clean microfiber towel to buff the paint and remove any excess polish. This will reveal the true shine and depth of your car’s finish.
- Use a clean microfiber towel: This prevents scratching the paint.
- Buff in overlapping motions: This ensures even coverage.
- Apply light pressure: This prevents damaging the paint.
Choosing the Right Polish
There are many different types of polishes available, each designed for specific types of paint and levels of correction.
Polishing is a crucial step in achieving a showroom shine. By carefully refining your car’s paint, you can enhance its gloss, depth, and overall appearance.
Waxing and Sealing: Protecting Your Investment
Waxing and sealing are essential for protecting your car’s paint from the elements. They create a barrier against UV rays, acid rain, and other environmental contaminants.
Applying Wax
Apply a thin, even coat of wax to your car’s paint using a foam applicator pad. Work in small sections and avoid applying too much product at once.
Buffing the Wax
Allow the wax to dry for the recommended amount of time (usually 15-20 minutes), then buff it off with a clean, dry microfiber towel.
Waxing and sealing are crucial for protecting your car’s paint and maintaining its shine. These steps create a barrier against environmental damage and help keep your car looking its best for years to come.
Interior Detailing: Cleaning and Protecting Your Cabin
DIY car detailing isn’t just about the exterior. Your car’s interior also needs attention to keep it clean, fresh, and comfortable.
Vacuuming the Interior
Start by vacuuming the entire interior, including the carpets, seats, and dashboard. Use a crevice tool to reach tight spaces and remove any dirt or debris.
Cleaning the Upholstery
Use a dedicated upholstery cleaner to remove stains and dirt from your car’s seats and carpets. Follow the product instructions carefully and avoid over-wetting the fabric.
By paying attention to both the interior and exterior of your car, you can achieve a complete and professional-quality detail that will keep your vehicle looking its best.
| Key Point | Brief Description |
|---|---|
| 🧼 Washing | Use the two-bucket method to gently wash and rinse your car. |
| ✨ Polishing | Enhance shine by removing imperfections with a quality car polish. |
| 🛡️ Waxing | Protect your car’s paint with wax to guard against UV rays and contaminants. |
| 🧽 Interior | Vacuum and clean upholstery to refresh your car’s interior. |
DIY Car Detailing: Achieve a Showroom Shine for Under $50
▼
You’ll need microfiber towels, car wash soap, two buckets, wheel cleaner, clay bar, polish, wax, upholstery cleaner, and a vacuum.
▼
Detailing your car every 4-6 months can help maintain its appearance and protect its surfaces from environmental damage.
▼
Yes, DIY detailing can be significantly cheaper as you save on labor costs and can reuse your supplies for multiple detailing sessions.
▼
It’s best to use products specifically designed for cars to avoid damaging the paint or interior surfaces with harsh chemicals.
▼
Applying wax or sealant after polishing protects the paint from UV rays, acid rain, and other contaminants, helping to maintain its shine.
Conclusion
By following these DIY car detailing steps, you can achieve a showroom shine for under $50. This approach not only saves you money but also gives you the satisfaction of maintaining your vehicle’s appearance with your own hands.


")