DIY Scratch Removal: Buff Out Car Scratches in 30 Minutes
DIY scratch removal can effectively buff out minor car scratches in 30 minutes or less using readily available materials and simple techniques, saving time and money compared to professional services.
Got a minor scratch on your car? Don’t rush to the auto shop just yet. DIY scratch removal is possible and can be surprisingly quick and easy.
Understanding Car Scratches and When to DIY
Before diving into DIY scratch removal, it’s crucial to understand the type of scratch you’re dealing with. Not all scratches are created equal, and attempting to fix a deep scratch yourself might actually worsen the damage.
Types of Car Scratches
Car scratches typically fall into three categories based on their severity:
- Clear Coat Scratches: These are the most superficial, affecting only the clear coat layer of your car’s paint. They often appear as light swirls or haziness.
- Paint Scratches: These go through the clear coat and into the paint layer itself. You’ll likely see a color difference within the scratch.
- Primer or Metal Scratches: These are the deepest scratches, penetrating all the way to the primer or even the bare metal of your car.
Understanding these levels helps you determine if DIY scratch removal is feasible. Clear coat scratches are the best candidates for home repair.
Assessing the Damage
To assess the scratch, run your fingernail lightly across the surface. If your nail doesn’t catch, the scratch is likely only in the clear coat and can be addressed with DIY scratch removal techniques. If your nail catches, it’s a deeper scratch that may require professional attention.
Choosing the right approach for the type of scratch is an important first step. Don’t waste time on deep scratches that go beyond surface level. Also, remember to be patient and always test your cleaning solution on a less visible area before going all in.
Gathering the Right Tools and Materials
Successfully performing DIY scratch removal relies heavily on having the appropriate tools and materials. Using the wrong items can lead to further damage or an ineffective repair.
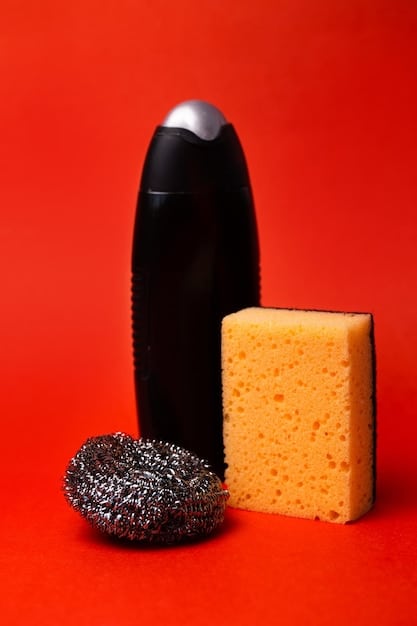
Essential Supplies for Scratch Removal
Here’s a list of essential supplies you’ll need:
- Microfiber Cloths: These soft cloths are essential for gentle cleaning and buffing without causing further scratches.
- Car Wash Soap: Use a dedicated car wash soap to clean the area around the scratch thoroughly.
- Scratch Removal Compound: Choose a compound specifically designed for removing scratches from car paint.
- Polishing Compound: This will help restore the shine and smoothness of the paint after using the scratch removal compound.
Having these materials organized and ready to use will streamline the scratch removal process.
Optional but Helpful Tools
While the essentials are enough for basic DIY scratch removal, these tools can make the process even easier:
- Buffing Pad: Using a foam buffing pad can provide a more even and effective application of the compounds.
- Detailing Clay: This helps remove any embedded contaminants from the paint surface before you start.
- Spray Bottle with Water: Keeping the area slightly damp can help the compounds work more effectively.
Remember to always read the instructions on each product carefully before use. This will ensure you are using them correctly and safely, resulting in the best possible outcome.
Selecting the right materials not only makes your job easier but also significantly reduces the risk of damaging your car’s paint further. Always prioritize quality.
Preparing the Area for Scratch Removal
Preparation is key for effective DIY scratch removal. A clean and properly prepped surface allows the scratch removal compound to work effectively and prevents further damage.
Thoroughly Washing the Car
Start by washing the car, paying close attention to the area around the scratch. Use a dedicated car wash soap and plenty of water to remove any dirt, grime, or debris.
A thorough, correct wash ensures nothing will hinder the process of scratch removal. Make sure to dry the wet area with a clean microfiber towel.
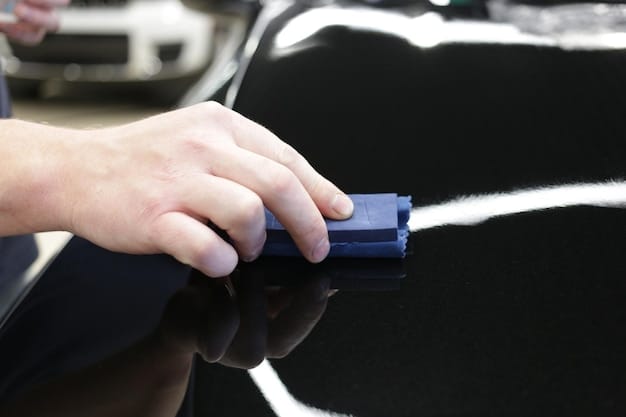
Using Detailing Clay (Optional)
If the paint feels rough or has embedded contaminants, use detailing clay to smooth the surface. This will create a clean slate for the scratch removal compound.
Detailing clay is used after washing to remove any impurities in your car’s finishing coat. Roll the clay into a sausage shape, then flatten it into a pancake shape for use.
Masking the Surrounding Area
Use painter’s tape to carefully mask off the area around the scratch. This will protect the surrounding paint from accidental damage during the buffing process.
Masking the area is about protecting the surrounding paint when the cleaning solution is applied. It keeps the process neat, tidy, and ensures an even clean.
Proper preparation sets the stage for a successful DIY scratch removal. Cleaning the area thoroughly and masking it off minimizes the risk of further damage and ensures the compound works effectively.
Applying Scratch Removal Compound
The application of scratch removal compound is where the actual magic happens. Proper technique and careful application are crucial for minimizing the scratch appearance.
Applying the Compound
Apply a small amount of scratch removal compound to a clean microfiber cloth or buffing pad. Avoid using excessive amounts, as this can make the buffing process more difficult.
- Start with a dime-sized amount of compound.
- Use gentle, circular motions.
- Ensure even distribution over the scratched area.
Having too little won’t have the intended effects and too much can make the job harder than necessary. So, stick to a small amount when applying the scratch removal compound to your vehicle.
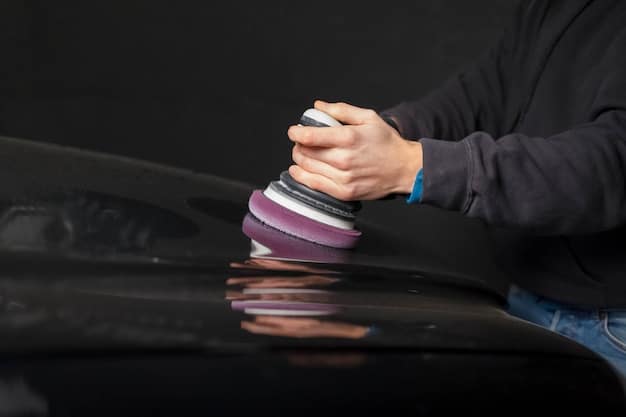
Buffing the Scratch
Gently buff the scratched area using small, circular motions. Apply moderate pressure and work the compound into the clear coat. Avoid applying too much pressure, as this can damage the paint.
- Use consistent, even pressure for best results.
- Work in small sections to maintain control.
- Continue buffing for about 5-10 minutes.
When buffing out scratches, remember less is more. Stick to even, gentle, and circular motions while applying to the affected area.
Applying the compound correctly involves careful distribution and patient buffing. This process will help blend the scratch with the surrounding paint, minimizing its appearance.
Polishing and Finishing the Area
After using the scratch removal compound, polishing the area restores shine and removes any remaining haze. This step is important for a professional-looking finish.
Applying Polishing Compound
Apply a small amount of polishing compound to a clean microfiber cloth or buffing pad. Use a similar technique to the scratch removal compound, applying gentle, circular motions.
Polishing is the finishing touch that ensures a seamless look and feel to your car’s paint. Be gentle, even, and circular during the application phase to get the best results.
Buffing and Cleaning the Area
Buff the polished area to restore the shine and remove any remaining residue. Use a clean microfiber cloth to wipe away any excess compound.
- Buff gently until the area shines.
- Wipe away any leftover residue.
- Inspect the area for any remaining imperfections.
The goal of buffing and cleaning is to make sure the area is reflective and clean. It is the final element in the process, so make sure to allocate enough time here.
Polishing and finishing the area bring back the original shine and smoothness of the car’s paint. This step completes the DIY scratch removal process, leaving your car looking its best.
Preventing Future Scratches
Once you’ve successfully removed the scratch, taking steps to prevent future damage is essential. A few simple precautions can save you time and effort in the long run.
Regular Washing and Waxing
Regular washing removes dirt and grime that can cause minor scratches. Waxing adds a protective layer, making the paint more resistant to scratches and other damage.
Regular maintenance goes a long way in saving you time and effort when detailing a vehicle or keeping its paint job spotless. A good wash and regular waxing are crucial.
Careful Parking Habits
Be mindful of where you park. Avoid parking too close to other cars or in areas with overgrown bushes or trees that could scratch the paint.
- Choose spacious parking spots.
- Avoid parking near potential hazards.
- Consider using a car cover in high-risk areas.
Being selective with where you park is a great habit to build. Not only could it prevent damage to your car, but also to the vehicles around you, which will save you a lot of money.
Using Protective Films
Consider applying paint protection film (PPF) to vulnerable areas like the hood, bumper, and side mirrors. PPF provides a durable barrier against scratches and other damage.
If you’re serious about safeguarding the paint job of your vehicle, think about paint protective films. This is a cost-effective way to avoid damage and maintain value.
Preventing future scratches involves proactive measures like regular maintenance and careful parking habits. These simple steps can help keep your car looking its best for years to come.
| Key Point | Brief Description |
|---|---|
| 🧼 Car Washing | Regularly wash your car to remove dirt and prevent scratches. |
| 🛡️ Paint Protection | Apply paint protection film to safeguard vulnerable areas. |
| 📍 Parking Smart | Choose parking spots to avoid potential scratches. |
| ✨ Polishing | Polish after scratch removal to restore shine. |
FAQ: DIY Scratch Removal
▼
You can typically fix clear coat scratches and light paint scratches. Deeper scratches that reach the primer or metal often require professional repair due to the complexity of the damage.
▼
Removing a minor scratch can take as little as 30 minutes if you have the right tools and materials. Deeper scratches or larger areas may require more time and effort to address properly.
▼
If the scratch is too deep, it’s best to consult with a professional auto body shop. They have the specialized equipment and expertise to properly repair the damage without causing further issues.
▼
When used correctly, scratch removal compounds are designed to be safe for your car’s paint. Always follow the manufacturer’s instructions and use gentle motions to avoid damaging the clear coat.
▼
Regularly wash and wax your car, park carefully to avoid potential hazards, and consider using paint protection film on vulnerable areas. These measures can help minimize the risk of new scratches.
Conclusion
Removing minor car scratches yourself is entirely feasible with the right tools, materials, and techniques. By following the steps outlined in this guide, you can save time and money while keeping your car looking its best. Always remember to assess the damage accurately and take preventive measures to avoid future scratches.


