Leather Car Seat Care: Your DIY Guide to Prevent Cracking & Fading
Maintaining your car’s leather seats doesn’t require expensive detailing; a simple DIY routine involving regular cleaning, conditioning, and protecting from sunlight can prevent cracking and fading, ensuring your car’s interior stays pristine.
Your car’s leather seats add a touch of luxury, but they’re also susceptible to wear and tear. Learning proper leather car seat care: prevent cracking and fading with this DIY routine is crucial for maintaining their appearance and longevity without breaking the bank.
Understanding Leather Car Seat Types and Their Vulnerabilities
Leather car seats come in various types, each with its own set of characteristics and vulnerabilities. Knowing the type of leather in your car is the first step to providing effective care.
Different types of leather react differently to environmental factors and cleaning products, making a one-size-fits-all approach ineffective. Here’s a breakdown of common leather types and what makes them susceptible to damage:
Common Leather Types in Cars
Car manufacturers use several types of leather for seating. Understanding these distinctions is essential for tailoring your cleaning and care approach.
- Full-Grain Leather: The highest quality, retaining natural markings and requiring gentle care.
- Top-Grain Leather: Sanded to remove imperfections, making it more resistant but still needing regular conditioning.
- Corrected-Grain Leather: Heavily processed, often embossed, and needing protection against cracking.
- Leatherette (Synthetic Leather): Vinyl or polyurethane that mimics leather, needing gentle cleaning to prevent damage.
Factors That Cause Cracking and Fading
Exposure to sun, extreme temperatures, and improper cleaning can all contribute to the deterioration of leather car seats.

- UV Exposure: Sunlight fades dyes and dries out leather, leading to cracks.
- Temperature Fluctuations: Heat and cold stress the leather, weakening its structure.
- Lack of Moisture: Dry leather loses elasticity and becomes prone to cracking.
- Improper Cleaning: Harsh chemicals strip natural oils, accelerating wear and tear.
By understanding the specific type of leather in your car and the environmental factors that impact it, you can develop a targeted and effective DIY care routine that helps prevent cracking and fading. This knowledge ensures that your efforts are focused on protecting and preserving your car’s interior for years to come.
Essential Supplies for DIY Leather Car Seat Care
Before you dive into the cleaning process, it’s essential to gather the right supplies. Using the appropriate tools and products can make a significant difference in the effectiveness and safety of your DIY care routine.
Choosing the right cleaning and conditioning products is crucial for maintaining the quality of your leather car seats. Here’s a guide to the essential supplies you’ll need:
Cleaning Tools and Products
Gentle cleaning products and soft tools are vital for removing dirt without damaging the leather.
- Microfiber Cloths: Soft and non-abrasive, perfect for wiping and buffing.
- Leather Cleaner: Specifically formulated for leather, pH-balanced to prevent damage.
- Soft-Bristled Brush: For gently scrubbing heavily soiled areas.
- Vacuum Cleaner with Brush Attachment: For removing loose dirt and debris.
Conditioning and Protecting Products
Conditioners and protectants help maintain the leather’s moisture and shield it from environmental damage.
- Leather Conditioner: Moisturizes the leather, preventing dryness and cracking.
- UV Protectant: Shields the leather from harmful UV rays, preventing fading.
- Leather Sealant: Adds a protective layer against spills and stains.
Having these essential supplies on hand ensures you can effectively clean, condition, and protect your leather car seats. Remember to always test new products on an inconspicuous area first to ensure they don’t cause discoloration or damage. With the right tools and products, you can maintain the beauty and longevity of your car’s leather interior.
Step-by-Step Guide to Cleaning Leather Car Seats
Cleaning your leather car seats is a straightforward process when you have the right supplies and follow a systematic approach. This step-by-step guide will help you effectively remove dirt and grime without damaging the leather.
Proper cleaning removes dirt and grime that can accelerate wear and tear. Here’s how to clean your leather car seats like a pro:
Preparation
Before you start cleaning, remove any loose debris and prepare your work area.
- Vacuum the Seats: Use a vacuum cleaner with a brush attachment to remove loose dirt and debris from the seats and crevices.
- Gather Supplies: Have your leather cleaner, microfiber cloths, and soft-bristled brush ready.
Cleaning Process
Apply the cleaner gently and work it into the leather, paying attention to soiled areas.
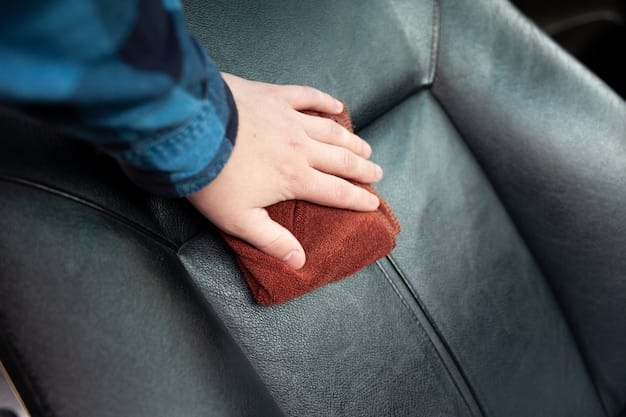
- Apply Leather Cleaner: Spray the leather cleaner onto a microfiber cloth, not directly onto the seat.
- Wipe the Surface: Gently wipe the leather in a circular motion, focusing on areas with dirt and grime.
- Scrub Stubborn Areas: Use a soft-bristled brush for heavily soiled areas, scrubbing gently to avoid damage.
- Wipe Clean: Use a clean, damp microfiber cloth to wipe away any remaining cleaner residue.
By following these steps, you can ensure a thorough cleaning process that removes dirt and grime without harming the leather. Regular cleaning, as part of your DIY care routine, will keep your car seats looking their best and prevent long-term damage from accumulated dirt and debris.
Conditioning Leather Car Seats: A DIY Approach
Conditioning is a vital part of leather car seat care, helping to maintain the leather’s moisture level and prevent cracking. This DIY approach makes it easy to keep your seats supple and protected.
Conditioning your leather car seats is essential for maintaining their suppleness and preventing cracks. Here’s how to do it effectively:
Why Conditioning is Essential
Conditioning products replenish the natural oils in leather, keeping it soft and pliable.
- Prevents Drying: Leather can dry out over time, leading to cracks. Conditioning adds moisture back into the material, preventing this.
- Maintains Suppleness: Regular conditioning keeps the leather soft and pliable, enhancing comfort.
- Extends Lifespan: By preventing cracks and maintaining moisture, conditioning extends the life of your car seats.
How to Condition Your Leather Seats
Applying conditioner properly ensures maximum absorption and protection.
- Apply Conditioner: Apply a small amount of leather conditioner to a clean microfiber cloth.
- Rub into Leather: Gently rub the conditioner into the leather in a circular motion, ensuring even coverage.
- Allow to Absorb: Let the conditioner absorb into the leather for 15-20 minutes.
- Buff Excess: Use a clean microfiber cloth to buff away any excess conditioner.
Regular conditioning, ideally every two to three months, will keep your leather car seats in top condition. This simple DIY process helps maintain their moisture level, prevent cracks, and extend their lifespan, ensuring your car’s interior remains luxurious and well-cared-for.
Protecting Leather Car Seats from UV Damage
Protecting your leather car seats from UV damage is crucial for preventing fading and cracking. Sunlight can have a significant impact on the leather’s appearance and longevity, making UV protection an essential part of your maintenance routine.
UV exposure is a major cause of fading and cracking in leather car seats. Here’s how to protect them with a DIY approach:
Why UV Protection Matters
UV rays can fade dyes and dry out leather, leading to significant damage over time.
- Prevents Fading: Sunlight causes dyes to fade, making the leather look old and worn.
- Reduces Cracking: UV rays weaken the leather, making it prone to cracking.
- Maintains Value: Protecting your seats from UV damage helps maintain the value of your car.
DIY UV Protection Methods
Several easy and affordable methods can help shield your leather seats from UV rays.
- Use a UV Protectant Spray: Apply a leather-specific UV protectant spray after cleaning and conditioning. Follow the product instructions for best results.
- Park in the Shade: Whenever possible, park your car in the shade to reduce direct sunlight exposure.
- Use Sunshades: Use sunshades on the windshield and windows to block UV rays from entering the car.
Regular UV protection will help keep your leather car seats looking new for longer. By integrating these DIY methods into your car care routine, you can safeguard your seats from the harmful effects of sunlight, preserving their color and preventing cracks.
Addressing Common Issues: Cracks and Stains
Even with diligent care, leather car seats can develop cracks and stains over time. Knowing how to address these common issues with DIY methods can help restore and maintain their appearance.
Addressing cracks and stains promptly can prevent further damage and maintain the beauty of your leather interior. Here’s how to handle these common issues:
Dealing with Cracks
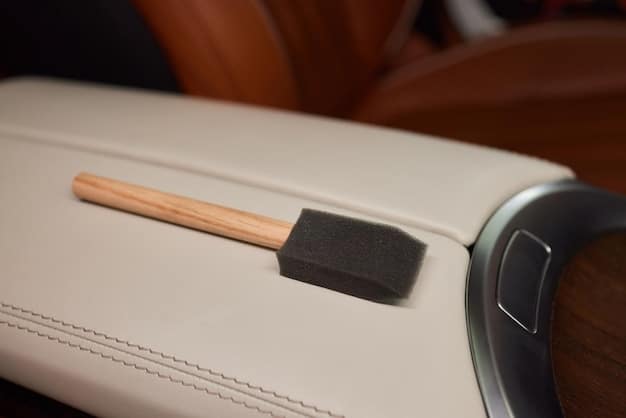
Minor cracks can often be repaired with a leather filler.
- Clean the Area: Use a leather cleaner to thoroughly clean the cracked area.
- Apply Leather Filler: Apply a small amount of leather filler to the crack using a palette knife.
- Smooth the Filler: Smooth the filler to match the surrounding leather.
- Allow to Dry: Let the filler dry completely according to the product instructions.
- Sand and Dye: Gently sand the filled area and apply a leather dye to match the original color.
Removing Stains
Quick action and the right cleaning agents can often remove stains effectively.
- Identify the Stain: Different stains require different cleaning methods.
- Act Quickly: The sooner you address a stain, the easier it is to remove.
- Use a Stain Remover: Apply a leather-specific stain remover to the affected area.
- Blot, Don’t Rub: Gently blot the stain with a clean microfiber cloth, avoiding rubbing, which can spread the stain.
- Wipe Clean: Use a clean, damp cloth to wipe away any remaining stain remover.
By addressing cracks and stains promptly and using the right DIY methods, you can keep your leather car seats looking their best. These techniques, combined with regular cleaning, conditioning, and UV protection, will ensure your car’s interior remains in excellent condition for years to come.
Maintaining Your Leather Car Seats in the Long Term
Long-term maintenance is key to keeping your leather car seats in excellent condition and preventing premature wear. Establishing a consistent care routine will help preserve their beauty and longevity.
Consistent maintenance ensures your leather car seats remain in top condition for years. Here’s how to maintain them in the long term:
Establishing a Regular Cleaning Schedule
Regular cleaning prevents dirt and grime from accumulating and causing damage.
- Weekly Vacuuming: Vacuum your leather seats weekly to remove loose dirt and debris.
- Monthly Cleaning: Clean your leather seats monthly with a leather-specific cleaner.
- Quarterly Conditioning: Condition your leather seats every three months to maintain their moisture and suppleness.
Long-Term Protection Strategies
In addition to regular cleaning and conditioning, consider these long-term protection strategies:
- Use Seat Covers: Consider using seat covers to protect against spills, stains, and UV damage.
- Park Smart: Park in the shade or use sunshades to minimize UV exposure.
- Address Issues Promptly: Address cracks and stains as soon as they appear to prevent further damage.
By committing to a long-term maintenance plan, you can ensure your leather car seats stay in top condition. Regular cleaning, conditioning, and protection from UV damage will help preserve their beauty and extend their lifespan, keeping your car’s interior looking luxurious for years to come.
| Key Point | Brief Description |
|---|---|
| 🧼 Regular Cleaning | Removes dirt and grime to prevent wear. |
| 🧴 Conditioning | Maintains leather’s moisture and suppleness. |
| ☀️ UV Protection | Shields seats from fading and cracking due to sunlight. |
| 🛠️ Crack & Stain Repair | Address damage promptly with leather filler and stain removers. |
Frequently Asked Questions (FAQ)
▼
Ideally, you should aim to clean your leather car seats monthly to remove dirt and grime that can accelerate wear and tear. Weekly vacuuming is also recommended to keep loose debris at bay.
▼
Use a leather-specific cleaner that is pH-balanced. Avoid harsh chemicals, solvents, or abrasive cleaners, as these can strip the natural oils from the leather and cause damage.
▼
Park your car in the shade whenever possible, and use sunshades on the windshield and windows. Applying a leather-specific UV protectant spray regularly will also help shield the leather from harmful UV rays.
▼
No, you should never use regular household cleaners on leather car seats. These cleaners often contain harsh chemicals that can damage, discolor, or dry out the leather, leading to cracking and fading.
▼
Apply a small amount of leather conditioner to a clean microfiber cloth and gently rub it into the leather in a circular motion. Allow it to absorb for 15-20 minutes, then buff away any excess with a clean dry cloth.
Conclusion
By following this DIY routine for leather car seat care: prevent cracking and fading with this DIY routine, you can keep your car’s leather seats looking luxurious and new for years to come. Regular cleaning, conditioning, and protection from UV damage are key to maintaining their appearance and longevity, making your driving experience more enjoyable and preserving the value of your vehicle.


