Achieve Showroom Shine: 3-Step Paint Correction (2025)

Achieving a showroom shine in 2025 involves a meticulous 3-step paint correction process: compounding to remove imperfections, polishing to refine the finish, and protecting with a sealant or wax for lasting brilliance and enhanced paint life.
Want your car to look like it just rolled off the assembly line? Achieving a showroom shine is within reach with a proper paint correction process. This guide will walk you through a how to achieve a showroom shine with a 3-step paint correction process in 2025, breathing new life into your vehicle’s paint job.
Understanding the Need for Paint Correction
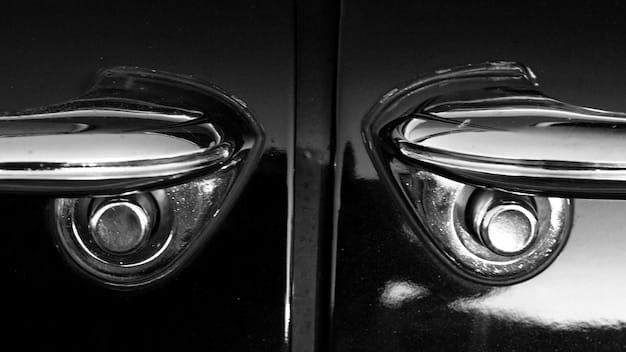
Before diving into the process, it’s crucial to understand why paint correction is necessary. Over time, your car’s paint is subjected to various environmental factors and improper washing techniques, leading to swirl marks, scratches, oxidation, and other imperfections.
These imperfections not only detract from the vehicle’s appearance but can also compromise the paint’s protective qualities. Paint correction aims to remove these flaws, restoring the paint’s original luster and protecting it from further damage.
Common Paint Imperfections
Identifying the types of imperfections present on your vehicle’s paint is the first step in determining the appropriate correction method. Here are some common culprits:
- Swirl Marks: Circular scratches caused by improper washing or polishing techniques.
- Scratches: Linear abrasions from branches, keys, or other objects coming into contact with the paint.
- Oxidation: A dull, faded appearance caused by exposure to UV rays and pollutants.
- Water Spots: Mineral deposits left behind by evaporating water, etching into the paint.
Paint correction involves using specialized tools and compounds to level the paint surface, effectively removing these imperfections and revealing a smooth, glossy finish.
Step 1: Compounding – Removing Severe Imperfections
The first step in a 3-step paint correction process is compounding. This is the most aggressive step, designed to remove severe imperfections such as deep scratches, heavy swirl marks, and oxidation.
Compounding involves using a rotary or dual-action polisher with a cutting pad and a compound to level the paint surface. It’s essential to proceed with caution during this step, as excessive compounding can remove too much clear coat, leading to potential damage.
Choosing the Right Compound and Pad
Selecting the appropriate compound and pad combination is crucial for achieving optimal results. Factors to consider include the severity of the imperfections and the hardness of the paint.
For heavily damaged paint, a more aggressive compound and a microfiber or wool cutting pad may be necessary. For less severe imperfections, a medium-cut compound and a foam cutting pad may suffice. Always start with the least aggressive combination and work your way up as needed.
- Test Spot: Always perform a test spot on an inconspicuous area of the vehicle to assess the effectiveness of the chosen compound and pad combination.
- Polisher Speed: Control the speed and pressure of the polisher to prevent overheating the paint.
- Overlapping Passes: Use overlapping passes to ensure uniform coverage and avoid creating holograms.
After compounding, the paint surface will likely appear hazy or dull. This is normal and will be addressed in the next step.
In conclusion, compounding is a crucial step in removing severe imperfections. Selecting the appropriate combination and working carefully is critical.
Step 2: Polishing – Refining the Finish
After compounding, the paint surface may appear hazy or dull. Polishing is the second step in the paint correction process, designed to refine the finish and remove any remaining imperfections left behind by compounding.
Polishing involves using a dual-action polisher with a polishing pad and a polishing compound to further level the paint surface and enhance its gloss. This step is less aggressive than compounding and aims to create a smooth, reflective finish.
Techniques for Effective Polishing
Polishing requires a different set of techniques compared to compounding. Here are some key considerations:
The polishing process aims to refine paint and involves specialized methods for optimal outcomes.
- Polishing Pad Selection: Choose a soft foam polishing pad to minimize the risk of marring the paint.
- Polishing Compound: Use a fine-cut polishing compound to remove light swirl marks and enhance gloss.
- Polisher Speed: Increase polisher speed slightly compared to the compounding stage, but maintain consistent pressure.
After polishing, the paint surface should exhibit a noticeable improvement in gloss and clarity. However, additional steps may be necessary to achieve a showroom-worthy finish.
Polishing refines the finish and removes imperfections left behind from compounding, leaving a great shine and prepping the surface for the third step.
Step 3: Protecting – Sealing and Waxing
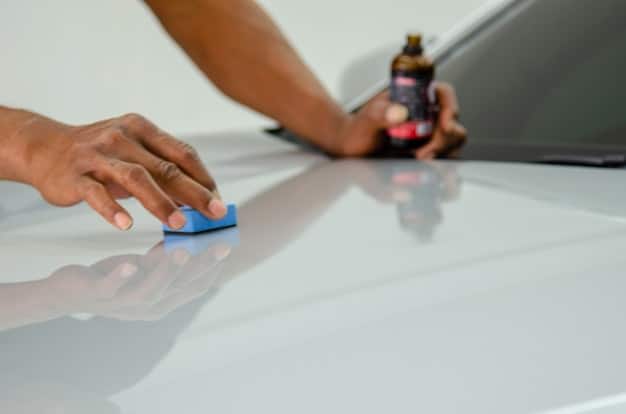
The final step in the 3-step paint correction process is protection. This involves applying a sealant or wax to the paint surface to protect it from environmental factors, enhance its gloss, and prolong the results of the paint correction.
Sealants and waxes create a barrier between the paint and the elements, preventing oxidation, water spots, and other forms of damage. They also add depth and shine to the paint, giving it that showroom-worthy appearance.
Choosing the Right Protection Method
Several types of sealants and waxes are available, each with its own benefits and drawbacks. Factors to consider include durability, ease of application, and desired finish.
Sealants are synthetic products that offer long-lasting protection and excellent durability. Waxes are natural products that provide a warm, rich glow and enhance the paint’s depth.
- Application Method: Apply the sealant or wax evenly using a clean applicator pad, following the manufacturer’s instructions.
- Buffing: Allow the sealant or wax to dry for the recommended time before buffing it off with a clean microfiber towel.
- Layering: Consider applying multiple layers of sealant or wax for added protection and enhanced gloss.
With proper protection, your car’s paint will retain its showroom shine for months to come.
Maintaining Your Showroom Shine
Once you’ve achieved a showroom shine with the 3-step paint correction process, it’s essential to maintain it with proper washing and care techniques. Regular washing and waxing will help prevent the buildup of contaminants and protect the paint from damage.
Avoid washing your car in direct sunlight, as this can cause water spots. Use a pH-neutral car wash soap and a soft microfiber wash mitt to prevent scratching the paint.
Best Practices for Car Washing
Proper car washing techniques are essential for preserving your paint’s shine.
Some best practices for car washing involve using appropriate equipment and methods.
- Two-Bucket Method: Use one bucket for soapy water and another for rinsing the wash mitt.
- Top-Down Approach: Wash the car from top to bottom to prevent dirt and grime from contaminating the clean areas.
- Drying: Dry the car with a clean microfiber towel or a leaf blower to prevent water spots.
By following these best practices, you can keep your car looking its best for years to come.
By following these best practices, you can help maintain that showroom shine.
Advanced Techniques and Considerations for 2025
As we look towards 2025, advancements in paint correction technology and techniques will continue to refine the process. Nanotechnology-based compounds, smart polishers with automated pressure control, and advanced ceramic coatings are poised to revolutionize the industry.
These innovations will enable enthusiasts and professionals alike to achieve even greater levels of paint correction and protection. Understanding these trends and adapting your techniques accordingly will be crucial for staying ahead of the curve.
Future Trends in Paint Correction
The paint correction industry is evolving rapidly. Staying informed regarding future trends is beneficial.
Here are some of the most promising developments:
- Nanotechnology Compounds: These compounds utilize ultra-fine abrasive particles to achieve unparalleled levels of refinement.
- Smart Polishers: These polishers automatically adjust pressure and speed based on the paint’s condition and the chosen compound.
- Ceramic Coatings: These coatings offer long-lasting protection and exceptional gloss, exceeding the performance of traditional sealants and waxes.
By embracing these advancements, you can ensure that your paint correction techniques remain at the cutting edge.
| Key Point | Brief Description |
|---|---|
| ✨ Compounding | Removes severe paint imperfections like scratches and oxidation. |
| 💎 Polishing | Refines the surface, removing haze left by compounding and enhancing gloss. |
| 🛡️ Protection | Seals the paint with wax or sealant, guarding against environmental damage. |
| 🚿 Maintenance | Regular washing and waxing preserve the showroom shine and prevent contamination. |
Frequently Asked Questions
▼
Paint correction involves removing imperfections like scratches, swirl marks, and oxidation from your car’s paint, restoring its original luster and protecting it from further damage.
▼
The frequency depends on factors like your car’s exposure to environmental elements and upkeep habits. Generally, doing it every 1-2 years keeps the paint looking its best.
▼
While DIY is possible, professional service is recommended, especially with serious imperfections. Professionals possess the experience and tools required for quality work.
▼
You’ll need a buffer, compounding, polishing and finishing pads, detailing clay, compound and polishes, microfiber towels, and sealant and wax for protection.
▼
Regular washing with pH-neutral soap, waxing, and avoiding automatic car washes can help maintain the corrected paint and extend its life and luster.
Conclusion
Achieving a showroom shine on your car in 2025 with a 3-step paint correction process is a goal achievable through knowledge, proper products, and careful execution. By understanding the need for paint correction, mastering the compounding, polishing, and protection steps, and staying abreast of future trends, you can keep your vehicle looking its absolute best for years to come.


