DIY Car Bulb Replacement: Your Step-by-Step Guide
DIY Car Bulb Replacement: A Step-by-Step Guide to Replacing Headlights and Taillights provides you with the knowledge and confidence to safely and effectively replace your car’s headlight and taillight bulbs, saving you time and money.
Changing a car bulb might seem daunting, but with the right guidance, it’s a manageable DIY task. This comprehensive guide, DIY Car Bulb Replacement: A Step-by-Step Guide to Replacing Headlights and Taillights, will empower you to tackle this common maintenance job yourself, saving you money and gaining valuable car care skills.
We’ll walk you through every step, from identifying the correct bulb to safely installing it, ensuring your car is road-ready and compliant with safety regulations. Let’s get started!
Understanding Your Car’s Lighting System
Before diving into the replacement process, it’s important to understand the basic components of your car’s lighting system. Knowing the different types of bulbs and their functions will make the replacement easier and ensure you choose the right parts.
Types of Car Bulbs
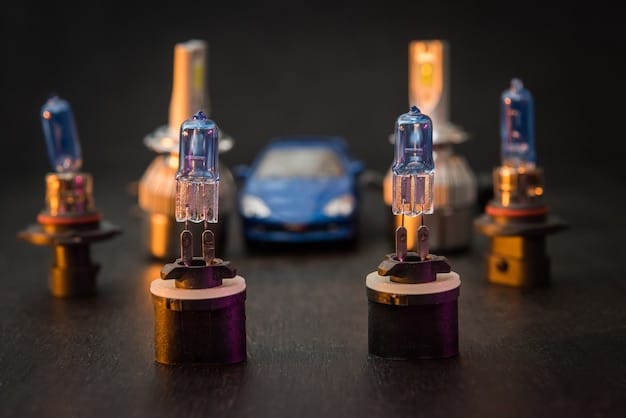
Car bulbs come in various types, each designed for specific purposes. Here’s a brief overview of the most common types:
- Halogen Bulbs: These are the most common type of headlight bulb, known for their brightness and relatively low cost.
- LED Bulbs: Offering superior energy efficiency and a longer lifespan, LED bulbs are increasingly popular for headlights, taillights, and interior lighting.
- Xenon/HID Bulbs: These bulbs produce a bright, white light and are often found in high-end vehicles. They require a ballast to operate.
- Incandescent Bulbs: Typically used for taillights, brake lights, and turn signals, these bulbs are less efficient than newer alternatives.
Identifying the Correct Bulb
Using the correct bulb is crucial for safety and performance. Refer to your car’s owner’s manual to find the specific bulb types recommended for your vehicle’s headlights and taillights. Alternatively, you can use online bulb finders by entering your car’s make, model, and year.
Choosing the right bulb ensures proper fit and functionality, which is essential for safe driving.
Understanding the different bulb types and how to identify the correct bulb for your car is a key initial step in DIY Car Bulb Replacement: A Step-by-Step Guide to Replacing Headlights and Taillights.
Gathering the Necessary Tools and Materials
Having the right tools and materials on hand will make the bulb replacement process smoother and safer. Preparation is key to a successful DIY project.
Essential Tools
Here’s a list of the tools you’ll likely need:
- New Bulbs: Make sure you have the correct type and quantity of bulbs for your car.
- Gloves: Wearing gloves will protect your hands and prevent oil from your skin from damaging the new bulbs.
- Screwdrivers: Both Philips head and flathead screwdrivers may be needed to access the bulb housing.
- Pliers: Pliers can be useful for removing clips or connectors.
- Socket Set: Depending on your car’s design, you might need a socket set.
- Safety Glasses: Protect your eyes from debris.
- Work Light: Good lighting is essential, especially if you’re working in a dimly lit area.
Safety Precautions
Safety should always be your top priority. Ensure the car is turned off and the parking brake is engaged. Allow the old bulbs to cool down before handling them, as they can get very hot. Never touch the glass part of a new halogen bulb with your bare hands, as the oil from your skin can cause it to fail prematurely.
By gathering the necessary tools and taking the proper safety precautions, you’re setting yourself up for a successful and safe experience with DIY Car Bulb Replacement: A Step-by-Step Guide to Replacing Headlights and Taillights.
Step-by-Step Guide to Headlight Bulb Replacement
Replacing a headlight bulb involves a few simple steps. Follow this guide to ensure a smooth and safe replacement.
Accessing the Headlight Housing
The first step is to access the headlight housing. This usually involves opening the hood and locating the back of the headlight assembly. Some cars have a cover that needs to be removed, while others may require you to unclip or unscrew the housing.
Removing the Old Bulb
Once you have access to the bulb, disconnect the wiring harness. There might be a clip or a tab that needs to be pressed to release the connector. After disconnecting the harness, carefully remove the old bulb. Depending on the design, you might need to twist or unclip the bulb.
Installing the New Bulb
Now, insert the new bulb into the socket. Make sure it’s properly aligned and securely in place. Avoid touching the glass part of the bulb. Reconnect the wiring harness, ensuring it clicks into place. Test the new headlight to make sure it’s working correctly before reassembling the headlight housing.
Correctly replacing your headlight bulb is a vital part of car maintenance, and this guide on DIY Car Bulb Replacement: A Step-by-Step Guide to Replacing Headlights and Taillights ensures you can confidently perform this task.
Replacing Taillight Bulbs: A Detailed Walkthrough
Replacing taillight bulbs is similar to replacing headlights, but there might be some variations depending on your car’s design. Here’s a step-by-step guide:
Accessing the Taillight Assembly
Accessing the taillight assembly usually involves opening the trunk or accessing it from inside the car. Some cars have a panel that needs to be removed to expose the back of the taillight assembly. Others may require you to remove the entire taillight housing.
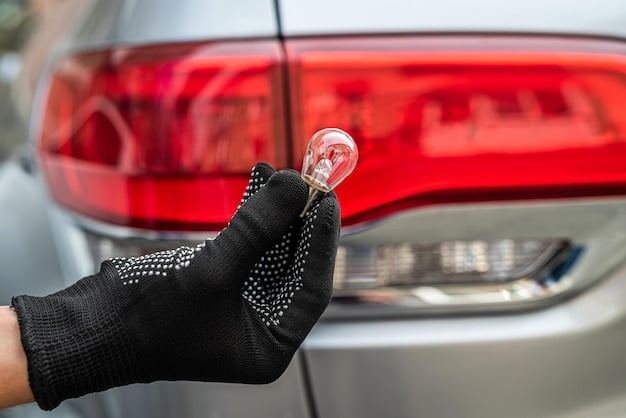
Removing the Old Taillight Bulb
Once you have access to the back of the taillight assembly, locate the bulb you need to replace. Disconnect the wiring harness by pressing any clips or tabs. Twist the bulb socket to release it from the assembly, then gently pull out the old bulb.
Installing the New Taillight Bulb
Insert the new bulb into the socket and twist it to secure it in place. Reconnect the wiring harness, making sure it clicks into position. Test the new taillight to ensure it’s working properly before reassembling the taillight assembly. Check the brake light, turn signal, and running light to confirm everything is functioning correctly.

Mastering the process of replacing taillight bulbs is an essential part of ensuring your vehicle’s safety and visibility, and this section of DIY Car Bulb Replacement: A Step-by-Step Guide to Replacing Headlights and Taillights gives you the knowledge to do so.
Troubleshooting Common Issues
Sometimes, even with careful attention, issues can arise during the bulb replacement process. Here are some common problems and how to address them.
The New Bulb Doesn’t Light Up
If the new bulb doesn’t light up, first double-check that the wiring harness is securely connected. Also, inspect the bulb itself for any damage. If the bulb is good and the connection is secure, check the fuse for that particular light. A blown fuse is a common cause of bulb failure.
The Bulb Keeps Burning Out
If a bulb keeps burning out frequently, there might be an underlying issue with the car’s electrical system. Check for any signs of corrosion or damage to the wiring. Also, make sure you’re using the correct type of bulb. Using a bulb with a higher wattage than recommended can cause it to burn out quickly.
Difficulty Accessing the Bulb
Some cars have headlight or taillight housings that are difficult to access. If you’re having trouble, consult your car’s owner’s manual for specific instructions. You might need to remove additional components to gain access to the bulb. If you’re uncomfortable with this, consider seeking assistance from a professional mechanic.
By understanding these potential issues and how to resolve them, you can navigate potential challenges with confidence during your DIY Car Bulb Replacement: A Step-by-Step Guide to Replacing Headlights and Taillights.
Maintaining Your Car’s Lighting System
Proper maintenance of your car’s lighting system ensures safety and extends the life of your bulbs. Regular checks and proactive replacements are key.
Regular Inspections
Make it a habit to regularly inspect your headlights, taillights, brake lights, and turn signals. Check for brightness, flickering, or any signs of damage. Replace any bulbs that are dim or not functioning properly.
Proactive Bulb Replacement
Even if a bulb hasn’t completely burned out, consider replacing it if it’s showing signs of dimming. Bulbs tend to dim over time, reducing visibility. Replace bulbs in pairs to ensure consistent brightness. When undertaking DIY Car Bulb Replacement: A Step-by-Step Guide to Replacing Headlights and Taillights, remember proper maintenance prevents future issues.
Cleaning the Headlight Lenses
Over time, headlight lenses can become cloudy or yellowed, reducing their brightness. Clean the lenses regularly with a headlight restoration kit to improve visibility. Follow the instructions on the kit carefully, and consider applying a protective sealant to prevent future clouding.
| Key Point | Brief Description |
|---|---|
| 💡Correct Bulb Type | Use the right bulb for your car model. |
| 🛠️ Essential Tools | Gloves, screwdrivers, pliers, and safety glasses. |
| ⚠️ Safety First | Turn off the car and let bulbs cool before replacing. |
| ✔️ Regular Checks | Inspect car lights frequently and replace dimming bulbs. |
Frequently Asked Questions
You’ll typically need gloves, screwdrivers (Philips and flathead), pliers, a socket set, safety glasses, and a work light. A car repair manual can also be helpful.
Check your car’s owner’s manual for the specific bulb types recommended for your vehicle. You can also use online bulb finders by entering your car’s make, model, and year.
No, never touch the glass part of a new halogen bulb with your bare hands. The oil from your skin can cause the bulb to fail prematurely. Always wear gloves.
Double-check that the wiring harness is securely connected and inspect the bulb for any damage. If the bulb is good and the connection is secure, check the fuse for that particular light.
Make it a habit to regularly inspect your headlights, taillights, brake lights, and turn signals. Aim to check them at least once a month, or before any long road trips.
Conclusion
Replacing car bulbs can seem like a minor task, but its importance to road safety cannot be overstated. By following this DIY Car Bulb Replacement: A Step-by-Step Guide to Replacing Headlights and Taillights, you’ve gained valuable knowledge and skills that empower you to maintain your vehicle’s lighting system effectively.
Regular maintenance and proactive replacements not only ensure your safety but also save you time and money in the long run. So, embrace the DIY approach and keep your lights shining bright on the road!


")
