DIY Car Detailing: Interior Cleaning Tips for a Fresh, New Car Feel
DIY Car Detailing: Interior Cleaning Tips for a Fresh, New Car Feel involve a systematic approach using the right products and techniques to thoroughly clean and refresh your car’s interior, enhancing its appearance and hygiene.
Is your car’s interior looking a little worse for wear? Over time, spills, dirt, and everyday use can take their toll, leaving your car feeling less than fresh. But don’t worry, you don’t need to spend a fortune at a professional detailer. With the right knowledge and a little elbow grease, you can achieve a showroom-worthy interior yourself. Let’s explore some **DIY Car Detailing: Interior Cleaning Tips for a Fresh, New Car Feel**.
Getting Started with DIY Car Detailing: Interior Cleaning Tips for a Fresh, New Car Feel
Embarking on a DIY car detailing journey can seem daunting, but breaking it down into manageable steps makes the process much easier. The key is preparation – gathering the right tools and products beforehand ensures a smooth and efficient cleaning session. Let’s get started with some essential tips for **DIY Car Detailing: Interior Cleaning Tips for a Fresh, New Car Feel**. We’ll cover the basics, from gathering your supplies to understanding the order in which to tackle different areas of your car’s interior.
Essential Tools and Products
Before you begin, make sure you have these items on hand:
- Vacuum cleaner with attachments
- Microfiber cloths
- Interior cleaner
- Upholstery cleaner
- Glass cleaner
- Detailing brushes (various sizes)
- Leather cleaner (if applicable)
Preparing Your Car’s Interior
Preparation is key to effective cleaning. Remove all loose items from your car, including trash, personal belongings, and floor mats. This will give you a clear workspace and prevent you from having to work around clutter. Open all the doors and windows to ventilate the interior and allow cleaning products to dry properly.
By prepping your car’s interior meticulously and gathering the right arsenal of tools, you set the stage for an efficient and satisfying detailing experience. The initial steps are crucial in removing the bulk of debris and setting a clean foundation for deeper cleaning and restoration, contributing significantly to achieving a fresh, new car feel through **DIY Car Detailing: Interior Cleaning Tips for a Fresh, New Car Feel**.
Deep Cleaning Your Car’s Interior Surfaces
Once you’ve prepped your car’s interior, it’s time to dive into deep cleaning the various surfaces. Each material requires a specific approach to ensure effective cleaning without causing damage. This section will walk you through the best methods for cleaning upholstery, dashboards, and other interior components, enabling you to achieve a comprehensively clean and refreshed interior through **DIY Car Detailing: Interior Cleaning Tips for a Fresh, New Car Feel**.
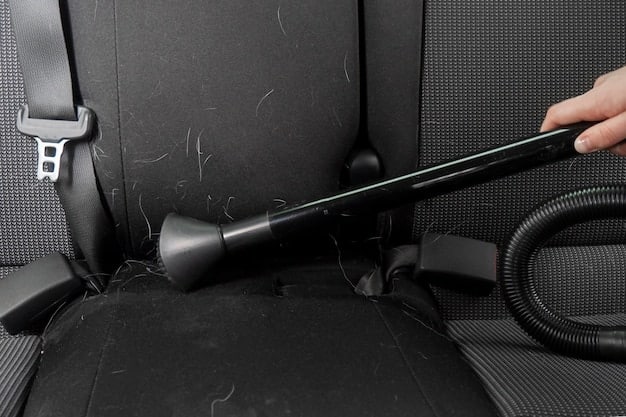
Cleaning Upholstery and Carpets
Start by vacuuming the upholstery and carpets thoroughly to remove loose dirt and debris. For fabric upholstery, use an upholstery cleaner and a soft brush to gently scrub away stains. For leather upholstery, use a leather cleaner and conditioner to clean and protect the material. Allow the upholstery to dry completely before moving on.
Detailing the Dashboard and Trim
Use an interior cleaner and a microfiber cloth to wipe down the dashboard, door panels, and other trim surfaces. For hard-to-reach areas, use a detailing brush to remove dirt and grime. Avoid using harsh chemicals that could damage the plastic or vinyl.
Refreshing Air Vents and Crevices
Use a detailing brush or a cotton swab to clean out dust and debris from air vents and other crevices. You can also use compressed air to blast away stubborn particles. This step is especially important for allergy sufferers, as it helps remove allergens from the air vents.
Mastering the art of deep cleaning your car’s interior surfaces is a cornerstone of **DIY Car Detailing: Interior Cleaning Tips for a Fresh, New Car Feel**. By meticulously tackling each material with the appropriate cleaning agents and techniques, you not only remove unsightly stains and grime but also rejuvenate the overall look and feel of your car’s interior, enhancing both its aesthetic appeal and hygiene.
Eliminating Odors and Refreshing the Air
A clean car is more than just visually appealing; it should also smell fresh and inviting. Lingering odors can detract from the overall driving experience, making it crucial to address them during the detailing process. In this section, we’ll explore effective strategies for eliminating odors and refreshing the air inside your vehicle, essential for **DIY Car Detailing: Interior Cleaning Tips for a Fresh, New Car Feel**.
Identifying and Removing Odor Sources
The first step in odor elimination is to identify the source of the odor. Common culprits include spilled food, pet dander, and mold. Once you’ve identified the source, take steps to remove it. For example, if you spilled food on the carpet, clean it up immediately with an upholstery cleaner.
- Use baking soda to absorb odors. Sprinkle baking soda on carpets and upholstery, let it sit for several hours, and then vacuum it up.
- Use an odor eliminator spray. There are many odor eliminator sprays available that can help neutralize odors.
- Consider using an ozone generator. Ozone generators can be effective at eliminating odors, but they should be used with caution, as ozone can be harmful to your health.
Using Air Fresheners Wisely
While air fresheners can help mask odors, they don’t actually eliminate them. Use air fresheners sparingly and choose scents that are not too overpowering. Consider using natural air fresheners, such as essential oil diffusers, to create a pleasant and inviting aroma.
Eliminating odors and refreshing the air is an integral part of achieving a truly fresh and clean interior through **DIY Car Detailing: Interior Cleaning Tips for a Fresh, New Car Feel**. By addressing the root causes of odors and employing effective deodorizing techniques, you can transform your car’s interior into a welcoming and pleasant space, enhancing your driving experience.
Protecting and Maintaining Your Car’s Interior
Once you’ve cleaned and refreshed your car’s interior, it’s important to take steps to protect and maintain it. Proper maintenance will help keep your car looking its best for years to come and help you remember that **DIY Car Detailing: Interior Cleaning Tips for a Fresh, New Car Feel** are not just a one time action.
Applying Protectants to Surfaces
Use a protectant spray to protect your dashboard, door panels, and other trim surfaces from UV damage. UV damage can cause fading and cracking, so it’s important to protect these surfaces. For leather upholstery, use a leather conditioner to keep the leather soft and supple.
Regular Cleaning Habits
Establish a regular cleaning schedule to keep your car’s interior looking its best. Vacuum the interior regularly, wipe down surfaces with an interior cleaner, and address spills immediately. Regular cleaning will prevent dirt and grime from building up and make future detailing sessions easier.
Protecting and maintaining your car’s interior is crucial for preserving its appearance and value. By diligently applying protectants, adopting regular cleaning habits, and safeguarding against wear and tear, you can ensure that your car’s interior remains in top condition, enhancing your driving experience and maintaining the fresh, new car feel achieved through meticulous **DIY Car Detailing: Interior Cleaning Tips for a Fresh, New Car Feel** sessions.
Addressing Specific Interior Detailing Challenges
Every car interior presents unique cleaning challenges, from stubborn stains to delicate surfaces. Understanding how to tackle these specific issues is crucial for achieving a thoroughly cleaned and revitalized interior. In this section, we’ll address some common interior detailing challenges and outline effective strategies for overcoming them, aiding in **DIY Car Detailing: Interior Cleaning Tips for a Fresh, New Car Feel**.
Removing Stubborn Stains
Stubborn stains, such as grease or ink, may require special attention. Try using a stain remover specifically designed for the type of stain you’re dealing with. Apply the stain remover to a clean cloth and gently blot the stain. Avoid rubbing, as this could spread the stain.
Cleaning Delicate Surfaces
Be extra careful when cleaning delicate surfaces, such as leather or suede. Use a gentle cleaner and a soft cloth to avoid damaging the material. Test the cleaner in an inconspicuous area first to ensure that it doesn’t cause discoloration or damage.
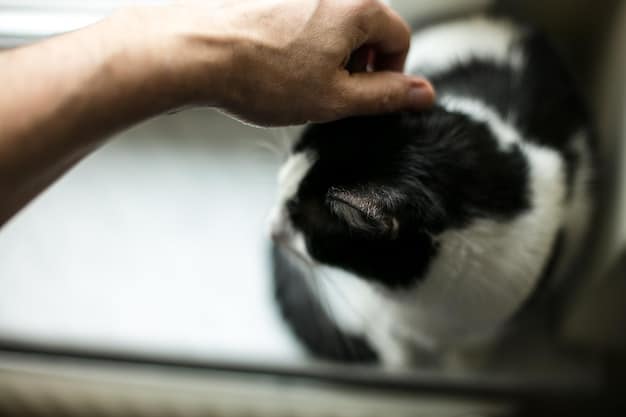
Dealing with Pet Hair
For pet owners, pet hair can be a major cleaning challenge. Use a rubber brush or a pet hair remover tool to loosen the hair from upholstery and carpets. Vacuum up the loose hair. You may need to repeat this process several times to remove all the hair.
Effectively addressing specific interior detailing challenges is key to achieving a truly comprehensive clean and revitalization. By tailoring your approach to tackle stubborn stains, delicate surfaces, and common issues like pet hair, you can overcome obstacles and restore your car’s interior to its pristine condition through **DIY Car Detailing: Interior Cleaning Tips for a Fresh, New Car Feel** techniques.
Final Touches for a Showroom Finish
The final touches are what separate a good detailing job from a great one. These small details can make a big difference in the overall appearance of your car’s interior. This section will cover some of the final touches that will help you achieve a showroom finish, reinforcing the impact of **DIY Car Detailing: Interior Cleaning Tips for a Fresh, New Car Feel**.
Cleaning Interior Glass and Mirrors
Use a glass cleaner and a microfiber cloth to clean the interior glass and mirrors. Spray the glass cleaner onto the cloth, not directly onto the glass, to avoid overspray. Wipe the glass in a back-and-forth motion to remove streaks.
- Use Q-tips to clean tight crevices in dashboards
- Apply a UV protectant to the dashboard
- Use leather conditioner to soften leather seats
Adding Finishing Touches
Once you’ve cleaned and protected all the surfaces, add some finishing touches to enhance the overall appearance of your car’s interior. Consider adding a car air freshener or a seat cover to personalize the space and make it more comfortable.
| Key Point | Brief Description |
|---|---|
| 🧹 Surface Cleaning | Vacuum & wipe down all surfaces with appropriate cleaners. |
| 💨 Odor Elimination | Remove odor sources and use air fresheners wisely. |
| 🛡️ Protection | Apply protectants to prevent UV damage and wear. |
| ✨ Final Touches | Clean glass, mirrors, and add personal touches. |
Frequently Asked Questions
Essential products include a vacuum cleaner, microfiber cloths, interior cleaner, glass cleaner, upholstery cleaner, and detailing brushes. The quality of these items can affect your final outcome.
Detailing your car’s interior every 3-6 months is generally recommended. However, it depends on how frequently you use the car and how well you maintain it.
It’s best to avoid using household cleaners, as they may contain harsh chemicals that can damage your car’s interior surfaces. Always use products specifically designed for car detailing.
Regularly cleaning your car’s interior, addressing spills immediately, and using odor absorbers like baking soda can help prevent odors from building up.
Use a leather cleaner and conditioner to gently clean and protect leather seats. Apply the product with a soft cloth and follow the manufacturer’s instructions for best results.
Conclusion
Mastering the art of **DIY Car Detailing: Interior Cleaning Tips for a Fresh, New Car Feel** empowers you to maintain a pristine and enjoyable driving environment without breaking the bank. By following these tips and tailoring your approach to your car’s unique needs, you can achieve professional-quality results and prolong the life of your vehicle’s interior.
Remember, regular maintenance and attention to detail are key to keeping your car looking and feeling its best. Not only that, it makes the whole experience of driving more relaxing and fun. So, roll up your sleeves and get ready to refresh your ride!


")