DIY Car Washing: Achieve a Scratch-Free Finish with the 2-Bucket Method
DIY car washing using the 2-bucket method is a safe and effective way to minimize scratches and swirl marks, ensuring a pristine finish by separating the wash and rinse water.
Want to keep your car looking its best without breaking the bank? The DIY car washing: the 2-bucket method for a scratch-free finish is your secret weapon. It’s a simple, effective technique to minimize swirl marks and scratches, leaving your car sparkling. Let’s dive in!
Why the 2-Bucket Method Matters for DIY Car Washing
When it comes to DIY car washing, simply grabbing a bucket and sponge might seem like the quickest route. However, this approach often leads to swirl marks and scratches, diminishing your car’s appearance over time. The 2-bucket method is designed to prevent exactly that.
The Problem with Single-Bucket Washing
Imagine dipping your wash mitt into a single bucket repeatedly. Each time, you’re picking up dirt and grime from your car’s surface and transferring it into the soapy water. This creates a gritty soup that acts like sandpaper as you continue washing. This is why the 2-bucket method is important.
- Dirt and grit are abrasive and cause swirl marks.
- A single bucket quickly becomes contaminated.
- You’re essentially rubbing dirt back onto your car’s paint.
How the 2-Bucket System Protects Your Paint
The 2-bucket method introduces a dedicated rinse bucket to separate clean water from the dirty wash water. This significantly reduces the amount of grit transferred back onto your car’s paint during the washing process.
- Wash bucket: Contains soapy water for cleaning.
- Rinse bucket: Contains clean water for rinsing the wash mitt.
- Grit guards: Placed at the bottom of each bucket to trap dirt.
The 2-bucket method is simple, cost-effective and saves your car from scratches. It keeps the water in your soapy mixture, clean and ready to wash.
Gathering Your DIY Car Washing Supplies
Before you start, make sure you have all the necessary supplies. Having the right equipment will not only make the process easier but also contribute to a scratch-free finish. Here’s a checklist to help you get started:
Essential Car Washing Tools
These items are fundamental to any successful DIY car wash. Investing in quality tools will pay off in the long run with a cleaner, better-protected car.
- Two buckets: Preferably with a capacity of 3-5 gallons each.
- Grit guards: These sit at the bottom of the buckets and trap dirt.
- Microfiber wash mitt: Soft and absorbent, minimizing the risk of scratches.
Cleaning Products and Solutions
Choosing the right car wash soap is crucial. Avoid household detergents, as they can strip away wax and damage your car’s paint.
Use soap that has a pH level of 7. These soaps are able to neutralize any acidic corrosives that can damage paint.
Additional Items for a Professional Finish
These extras can enhance your car washing experience and ensure a more thorough clean.
- Microfiber drying towels: Absorbent and gentle on the paint.
- Wheel cleaner: Formulated to remove brake dust and grime.
- Tire shine: To give your tires a deep, black look.
Having the right tools and solutions can lead to beautiful results while washing your car. Always double-check you have these items before starting!
Step-by-Step Guide to the 2-Bucket Car Wash Method
Now that you have your supplies ready, it’s time to get down to business. Follow these steps for a safe and effective DIY car wash using the 2-bucket method:
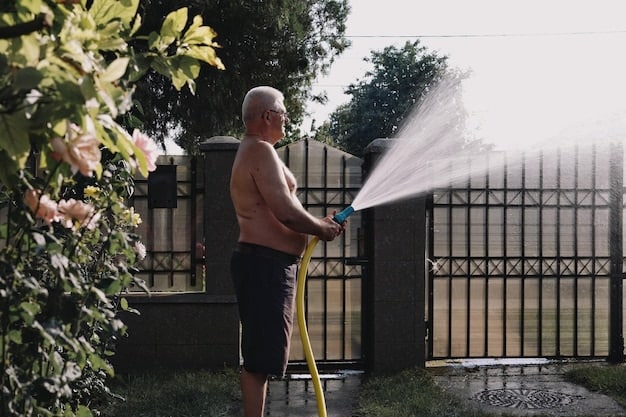
Step 1: Pre-Rinse Your Car
Start by rinsing your car thoroughly with water to remove loose dirt and debris. This step is critical to prevent larger particles from scratching your paint during the wash.
Step 2: Prepare Your Buckets
Fill one bucket with clean water and the other with car wash soap mixed according to the manufacturer’s instructions. Place a grit guard in the bottom of each bucket.
Step 3: Wash in Sections
Dip your wash mitt into the soapy water, and gently wash one section of your car at a time. Use a back-and-forth motion, avoiding circular movements that can create swirl marks.
Step 4: Rinse Your Mitt
After washing a section, rinse your mitt thoroughly in the clean water bucket. This removes the dirt and grime collected from your car’s surface. This is the most important step of the wash, so take the time to clean your mitt thoroughly.
Step 5: Repeat and Dry
Repeat steps 3 and 4, section by section, until you have washed the entire car. Once finished, dry your car immediately using microfiber drying towels to prevent water spots.
This method can be modified to fit your specific environment. For example, those who live in apartments rarely have access to hoses, so they could opt to fill up both buckets entirely and take the car straight to drying, rather than pre-rinsing.
Advanced DIY Car Washing Tips and Tricks
Want to take your DIY car washing skills to the next level? Here are some additional tips and tricks to help you achieve a show-worthy shine:
The Importance of a Grit Guard
Remember that a grit guard will always assist in keeping your water cleaner for longer. It drastically reduces cross-contamination of dirt from the ground, but also from the actual car.
Top-to-Bottom Washing Approach
Always start washing from the top of the car and work your way down. This prevents dirty water from running over already-cleaned surfaces.
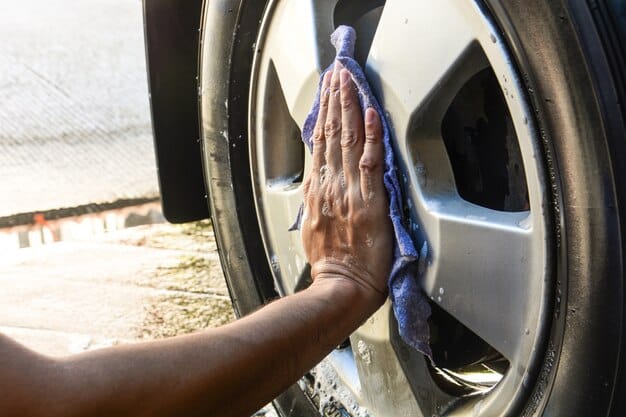
Dedicated Wheel and Tire Cleaning
Use separate brushes and cleaning solutions for your wheels and tires to avoid transferring brake dust and grime onto your car’s paint.
This can be especially important for trucks and SUVs that may be driven through mud or gravel. This is a great additional tip, given these car types are especially susceptible to dirt.
The benefits of Clay Bar Treatment
The benefits of using a clay bar treatment are huge. Its benefits have been discovered and re-iterated by car enthusiasts for decades.
- Removes embedded contaminants: Clay bars lift away stubborn dirt and grime.
- Smoother paint surface: Creates a slick, glass-like feel.
- Improved waxing results: Wax bonds better to a clean surface.
Clay bars take time, but can be worth it. Always consider the effort and resources required before choosing to use one. These can be expensive, but can be found online at a discount.
Avoiding Common DIY Car Washing Mistakes
Even with the best intentions, it’s easy to make mistakes when washing your car at home. Here are some common pitfalls to avoid:
Washing in Direct Sunlight
Direct sunlight can cause soap to dry quickly, leaving water spots and streaks. Wash your car in the shade or during cooler hours of the day.
Using Abrasive Sponges or Rags
Avoid using old rags or abrasive sponges, as they can scratch your car’s paint. Always use a microfiber wash mitt.
Neglecting the Rinse Bucket
The rinse bucket is just as important as the wash bucket. Don’t skip rinsing your mitt regularly, or you’ll be rubbing dirt back onto your car.
Overlooking Water Spots
Dry your car immediately after washing to prevent water spots. Use microfiber drying towels for best results.
Those with darker colored cars require extra attention when drying because water spots may become extra visible and require more aggressive cleaning in the future. Take the time to dry these cars carefully!
Maintaining Your Car’s Shine After Washing
Congratulations, you’ve successfully washed your car using the 2-bucket method! Now, how do you maintain that fresh, clean look? Here are some tips and tricks:
Waxing for Protection and Shine
Waxing your car adds a layer of protection against the elements, including UV rays, rain, and road grime. It also enhances the shine and makes future washing easier. Wax regularly to protect your car!
Regular Washing Schedule
Establish a regular car washing schedule to prevent dirt and grime from building up. How often you wash your car depends on your driving habits and local conditions, but a good rule of thumb is every two weeks.
Touch-Up Solutions for Minor Imperfections
Keep a bottle of detailer spray on hand for quick touch-ups between washes. This can help remove light dirt, fingerprints, and water spots, keeping your car looking its best.
- Remove light dirt: Detailer spray quickly dissolves and lifts away light dirt.
- Eliminate fingerprints: Smudges and fingerprints disappear with a quick wipe.
- Prevent water spots: Spray and wipe to remove water before it dries.
| Key Point | Brief Description |
|---|---|
| 🧼 Two-Bucket Method | Uses separate buckets for washing and rinsing to minimize dirt transfer. |
| 🧤 Microfiber Mitts | Gentle on paint; unlike sponges, they reduce the risk of scratches. |
| 🛡️ Grit Guards | Traps dirt at the bottom of the bucket, preventing recontamination. |
| ☀️ Washing Conditions | Avoid washing in direct sunlight to prevent soap from drying too quickly and causing water spots. |
Frequently Asked Questions
▼
The 2-bucket method separates dirty rinse water from clean wash water, drastically reducing the amount of grit that gets rubbed back onto your car’s paint, thus reducing the chance of scratches.
▼
No, regular dish soap can strip away wax and damage your car’s paint. It’s best to use a car wash soap specifically formulated for automotive finishes, ensuring a safer experience.
▼
Ideally, washing your car every two weeks is a great decision that helps keep any abrasive materials like dirt or asphalt off your paint for too long. This can be adjusted based on your car’s usage.
▼
A grit guard rests at the bottom of your bucket and helps trap dirt, preventing it from circulating back into the wash mitt. Always use a grit guard to stop swirls and scratches.
▼
It’s best to avoid washing your car in direct sunlight, as this can cause the soap to dry too quickly, leading to water spots. Try washing in the shade or during the cooler parts of the day.
Conclusion
Mastering the DIY car washing: the 2-bucket method for a scratch-free finish is a simple way to maintain the appearance of your car. By following these steps and tips, you can achieve a showroom-worthy shine while protecting your investment for years to come. Happy washing!


")

