DIY Car Waxing: Get a Mirror Finish That Lasts 6+ Months
DIY car waxing is an effective way to achieve a mirror-like finish that can last for more than six months, enhancing your vehicle’s appearance and protecting its paint from environmental damage.
Want to give your car a professional-looking shine without the hefty price tag? DIY car waxing is the answer. With the right techniques and products, you can achieve a mirror finish that lasts well beyond six months, protecting your car’s paint and making it look its best.
Why DIY Car Waxing is Worth Your Time
Many car owners underestimate the power of a good wax job. It’s not just about aesthetics; it’s about protecting your investment and keeping your car looking newer for longer. Let’s explore the benefits of taking on this task yourself.
Protection Against the Elements
Wax acts as a barrier between your car’s paint and the harsh elements. UV rays, acid rain, bird droppings, and road grime can all damage the paint over time. A quality wax layer helps to deflect these threats.
Enhanced Appearance
Wax fills in minor imperfections in the paint, creating a smooth, reflective surface. This results in a deep, glossy shine that makes your car look like it just rolled off the showroom floor.
Cost Savings
Professional waxing can be expensive, costing hundreds of dollars per year. By doing it yourself, you only pay for the supplies, which can last for multiple applications, saving you a significant amount of money.
- Protection from UV rays and environmental contaminants
- Enhanced depth and gloss of the paint finish
- Prevention of oxidation and fading
- Cost-effective maintenance compared to professional services
In conclusion, DIY car waxing offers a range of benefits that go beyond just appearances. Taking the time to wax your car yourself is a worthwhile investment for any car owner looking to protect their vehicle and keep it looking its best.
Gathering Your Car Waxing Supplies
Before you start, it’s essential to have all the necessary supplies on hand. This will ensure a smooth and efficient waxing process. Let’s break down the essentials.
Essential Cleaning Products
A clean surface is crucial for proper wax adhesion. You’ll need a good quality car wash soap, a microfiber wash mitt, and a couple of buckets – one for soapy water and one for rinsing.
Wax Options
There are several types of car wax to choose from, each with its own advantages and disadvantages. Carnauba wax offers a deep shine but requires more frequent application. Synthetic waxes, on the other hand, are more durable but may not provide the same level of gloss.
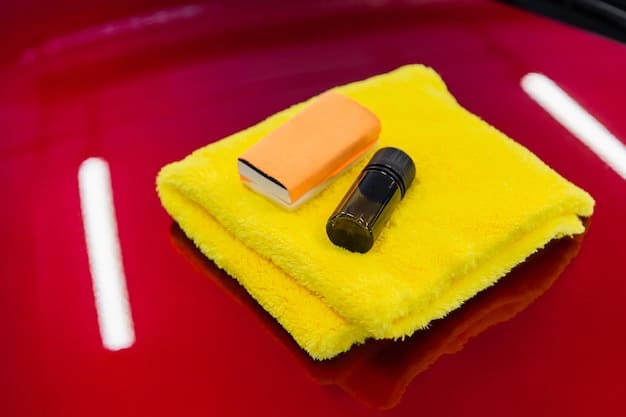
Application Tools
You’ll need a wax applicator pad, preferably made of microfiber or foam. These pads are designed to distribute the wax evenly without scratching the paint. You’ll also need a few clean microfiber towels for buffing.
- Car wash soap and microfiber wash mitt
- Carnauba wax, synthetic wax, or a hybrid
- Microfiber applicator pads and buffing towels
- Detailing clay for removing contaminants (optional)
In summary, gathering the right supplies is a critical first step in the DIY car waxing process. Having these items prepared will not only make the job easier but also help ensure the best possible results, leaving your car with a lasting mirror finish.
Prepping Your Car for Waxing: The Key to a Flawless Finish
Skipping the prep work is like building a house on a shaky foundation. Proper preparation ensures the wax adheres properly and provides the best possible protection and shine. Let’s dive into the steps.
Washing and Drying
Start by thoroughly washing your car with a quality car wash soap and a microfiber wash mitt. Be sure to rinse all the soap off completely and dry the car with a clean microfiber towel.
Clay Bar Treatment (Optional)
If your car’s paint feels rough or has embedded contaminants, consider using a detailing clay bar. This will remove any impurities that washing alone can’t get rid of, leaving your paint smooth and ready for waxing.
Inspect for Imperfections
Take a close look at your car’s paint. Note any scratches, swirl marks, or other imperfections. While waxing can help minimize the appearance of these flaws, it won’t eliminate them completely.
Proper preparation transforms the waxing process. Skipping steps may result in a substandard outcome. Here’s a breakdown:
- Wash the car thoroughly with a pH-balanced soap.
- Dry using a clean, soft microfiber towel to prevent water spots.
- Use a clay bar to remove any embedded contaminants for a smooth surface.
In conclusion, meticulous preparation is essential for achieving a flawless finish with DIY car waxing. By following these steps, you’ll create a smooth, clean surface that allows the wax to adhere properly, providing maximum protection and shine.
The Art of Applying Car Wax: Techniques and Tips
Applying car wax isn’t just about slapping it on and buffing it off. It’s an art that requires technique and attention to detail. Here’s how to get it right.
Applying the Wax
Use a clean wax applicator pad to apply a thin, even layer of wax to your car’s paint. Work in small sections, using circular or overlapping motions. Avoid applying too much wax, as this can make it difficult to buff off.
Allowing it to Haze
Let the wax sit on the paint for the recommended amount of time, as specified on the product label. This allows the wax to dry and bond to the paint, creating a protective layer. The wax should look hazy or cloudy when it’s ready to be buffed off.
Perfecting Application
Applying wax may seem simple, but mastering it requires finesse. Here’s a refined process:
- Apply wax in a thin, even layer using overlapping circles.
- Work in small, manageable sections to ensure even coverage.
- Allow the wax to dry to a haze before buffing.
In conclusion, mastering the art of applying car wax involves attention to detail and proper technique. By following these steps, you can ensure that the wax is applied evenly and effectively, providing optimal protection and a stunning mirror finish for your car.
Buffing for a Mirror Finish: Achieving Perfection
Buffing is where the magic happens. It’s the crucial step that transforms a dull, hazy surface into a gleaming, mirror-like finish. Let’s explore the best techniques.
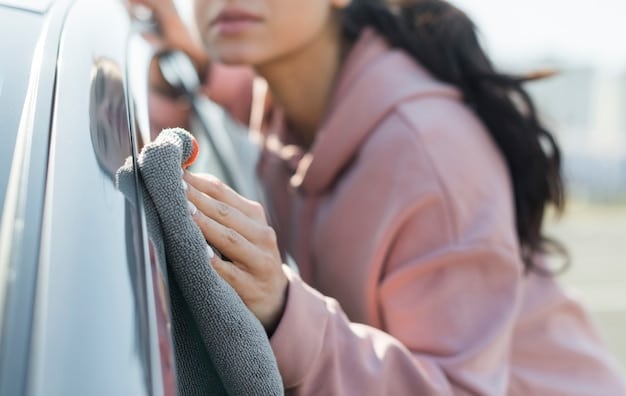
Choosing the Right Towel
Use a clean, soft microfiber towel for buffing. Avoid using terry cloth towels or other abrasive materials, as these can scratch the paint. Fold the microfiber towel into quarters to create multiple clean surfaces.
Buffing Technique
Using light to moderate pressure, buff the wax off the paint in circular or back-and-forth motions. Start with the larger, flatter surfaces and work your way to the smaller, more intricate areas. Change to a clean section of the microfiber towel as needed.
Finishing Touches
After buffing off the main layer of wax, inspect the paint for any remaining residue. If you find any, use a clean microfiber towel to gently remove it. For the best results, buff the entire car a second time with a fresh microfiber towel.
The finishing touch hinges on meticulous buffing. Important considerations include:
- Use a plush microfiber towel to avoid scratching the paint.
- Apply gentle, circular motions to remove wax evenly.
- Inspect for residue and re-buff as necessary for a streak-free shine.
In conclusion, buffing is the key to achieving a mirror finish with DIY car waxing. By using the right tools and techniques, you can transform your car’s paint from dull and hazy to gleaming and reflective, making it look like it just came from a professional detailing shop.
Maintaining Your Waxed Finish: Longevity Tips
You’ve put in the work to wax your car, now it’s important to maintain that beautiful finish. Proper maintenance can extend the life of your wax and keep your car looking its best for longer. Here’s how.
Regular Washing
Wash your car regularly, ideally every one to two weeks, to remove dirt, grime, and other contaminants that can degrade the wax layer. Use a pH-balanced car wash soap and a microfiber wash mitt to avoid scratching the paint.
Avoid Harsh Chemicals
Stay away from harsh chemicals and abrasive cleaners, as these can strip away the wax. Stick to gentle car wash soaps and avoid using household cleaners or degreasers on your car’s paint.
Wax Boosters and Sprays
Consider using a wax booster or spray wax after each wash to enhance the shine and add an extra layer of protection. These products are easy to apply and can significantly extend the life of your wax.
To maintain the waxed finish, incorporate these habits:
- Regularly wash the car with pH-balanced soap every 1-2 weeks.
- Apply a wax booster or spray wax for additional protection after washing.
- Avoid harsh chemicals and abrasive cleaners that can degrade the wax.
In conclusion, maintaining your waxed finish is essential for preserving the longevity and appearance of your car’s paint. By following these tips, you can keep your car looking freshly waxed for months to come, enjoying a lasting mirror finish that turns heads wherever you go.
| Key Point | Brief Description |
|---|---|
| 🧼 Cleaning | Wash and dry your car thoroughly before waxing. |
| 🧴 Waxing | Apply a thin, even layer of wax using a microfiber pad. |
| ✨ Buffing | Buff the wax off with a clean microfiber towel for a mirror finish. |
| 🛡️ Maintenance | Regular washing and wax boosters help prolong the waxed finish. |
Frequently Asked Questions (FAQ)
▼
The frequency depends on the type of wax used and environmental conditions. Carnauba wax may require waxing every 3 months, while synthetic waxes can last up to 6 months or longer.
▼
It’s best to avoid waxing in direct sunlight as it can cause the wax to dry too quickly and make it difficult to buff off. Work in a shaded area or during cooler parts of the day.
▼
Wax provides a glossy finish and short-term protection, while sealant offers longer-lasting protection against UV rays and contaminants, but may not provide the same level of shine.
▼
Using a clay bar is highly recommended if your car’s paint feels rough, as it removes embedded contaminants that washing alone can’t get rid of, ensuring a smoother surface for waxing.
▼
Yes, a machine polisher can be used to apply wax, but it requires skill and caution. Use a soft foam pad and low speed to avoid damaging the paint. Always follow the manufacturer’s instructions.
Conclusion
Achieving a mirror finish through DIY car waxing is a rewarding process that enhances your vehicle’s appearance and protects its paint. By following the steps outlined in this guide, from gathering the right supplies to maintaining your waxed finish, you can enjoy professional-quality results at a fraction of the cost.


