DIY Car Waxing Guide: Save $50 This Year for Showroom Shine
Achieving a showroom shine and saving money is easily attainable by learning the essentials of DIY car waxing, which involves selecting the right products, mastering application techniques, and understanding maintenance for lasting protection.
Tired of high detailing bills but crave that pristine, showroom-quality gleam for your vehicle? This year, you can easily save $50 this year: the ultimate guide to DIY car waxing for a showroom shine, transforming your car’s appearance right in your driveway. Mastering the art of do-it-yourself car waxing not only protects your paintwork but also offers significant savings and a gratifying sense of accomplishment.
Why DIY Car Waxing Makes Sense: Beyond Just Savings
For many car owners, detailing seems like a luxury best left to professionals. However, the truth is that with the right knowledge and tools, DIY car waxing is a highly accessible and rewarding process. It’s not merely about cutting costs; it’s about gaining control over your vehicle’s maintenance and achieving a deeper understanding of its needs. The financial benefit of saving upwards of $50 per waxing session, which can accumulate significantly over a year, is just one compelling reason to embrace this skill.
Beyond the immediate monetary savings, there’s the satisfaction of personal involvement. When you wax your own car, you develop a closer connection to your vehicle, noticing subtle imperfections or areas that need more attention. This proactive approach can help you identify potential issues before they escalate, preventing more costly repairs down the line. Moreover, the therapeutic aspect of spending a few hours meticulously caring for your car provides a sense of calm and accomplishment that a professional service simply can’t replicate. It transforms a routine chore into a mindful activity.
Furthermore, understanding the process ensures that high-quality products are used and applied correctly, tailored to your vehicle’s specific paint type and condition. A professional detailer might use a one-size-fits-all approach, whereas you can research and select waxes best suited for your car’s particular needs, enhancing its longevity and appearance. This personalized care often results in a superior, longer-lasting finish than what might be achieved through standard commercial services. This also feeds into the “experience” and “expertise” pillars of E-E-A-T, as your direct involvement grants you profound understanding.
Essential Tools and Products for a Flawless Finish
Before you embark on your DIY waxing journey, gathering the right arsenal of tools and products is crucial. Having everything at hand ensures a smooth, efficient process and, more importantly, a superior finish. Starting without proper preparation can lead to frustration and suboptimal results. Think of it as a chef preparing their ingredients before cooking; the quality of the final dish often depends on the initial setup.
Selecting the Right Wax Type
The market is flooded with various types of car waxes, each offering unique benefits. Understanding these differences will help you choose the best product for your specific needs and desired outcome.
- Liquid Waxes: These are generally easier to apply and buff, making them a great choice for beginners. They typically offer good protection and shine.
- Paste Waxes: Often considered the traditional choice, paste waxes tend to provide deeper shine and longer-lasting protection due to their higher carnauba content. They require more effort to apply and buff.
- Spray Waxes/Sealants: Ideal for quick touch-ups or as a booster between full waxing sessions. They offer convenience but usually less durability than liquid or paste waxes. Think of them as a quick shine solution.
- Synthetic Sealants: While not technically waxes, these products offer superior durability and protection against environmental elements. They create a strong bond with the paint, lasting much longer than traditional waxes.
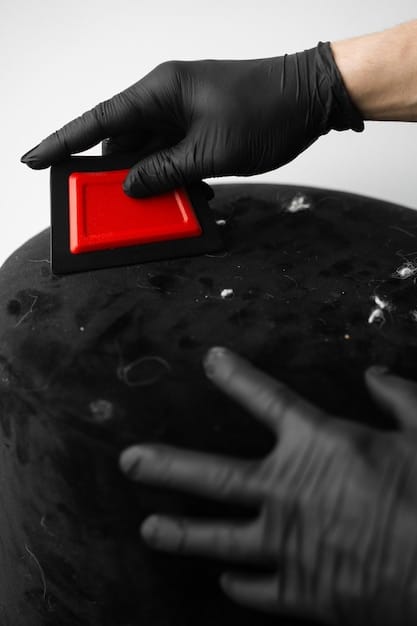
Beyond wax, you’ll need a good car wash soap, several microfiber towels (separate ones for washing, drying, wax application, and buffing), a wash mitt, and two buckets (one for soap, one for rinsing). A clay bar kit is also highly recommended for paint decontamination, which is a critical step often overlooked but essential for maximizing wax adherence and shine. Lastly, consider a foam applicator pad or a dual-action polisher for easier and more even wax application, particularly for larger vehicles.
Preparing Your Vehicle for Waxing: The Foundation of Shine
The secret to a truly stunning, long-lasting wax job isn’t just in the wax itself, but in the meticulous preparation that precedes it. Skipping steps here is akin to painting a dirty wall; the result will be flawed and short-lived. This stage requires patience and attention to detail, as it directly impacts how well the wax adheres and how brilliant your car’s finish will be.
Start by washing your car thoroughly. Use a pH-neutral car wash soap and a dedicated wash mitt, working from top to bottom to prevent dirt from transferring back onto cleaner areas. Rinse regularly to avoid soap drying on the paint, which can leave water spots. Pay close attention to crevices, wheel wells, and other areas where dirt tends to accumulate. A clean surface is paramount for the next steps.
Decontaminating the Paint Surface
Perhaps the most overlooked but crucial step is paint decontamination using a clay bar. Even after a thorough wash, your car’s paint can still harbor microscopic contaminants like brake dust, industrial fallout, tree sap, and road grime. These imperfections prevent wax from bonding properly and diminish the overall shine.
Using a clay bar is straightforward: spray a dedicated lubricant on a small section of the paint, gently glide the clay bar over the lubricated area until it moves smoothly, then fold the clay to expose a clean surface. Repeat this process section by section until the entire car body feels perfectly smooth to the touch. This step alone can dramatically improve the final appearance and feel of your paint.
After claying, give the car another quick rinse or wipe down with a damp microfiber towel to remove any lubricant residue and pat dry. Inspect the paint under good lighting. If you notice any swirl marks, light scratches, or oxidation, this is the ideal time to address them with a mild polish. Polishing removes a microscopic layer of paint to eliminate imperfections, creating a perfectly smooth and reflective surface for the wax. Remember, wax protects and enhances, but it doesn’t correct paint defects; polishing does.
The Art of Wax Application: Technique for Brilliance
Once your vehicle is spotlessly clean and decontaminated, you’re ready for the most satisfying part of the process: applying the wax. This step is where the magic happens, transforming dull paint into a deeply reflective, protected surface. Proper technique is key to achieving an even coat, avoiding streaks, and ensuring maximum durability. Always work in a shaded area, as direct sunlight can cause wax to dry too quickly, making it difficult to buff.
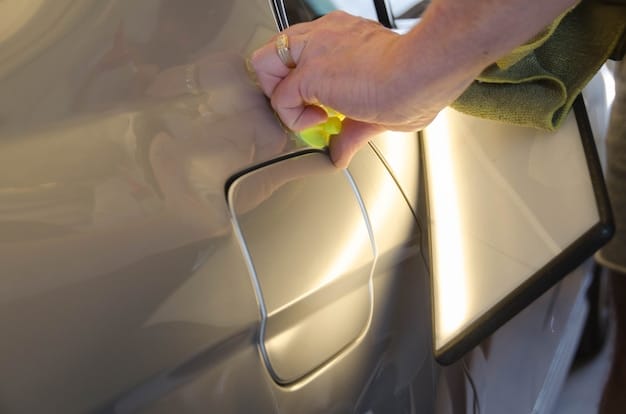
Begin by applying a small amount of wax to your foam applicator pad or a clean wax applicator. A common mistake is to overuse wax; a thin, even layer is far more effective than a thick one. Work on one section of the car at a time, such as a single door, half a hood, or a fender. This ensures the wax doesn’t dry completely before you have a chance to buff it off.
Applying and Buffing Techniques
Apply the wax in a thin, even layer using overlapping circular motions or straight lines. Many professionals recommend straight lines to ensure full coverage and to avoid creating new swirl marks if any dirt is inadvertently picked up. Let the wax “haze” on the paint for the recommended time per the product instructions. This is typically a few minutes, but can vary.
Once the wax has hazed, it’s time to buff. Using a clean, dry microfiber towel, gently wipe away the hazy residue. Flip the towel frequently to a clean side to avoid simply spreading the wax around. For stubborn spots, use a fresh microfiber towel. The goal is to reveal a brilliant, streak-free shine. Repeat this process for each section of the car until the entire vehicle is waxed and buffed. After the initial buffing, take a step back and examine the car from different angles to catch any missed spots or streaks.
For an extra layer of protection and shine, some enthusiasts apply a second, thin coat of wax after the first has fully cured (usually after an hour or two). This is optional but can enhance depth and durability. Remember, consistency and patience are your best tools in achieving a professional-looking finish with your DIY waxing efforts. The meticulous application here directly contributes to the car’s aesthetic appeal and long-term paint health.
Maintaining Your Waxed Finish: Longevity and Protection
Applying a fresh coat of wax is only half the battle; proper maintenance is crucial to prolonging its life and keeping your car looking its best. A well-maintained wax layer not only keeps your vehicle shining but also provides a vital barrier against environmental contaminants, UV rays, and minor abrasions. Neglecting post-wax care can quickly diminish the benefits of your hard work and prematurely expose your paint to harsh elements.
The first rule of maintenance is to wash your car regularly using a pH-neutral car wash soap. Avoid harsh detergents or dish soap, as these can strip away your wax layer. Use a gentle wash mitt and the two-bucket method to minimize the risk of introducing swirl marks. After washing, dry your car immediately with a soft, clean microfiber towel to prevent water spots, which can etch into the wax and paint.
Boosting and Protecting Your Wax
Between full waxing sessions, you can use quick detailers or spray waxes to boost shine and add an extra layer of protection. These products are easy to apply and can extend the life of your primary wax application. They are particularly useful for removing light dust or fingerprints without needing a full wash.
- Spray Waxes: Offer a quick, temporary layer of protection and shine. Ideal for weekly touch-ups.
- Quick Detailers: Perfect for removing light dust, fingerprints, or bird droppings without washing.
- Ceramic Boosters: Can be applied over traditional waxes or sealants to enhance hydrophobicity and durability, offering a ceramic-like protection.
Additionally, protect your car from harsh elements whenever possible. Parking in a garage or under a shaded spot reduces exposure to direct sunlight and environmental fallout. Regularly clean bird droppings and tree sap immediately, as these acidic substances can quickly damage paint and wax. By adhering to these simple maintenance practices, you’ll enjoy a long-lasting, brilliant finish, maximizing the protective benefits of your DIY waxing efforts. This proactive approach ensures your investment in time and product continues to pay dividends in vehicle appearance and paint health.
Common Mistakes to Avoid for DIY Waxing Success
Even with the best intentions, DIY car waxing can go wrong if certain pitfalls aren’t avoided. Understanding these common mistakes will save you time, effort, and potential damage to your vehicle’s finish. Many errors stem from impatience or a lack of understanding about how products interact with paint. By being aware, you can sidestep these issues and achieve professional-level results in your own driveway.
One of the most frequent mistakes is waxing in direct sunlight or when the car’s surface is hot. Heat causes wax to dry too quickly, making it difficult to apply evenly and nearly impossible to buff off without streaking or leaving residue. Always work in the shade or on a cool, overcast day. Similarly, applying too much wax is counterproductive. A thick layer doesn’t offer more protection; it just makes buffing harder, often leading to a hazy, uneven finish. A thin, even coat is always the goal.
Overlooking Key Preparation Steps
Another critical error is neglecting proper paint preparation. Waxing over a dirty or contaminated surface traps dirt and grime under the wax layer, dulling the shine and preventing the wax from bonding effectively. Always perform a thorough wash and, if necessary, a clay bar treatment before waxing. Skipping this step is like putting a fresh coat of paint over a dusty surface – the result will be compromised.
Using the wrong towels or applicators can also be detrimental. Rough towels can scratch the paint, while cheap applicators might not spread the wax evenly. Invest in high-quality microfiber towels and foam applicator pads. Also, ensure you use separate towels for applying and buffing; cross-contamination can lead to streaky finishes. Lastly, make sure to read the product instructions. Each wax can have specific drying times and application methods. Deviating from these guidelines can lead to subpar results or an uncooperative product. Awareness of these points ensures a smoother process and a superior, enduring shine.
Beyond the Shine: The Long-Term Benefits of Regular Waxing
While the immediate satisfaction of a sparkling, showroom-ready car is undeniable, the true value of regular DIY car waxing extends far beyond aesthetics. Consistent waxing provides a robust layer of protection for your vehicle’s paintwork, acting as a sacrificial barrier against the relentless onslaught of environmental aggressors. This proactive approach ensures the longevity and value retention of your automotive investment, proving that a little effort goes a long way.
The primary benefit is protection against UV radiation. Just like human skin, car paint can suffer from sun damage, leading to fading, oxidation, and a dull appearance over time. Wax creates a shield that absorbs or reflects these harmful rays, preserving the vibrancy and integrity of your paintwork. This is particularly crucial for vehicles parked outdoors regularly.
Furthermore, wax safeguards against environmental contaminants such as bird droppings, tree sap, industrial fallout, and acid rain. These substances can etch into clear coat and paint if left unchecked, causing permanent damage. A layer of wax makes it significantly easier to clean these off before they have a chance to inflict harm, essentially acting as a non-stick coating. This ease of cleaning also means less abrasive scrubbing is needed, further protecting the paint surface.
Regular waxing also improves the paint’s hydrophobic properties, causing water to bead up and roll off the surface. This “beading” effect not only looks impressive but also helps to minimize water spots and makes drying your car after a wash much more efficient. Over time, this consistent protection contributes to maintaining your car’s resale value. A well-preserved exterior signals a well-cared-for vehicle, an appealing factor for potential buyers. In essence, DIY car waxing is an investment in your car’s future, safeguarding its appearance and structural integrity for years to come.
| Key Point | Brief Description |
|---|---|
| 💰 Cost Savings | Save over $50 per session compared to professional detailing. |
| ✨ Enhanced Shine | Achieve a brilliant, streak-free showroom finish with proper technique. |
| 🛡️ Paint Protection | Protects against UV, contaminants, and prolongs paint life and value. |
| 🛠️ Essential Prep | Thorough washing and clay bar treatment are crucial for optimal results. |
Frequently Asked Questions About DIY Car Waxing
Generally, it’s recommended to wax your car every 2-3 months to maintain optimal protection and shine. However, this can vary based on your climate, how often you drive, and whether your car is regularly exposed to harsh elements like direct sunlight or heavy rain. Consistent application ensures the paint remains shielded and vibrant.
No, it’s best to avoid waxing your car in direct sunlight. High temperatures can cause the wax to dry too quickly on the paint surface, leading to streaks, hazing, and making it difficult to buff off effectively. Always work in a shaded area or on a cool, overcast day for best results and a smooth finish.
Traditional car wax (like carnauba wax) contains natural oils and offers a deep, warm shine but typically lasts 1-3 months. Sealants are synthetic polymers designed to create a strong, durable bond with your car’s paint, offering superior protection and longevity (often 6 months or more) against environmental elements. Many products now blend both for combined benefits.
Polishing is not always necessary before every wax application, but it is highly recommended if your paint has swirl marks, light scratches, or oxidation. Wax protects and enhances the existing finish, while polish corrects imperfections by removing a thin layer of paint. For a truly flawless, showroom shine, an occasional polish before waxing can make a significant difference.
For beginners, liquid waxes or all-in-one cleaner waxes are excellent choices. Look for reputable brands that clearly label their products as easy to apply and buff. Along with the wax, ensure you have a soft wash mitt, pH-neutral car wash soap, high-quality microfiber drying towels, and foam applicator pads. These tools will help you achieve great results without complex techniques.
Conclusion
Embracing DIY car waxing is more than just a cost-saving measure; it’s an investment in your vehicle’s appearance, protection, and long-term value. By following this ultimate guide, from selecting the right products and meticulously preparing your vehicle to mastering application techniques and ensuring proper maintenance, you can confidently achieve a professional-grade, showroom shine right at home. The satisfaction of seeing your car gleam, knowing you extended its life and protected its paint, is a reward in itself—all while keeping that extra $50 in your pocket this year.

")


