Headlight Restoration: Improve Visibility by 75% with DIY Detailing

Headlight restoration is a cost-effective DIY solution to improve visibility by up to 75%. By detailing your headlights, you enhance safety and aesthetics, saving money on replacements.
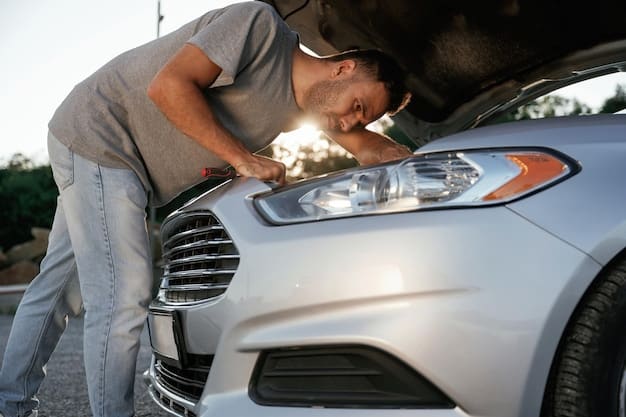
Are your headlights looking cloudy and dim? Do you find yourself struggling to see clearly at night? You’re not alone. Over time, headlight lenses can become oxidized and yellowed, significantly reducing their effectiveness. The good news is that headlight restoration: how to improve visibility by 75% with DIY detailing is a simple and affordable solution that can dramatically improve your driving safety.
This guide will walk you through the steps for restoring your headlights yourself, helping you save money and achieve professional-quality results. We’ll cover everything from the necessary materials to the best techniques for achieving crystal-clear lenses and a safer driving experience. Let’s dive in and discover how you can enhance your visibility and the look of your vehicle with headlight restoration: how to improve visibility by 75% with DIY detailing.
Understanding Headlight Degradation
Headlight lenses are typically made of polycarbonate plastic, which is durable but susceptible to damage from UV rays, road debris, and chemicals. This degradation leads to cloudiness and yellowing, reducing light output. Headlight restoration is crucial to maintain optimal visibility and safety.
The Science Behind Cloudy Headlights
When polycarbonate is exposed to UV radiation, the surface layer undergoes a chemical change, causing oxidation. This creates a hazy, yellowed appearance that blocks light. Regular wear and tear from environmental factors like road salt and grime accelerates this process.
Why Headlight Restoration Matters
Clear headlights are essential for safe driving, especially at night or in poor weather conditions. Cloudy headlights can reduce visibility by as much as 75%, increasing the risk of accidents. Restoring them improves light output and ensures you can see and be seen clearly.
- Reduced Glare: Clear lenses scatter less light, reducing glare for oncoming drivers.
- Enhanced Night Vision: Improved light output increases visibility at night.
- Aesthetic Appeal: Restored headlights improve the overall look of your vehicle.
Headlight restoration: how to improve visibility by 75% with DIY detailing not only enhances safety but also adds to the aesthetic value of your car. Restoring your headlights is a straightforward process with significant benefits.
Essential Tools and Materials for DIY Headlight Restoration
Before starting, gather the necessary tools and materials to ensure a smooth and effective headlight restoration process. Having everything on hand will save time and improve the quality of your results. Proper preparation is key to achieving the desired clarity and visibility.
Required Tools
To perform headlight restoration: how to improve visibility by 75% with DIY detailing, you’ll need a few basic tools. These include sandpaper in various grits, masking tape, a spray bottle, and microfiber cloths. A drill with a polishing pad attachment can also be helpful for achieving a professional finish.
Necessary Materials
In addition to the tools, you’ll need the right materials to remove oxidation and protect the lenses. These materials include automotive sandpaper (ranging from 400 to 3000 grit), polishing compound, UV sealant, and a plastic cleaner. Ensure you choose high-quality products for best results.
- Sandpaper Kit: Includes different grits for removing oxidation and smoothing the surface.
- Masking Tape: Protects the surrounding paint from scratches during sanding.
- UV Sealant: Prevents future yellowing and oxidation.
Having the right tools and materials is crucial for effective headlight restoration: how to improve visibility by 75% with DIY detailing. Make sure to select quality products to achieve optimal results.
Step-by-Step Guide to DIY Headlight Restoration
Now that you have gathered all the necessary tools and materials, let’s walk through the step-by-step process of restoring your headlights. This guide will provide clear instructions and tips for achieving professional-quality results at home.
Step 1: Cleaning the Headlights
Begin by thoroughly cleaning the headlight lenses with soap and water to remove any dirt and debris. Rinse and dry the surface completely before moving on to the next step. This ensures that you start with a clean surface for sanding.
Step 2: Masking the Surrounding Area
Use masking tape to protect the paint around the headlights. Apply the tape carefully, ensuring full coverage to prevent scratches during sanding. This step is crucial to maintain the integrity of your vehicle’s paint job.
Step 3: Sanding the Headlights
Start with the 400-grit sandpaper, wet-sanding the headlight lenses in a circular motion. Apply even pressure and keep the surface wet to prevent scratches. Gradually move to higher grits (800, 1200, 2000, and 3000), repeating the process with each grit until the lens is smooth. When you perform the headlight restoration: how to improve visibility by 75% with DIY detailing, make sure not to skip any grit! Every one helps progressively smoothing the lens.
- Use a spray bottle: Keep the sandpaper and lens wet during sanding to prevent clogging.
- Apply even pressure: Ensure consistent sanding across the entire lens surface.
- Work in circular motions: This helps to remove oxidation evenly and create a smooth finish.
Headlight restoration: how to improve visibility by 75% with DIY detailing involves careful sanding to remove the oxidized layer. Follow the steps closely for best results.
Polishing and Sealing for Long-Lasting Results
After sanding, polishing and sealing are essential steps to restore clarity and protect your headlights from future damage. These steps refine the surface and provide a protective barrier against UV rays and environmental factors.
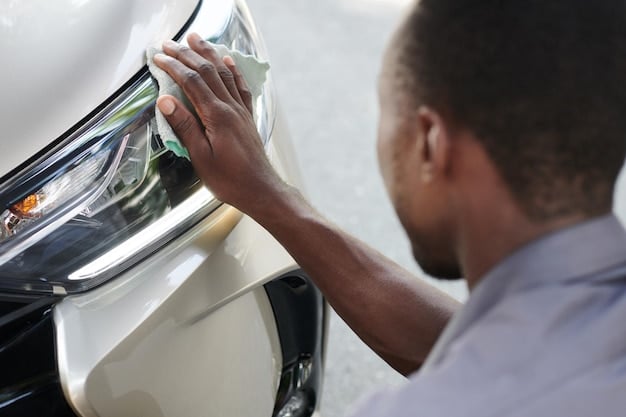
Polishing the Headlights
Apply a polishing compound to the headlight lenses and use a clean microfiber cloth or a polishing pad attached to a drill to polish the surface. Work in circular motions until the lens becomes clear and glossy. Repeat as necessary to achieve the desired clarity. Remember that headlight restoration: how to improve visibility by 75% with DIY detailing requires that polishing step.
Applying UV Sealant
Once the lenses are polished, apply a UV sealant to protect them from future oxidation. Follow the manufacturer’s instructions for application and drying time. This sealant creates a protective barrier that helps maintain the clarity of your headlights for a longer period. You may check some youtube videos about headlight restoration: how to improve visibility by 75% with DIY detailing, so you know better how to do this sealing.
- Choose a quality sealant: Opt for a UV sealant specifically designed for headlight lenses.
- Apply thin, even coats: Avoid applying too much sealant at once to prevent streaks.
- Allow proper drying time: Ensure the sealant is fully dry before exposing the headlights to the elements.
Headlight restoration: how to improve visibility by 75% with DIY detailing ensures long-lasting results with proper polishing and sealing. Protect your investment with these essential steps.
Maintaining Your Restored Headlights
Maintaining your restored headlights is crucial for preserving their clarity and visibility over time. Regular cleaning and protection will help prevent future oxidation and keep your headlights looking their best. Incorporate these practices into your regular car care routine.
Regular Cleaning
Clean your headlights regularly with a mild detergent and water to remove dirt and debris. Use a soft cloth to avoid scratching the lenses. Regular cleaning prevents buildup and helps maintain clarity. This is important in the headlight restoration: how to improve visibility by 75% with DIY detailing!
Applying Protective Coatings
Reapply UV sealant periodically to provide ongoing protection against UV rays and environmental factors. Follow the manufacturer’s instructions for application and frequency. Protective coatings help extend the life of your restored headlights.
- Wash Regularly: Keep headlights free from dirt and debris with regular washing.
- Reapply Sealant: Maintain UV protection with periodic sealant applications.
- Inspect Periodically: Check for early signs of oxidation and address them promptly.
Headlight restoration: how to improve visibility by 75% with DIY detailing requires ongoing maintenance to preserve results. Keep your headlights clean and protected for optimal visibility.
Troubleshooting Common Issues
Even with careful preparation and execution, you may encounter some common issues during the headlight restoration process. Understanding these issues and how to address them can help you achieve the best possible results.
Streaks and Swirl Marks
Streaks and swirl marks can occur if the sandpaper is not used properly or if the polishing compound is not applied evenly. To address this, repeat the sanding and polishing steps, paying close attention to applying even pressure and using clean materials.
Uneven Clarity
Uneven clarity can result from inconsistent sanding or polishing across the lens surface. Ensure you are using consistent motions and pressure throughout the process. If necessary, repeat the sanding and polishing steps to achieve uniform clarity.
Ensuring a good headlight restoration: how to improve visibility by 75% with DIY detailing is about knowing what to do if something goes wrong, Troubleshooting is something crucial!
- Evaluate Sanding Progress: Assess the smoothness of the lens after each grit of sandpaper.
- Check Polishing Technique: Ensure even application and buffing of the polishing compound.
- Adjust Pressure: Apply consistent pressure during both sanding and polishing to avoid uneven results.
Headlight restoration: how to improve visibility by 75% with DIY detailing can be challenging, but troubleshooting common issues will help you achieve professional results. Be patient and adjust your technique as needed.
| Key Point | Brief Description |
|---|---|
| 💪 Sanding | Removes oxidation using progressively finer grits of sandpaper. |
| ✨ Polishing | Restores clarity and gloss using polishing compounds. |
| 🛡️ UV Sealant | Protects against future yellowing caused by UV rays. |
| 🧽 Maintenance | Regular cleaning preserves restoration results. |
Frequently Asked Questions
The frequency of headlight restoration depends on environmental conditions and the quality of the sealant used. Typically, restoring your headlights every 12-18 months is recommended to maintain optimal visibility.
While some household products may offer temporary solutions, automotive-specific products are formulated to provide better and longer-lasting results. Using the right products ensures optimal restoration and protection.
Headlights become cloudy primarily due to UV exposure, which causes oxidation of the polycarbonate plastic. Environmental factors such as road debris, pollutants, and chemicals also contribute to the degradation of the headlight lenses.
Restoring headlights is a cost-effective alternative to replacement, especially if the lenses are only mildly oxidized. Restoration can significantly improve visibility and save you money compared to purchasing new headlights.
By removing the cloudiness and yellowing from headlight lenses, headlight restoration: how to improve visibility by 75% with DIY detailing increases light output, which helps improving visibility at night and in poor weather conditions. This enhanced visibility improves overall driving safety.
Conclusion
Restoring your headlights is a straightforward and cost-effective way to enhance your driving safety and improve the look of your vehicle. By following the steps outlined in this guide, you can achieve professional-quality results and enjoy clearer visibility on the road. Headlight restoration: how to improve visibility by 75% with DIY detailing is also a big money saver, since you don’t have to buy new headlights.
Remember to maintain your restored headlights with regular cleaning and protective coatings to preserve their clarity and longevity. With a little effort, you can keep your headlights looking their best and ensure optimal visibility for years to come.

")


")