How to Remove Car Scratches: A Step-by-Step Guide
How to Remove Scratches from Your Car’s Paint: A Step-by-Step Guide involves cleaning the area, assessing the scratch depth, using appropriate products like rubbing compound or polish, and applying protective wax or sealant for a flawless finish.
Is your car’s paint marred by unsightly scratches? Don’t despair! Learning how to Remove Scratches from Your Car’s Paint: A Step-by-Step Guide is easier than you might think. With the right tools and techniques, you can restore your car’s finish to its former glory.
This guide provides a comprehensive, step-by-step approach to how to Remove Scratches from Your Car’s Paint: A Step-by-Step Guide, empowering you to tackle minor scratches at home and save money on professional detailing services. Are you ready to get started and make your car shine again?
Understanding Car Paint and Scratches
Before diving into how to Remove Scratches from Your Car’s Paint: A Step-by-Step Guide, it’s essential to understand the structure of your car’s paint. Knowing the layers involved will help you determine the severity of the scratch and choose the appropriate repair method.
The Layers of Car Paint
Modern car paint typically consists of several layers, each serving a specific purpose:
- Clear Coat: This is the outermost layer, providing gloss and protection against UV rays and environmental elements.
- Base Coat: This layer contains the color of your car.
- Primer: This layer promotes adhesion between the metal body and the base coat.
- Metal Body: The car’s underlying metal structure.
Identifying which layer has been scratched is crucial for effective repair. Minor scratches usually only affect the clear coat, while deeper scratches can penetrate the base coat or even the primer.
Types of Car Scratches
Understanding the types of scratches will help you choose the right approach for how to Remove Scratches from Your Car’s Paint: A Step-by-Step Guide:
- Clear Coat Scratches: These are light scratches that only affect the clear coat. They often appear as swirl marks or fine lines.
- Base Coat Scratches: These are deeper scratches that penetrate the clear coat and reach the base coat. They are usually more visible and may show the color of the primer.
- Primer Scratches: These are the deepest scratches, extending through the clear coat and base coat to the primer layer. They require more extensive repair methods.
By understanding the anatomy of car paint and identifying the type of scratch, you’ll be better equipped to tackle the repair process effectively.
Essential Tools and Materials
Gathering the necessary tools and materials is the first step in how to Remove Scratches from Your Car’s Paint: A Step-by-Step Guide. Having everything on hand will make the process smoother and more efficient.
Cleaning Supplies
Proper cleaning is crucial before attempting any scratch removal. Here’s what you’ll need:
- Car Wash Soap: Use a pH-balanced car wash soap to gently remove dirt and grime without damaging the paint.
- Microfiber Wash Mitt: A soft microfiber mitt will help you clean the car without causing further scratches.
- Two Buckets: Use one bucket for soapy water and another for rinsing the mitt to prevent reintroducing dirt.
- Clean Microfiber Towels: These are essential for drying the car and polishing after scratch removal.
Ensure your car is thoroughly cleaned and dried before moving on to the next steps.
Scratch Removal Products
Choosing the right products is vital for effective scratch removal. Consider these options:
- Rubbing Compound: A more abrasive compound used for deeper scratches.
- Polishing Compound: A less abrasive compound used for light scratches and swirl marks.
- Scratch Repair Kit: These kits often include multiple compounds and applicators designed for various scratch types.
Select the product that matches the severity of the scratch to avoid causing further damage.
Application and Finishing Tools
Having the right tools for application and finishing will ensure a professional-looking result:
- Foam Applicator Pads: These are used to apply rubbing compound and polishing compound evenly.
- Dual-Action (DA) Polisher: A power tool that helps to buff the paint and remove scratches more effectively (optional but recommended).
- Wax or Sealant: Use a high-quality wax or sealant to protect the repaired area and enhance the shine.
With the right tools and materials, you’ll be well-prepared to tackle how to Remove Scratches from Your Car’s Paint: A Step-by-Step Guide like a pro.
Step-by-Step Guide to Scratch Removal
Now that you have your tools and understand the basics, let’s dive into the step-by-step process of how to Remove Scratches from Your Car’s Paint: A Step-by-Step Guide.
Step 1: Cleaning the Area
Start by thoroughly cleaning the area around the scratch:
- Wash the car with car wash soap and a microfiber wash mitt.
- Rinse the area thoroughly with water.
- Dry the area with a clean microfiber towel.
Ensure the area is completely clean and dry before proceeding to the next step.
Step 2: Assessing the Scratch
Determine the depth and severity of the scratch. You can do this by running your fingernail lightly across the scratch. If your nail catches, the scratch is likely deep and may require professional attention.
Step 3: Applying Rubbing Compound (For Deeper Scratches)
If the scratch is deep, use rubbing compound:
- Apply a small amount of rubbing compound to a foam applicator pad.
- Gently rub the compound onto the scratch in a circular motion, using moderate pressure.
- Work the compound for several minutes, then wipe away the excess with a clean microfiber towel.
Be careful not to apply too much pressure, as this can damage the paint.
Step 4: Applying Polishing Compound (For Light Scratches)
For light scratches, use polishing compound:
- Apply a small amount of polishing compound to a foam applicator pad.
- Gently rub the compound onto the scratch in a circular motion, using light pressure.
- Work the compound for several minutes, then wipe away the excess with a clean microfiber towel.
Polishing compound will help to remove swirl marks and restore the shine to the paint.
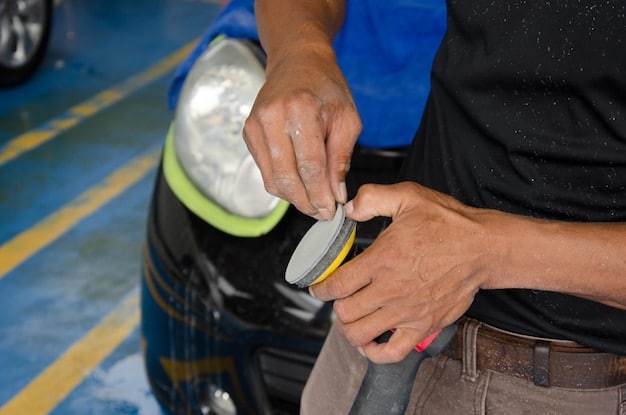
Step 5: Polishing with a Dual-Action (DA) Polisher (Optional)
Using a DA polisher can enhance the scratch removal process:
- Attach a clean polishing pad to the DA polisher.
- Apply a small amount of polishing compound to the pad.
- Set the polisher to a low speed and gently move it over the scratched area in overlapping passes.
- Increase the speed gradually and continue polishing for several minutes.
- Wipe away any residue with a clean microfiber towel.
A DA polisher provides more consistent and effective results than hand polishing.
Step 6: Applying Wax or Sealant
Protect the repaired area with a layer of wax or sealant:
- Apply a thin, even layer of wax or sealant to the area using a clean foam applicator pad.
- Allow the wax or sealant to dry according to the manufacturer’s instructions.
- Buff the area with a clean microfiber towel to reveal a glossy finish.
Wax or sealant will help to protect the paint from future scratches and environmental damage.
Advanced Techniques for Deeper Scratches
For deeper scratches that penetrate the base coat or primer, more advanced techniques may be required to how to Remove Scratches from Your Car’s Paint: A Step-by-Step Guide.
Using Touch-Up Paint
Touch-up paint can be used to fill in deep scratches and restore the color to the affected area:
- Clean the scratch thoroughly and remove any loose paint chips.
- Apply a thin layer of touch-up paint to the scratch using a fine-tipped brush.
- Allow the paint to dry completely according to the manufacturer’s instructions.
- Apply additional coats as needed to fill the scratch to the level of the surrounding paint.
- Wet sand the area with fine-grit sandpaper to blend the touch-up paint with the surrounding paint.
- Polish the area to restore the shine.
Using touch-up paint requires patience and precision, but it can be an effective way to repair deep scratches.
Wet Sanding
Wet sanding is a technique used to level the surface of the paint and remove imperfections:
- Soak a piece of fine-grit sandpaper (e.g., 2000-grit or 3000-grit) in water for several minutes.
- Wrap the sandpaper around a sanding block.
- Gently sand the area around the scratch in a back-and-forth motion, keeping the surface wet.
- Use light pressure and avoid sanding too aggressively.
- Rinse the area with water and inspect the surface.
- Repeat the process as needed until the scratch is level with the surrounding paint.
- Polish the area to restore the shine.
Wet sanding should be done with caution, as it can remove the clear coat if done improperly. It’s best to practice on an inconspicuous area first.
When to Seek Professional Help
While many scratches can be repaired at home, some may require professional attention. Consider seeking professional help if:
- The scratch is very deep and extends to the metal body.
- The scratch is located in a complex or hard-to-reach area.
- You are not comfortable performing the repair yourself.
A professional auto detailer or body shop will have the expertise and equipment to repair even the most severe scratches.
Preventing Future Scratches
Preventing scratches is always better than having to repair them. Here are some tips to help protect your car’s paint and minimize the risk of scratches:
Protective Measures
Taking protective measures can significantly reduce the likelihood of scratches:
- Regular Washing: Wash your car regularly to remove dirt, grime, and other contaminants that can scratch the paint.
- Waxing: Apply wax or sealant to your car’s paint to create a protective barrier against scratches and environmental elements.
- Paint Protection Film (PPF): Consider applying PPF to high-impact areas such as the hood, fenders, and bumpers.
- Avoid Automatic Car Washes: Automatic car washes can use abrasive brushes that can scratch the paint. Opt for touchless car washes or hand washing.
By taking these precautions, you can keep your car’s paint looking its best for years to come.
Safe Driving Habits
Your driving habits can also impact the likelihood of scratches:
- Maintain a Safe Distance: Keep a safe distance from other vehicles to avoid rock chips and road debris.
- Avoid Construction Zones: Construction zones can be filled with debris that can scratch your car’s paint.
- Park Carefully: Park in well-lit areas and avoid parking too close to other vehicles to prevent door dings and scratches.
Being mindful of your driving and parking habits can help to minimize the risk of scratches.
| Key Point | Brief Description |
|---|---|
| ✨ Cleaning | Thoroughly clean area before any scratch removal. |
| 🛠️ Products | Use rubbing or polishing compound as needed. |
| 🛡️ Protection | Apply wax or sealant to protect the paint. |
Frequently Asked Questions
Yes, many minor scratches can be effectively removed at home with the right tools, products, and techniques. This guide provides a step-by-step approach for successful scratch removal.
Rubbing compound is more abrasive and used for deeper scratches, while polishing compound is less abrasive and used for light scratches and swirl marks, refining the finish.
If your fingernail catches when you run it across the scratch, it’s likely too deep to fix yourself and may require professional repair to achieve the best results.
While some claim toothpaste can remove light scratches, it’s not recommended as it can be abrasive and damage the paint. Use dedicated scratch removal products for better results.
Waxing your car every 3-6 months helps protect the paint from scratches and environmental damage. Regular waxing maintains a protective barrier for your car’s finish.
Conclusion
Learning how to Remove Scratches from Your Car’s Paint: A Step-by-Step Guide empowers you to maintain your vehicle’s appearance and save money on professional detailing services. With the right tools, materials, and techniques, you can effectively tackle minor scratches at home.
Remember to assess the scratch, choose the appropriate products, and follow the steps carefully for a flawless finish. Regular maintenance and protective measures can also help prevent future scratches, keeping your car looking its best.


