How to Wash Your Car Without Scratches: A Step-by-Step Guide
To properly wash your car without scratches and swirl marks, start with a pre-wash rinse, use the two-bucket method with grit guards, apply a pH-neutral car soap with a microfiber wash mitt, rinse thoroughly, dry with a clean microfiber towel, and consider using a carnauba wax or sealant for added protection.
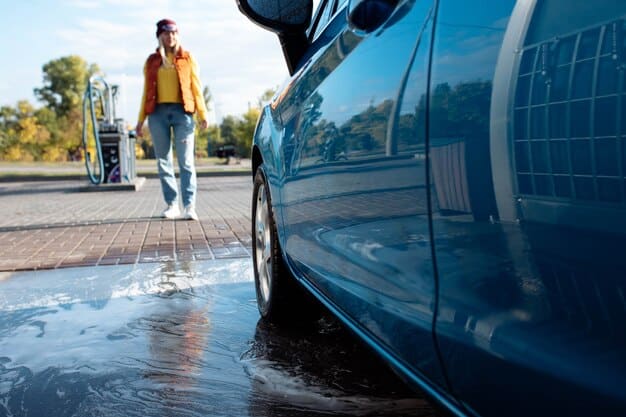
Want to keep your car looking its best? Learning how to properly wash your car to avoid scratches and swirl marks is crucial. This step-by-step guide will help you achieve a showroom shine without damaging your paint.
Getting Started: Essential Car Washing Supplies
Before you even think about getting your car wet, you need to gather the right supplies. Using the wrong materials can lead to scratches and swirl marks, which is exactly what we want to avoid. Investing in quality products will not only protect your car’s finish but also make the washing process much easier and more effective.
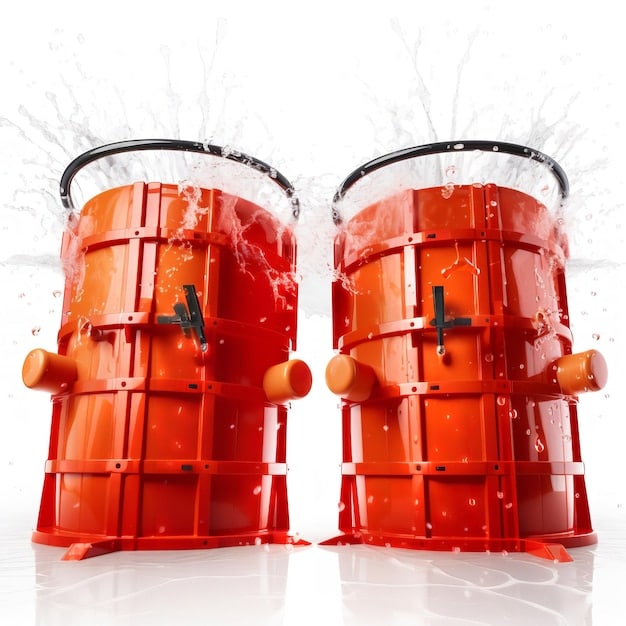
The Two-Bucket System
The two-bucket system is a game-changer when it comes to scratch-free washing. It’s a simple yet highly effective method that minimizes the transfer of dirt and grime back onto your car’s paint.
Microfiber Wash Mitts and Drying Towels
Choosing the right wash mitt and drying towel is essential for a scratch-free wash. Microfiber is the way to go, as it’s soft, absorbent, and won’t scratch the paint like sponges or old towels. Quality microfiber wash mitts and drying towels can make a significant difference in the final result, leaving your car looking pristine without any unwanted marks.
- Two Buckets with Grit Guards: Separates clean water from dirty water.
- pH-Neutral Car Soap: Safely cleans without stripping wax.
- Microfiber Wash Mitts: Gentle on paint, traps dirt effectively.
- Microfiber Drying Towels: Absorbs water quickly without scratching.
With the right supplies in hand, you’re well on your way to achieving a scratch-free car wash. Next, we will discuss the preparation steps to ensure a safe and effective cleaning process.
Pre-Wash: Preparing Your Car for a Safe Wash
Proper preparation is key to a safe and effective car wash. Skipping this step can lead to scratches and swirl marks, as you’ll be rubbing dirt and grime directly onto your paint. Taking the time to properly prepare your car ensures a cleaner and safer wash.
Rinsing Off Loose Dirt
The first step in preparing your car for a wash is to rinse off any loose dirt and debris. Use a strong stream of water to remove as much surface contamination as possible. This step alone can significantly reduce the risk of scratches during the actual wash.
Dealing with Stubborn Contaminants
Sometimes, a simple rinse isn’t enough to remove stubborn contaminants like bug splatter, tar, or bird droppings. These can be particularly abrasive and cause scratches if not properly addressed before washing. Use dedicated products to loosen and remove these contaminants safely.
- Rinse Thoroughly: Remove loose dirt with a strong water stream.
- Pre-Soak: Apply a pre-wash solution to loosen tougher grime.
- Bug and Tar Remover: Use specialized products for stubborn contaminants.
By taking the time to properly prepare your car, you’re setting yourself up for a scratch-free wash. Now that your car is prepped, let’s move on to the actual washing process.
The Two-Bucket Wash Method: A Detailed Guide
The two-bucket wash method is the cornerstone of scratch-free car washing. This technique minimizes the amount of dirt and grime that gets transferred back onto your car’s paint, significantly reducing the risk of scratches and swirl marks. It’s a simple method that can make a huge difference in the appearance of your car.
Filling Your Buckets Properly
Start by filling one bucket with clean water and adding your chosen car soap according to the manufacturer’s instructions. Fill the other bucket with plain, clean water—this will be your rinse bucket. The key is to keep your wash water as clean as possible throughout the entire process.
Washing Panel by Panel
Dip your microfiber wash mitt into the soapy water, gently wash a panel of your car, and then rinse the mitt thoroughly in the rinse bucket. This removes the dirt from the mitt before you re-dip it into the soapy water. Repeat this process panel by panel, working your way around the entire car.
- Soapy Water Bucket: Mix car soap with clean water.
- Rinse Water Bucket: Use for rinsing the wash mitt.
- Wash Mitt Technique: Wash one panel at a time, rinsing the mitt after each panel.
The two-bucket wash method is a simple yet effective technique for minimizing scratches and swirl marks. By following this guide, you can ensure a cleaner and safer wash for your car’s paint. Next, we’ll cover the rinsing process to remove all traces of soap.
Rinsing: Removing Soap Residue Effectively
After washing your car, it’s crucial to rinse off all the soap residue. Leaving soap on your car’s surface can lead to water spots and streaks, diminishing the shine you’ve worked so hard to achieve. A thorough rinse ensures that your car is clean and ready for the drying process.
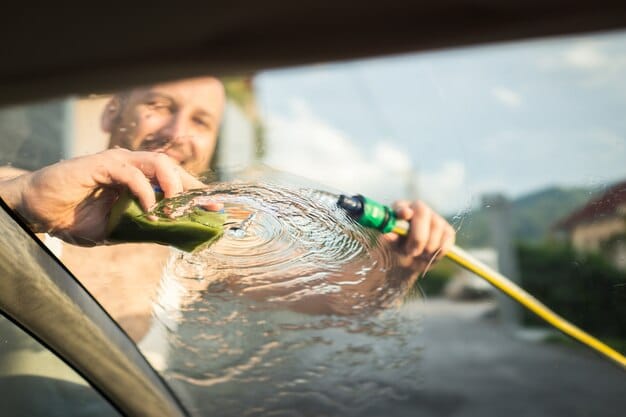
Using a Hose with an Adjustable Nozzle
Equip your hose with an adjustable nozzle that allows you to control the water pressure and spray pattern. A focused stream of water is great for blasting away soap residue from crevices and hard-to-reach areas, while a wider spray pattern is ideal for rinsing larger surfaces.
Rinsing from Top to Bottom
Start rinsing from the top of your car and work your way down to the bottom. This allows gravity to help carry away the soap and prevents dirty water from running over already-clean surfaces. Pay extra attention to areas like door jambs, wheel wells, and around emblems, as these tend to trap soap residue.
- Adjustable Nozzle: Control water pressure and spray pattern.
- Top-to-Bottom Rinse: Let gravity help remove soap.
- Check for Residue: Ensure all soap is completely removed.
A thorough rinse is essential for avoiding water spots and maintaining a clean finish. With all the soap residue removed, you’re ready to dry your car safely and effectively.
Drying: Preventing Water Spots and Swirl Marks
Drying your car properly is just as important as washing it. Improper drying techniques can lead to water spots, streaks, and even swirl marks. Using the right tools and methods will help you achieve a spot-free shine without damaging your paint.
Microfiber Drying Towels
Invest in high-quality microfiber drying towels. These towels are super absorbent and soft, making them ideal for drying your car without scratching the paint. Look for towels specifically designed for drying cars, as they tend to be larger and more absorbent.
Blotting Technique
Instead of wiping or dragging the towel across the surface, use a blotting technique. Gently pat the towel onto the wet surface, allowing it to absorb the water. This minimizes friction and reduces the risk of swirl marks. Work your way around the car, blotting each panel until it’s dry.
- Microfiber Towels: Soft and absorbent for scratch-free drying.
- Blotting Technique: Pat the surface instead of wiping.
- Quick Detailing Spray: Adds lubrication for extra protection.
Proper drying is essential for achieving a spot-free and scratch-free finish. By following these tips, you can ensure that your car looks its best after every wash. Let’s now proceed to the next section to see how to add extra protection.
Applying Wax or Sealant: Adding Extra Protection
Once your car is clean and dry, consider applying a layer of wax or sealant. This not only enhances the shine but also provides an extra layer of protection against UV rays, environmental contaminants, and minor scratches. Waxing or sealing your car is an investment in its long-term appearance and value.
Choosing the Right Product
There are many different types of waxes and sealants available, each with its own set of benefits and drawbacks. Carnauba waxes provide a deep, warm shine but typically don’t last as long as synthetic sealants. Sealants, on the other hand, offer longer-lasting protection but may not provide the same depth of shine. Choose a product that suits your needs and preferences.
Application Techniques
Follow the manufacturer’s instructions carefully when applying wax or sealant. Typically, you’ll want to apply a thin, even layer to a clean, dry surface using a foam applicator pad. Allow the product to haze over, then buff it off with a clean microfiber towel. Work in small sections to ensure even coverage and a consistent finish.
- Wax vs. Sealant: Choose based on shine and durability preferences.
- Thin, Even Layer: Apply product sparingly.
- Buffing: Use a clean microfiber towel for a streak-free finish.
Adding a layer of wax or sealant is a great way to protect your car’s paint and enhance its shine. This final step ensures that your car looks its best and stays protected from the elements.
| Key Point | Brief Description |
|---|---|
| 💧Pre-Wash Rinse | Removes loose dirt before washing. |
| 🧽Two-Bucket Method | Keeps wash water clean, reducing scratches. |
| 🧤Microfiber Mitts | Gentle on paint, traps dirt effectively. |
| ✨ Wax/Sealant | Adds shine and protects paint. |
Frequently Asked Questions (FAQs)
▼
No, dish soap is not recommended. It can strip away wax and protective oils from your car’s paint, leading to premature fading and damage. Use a pH-neutral car soap specifically designed for automotive finishes.
▼
Ideally, wash your car every two weeks or as needed. Factors like weather, road conditions, and storage environment can influence the frequency. Washing more often helps prevent contaminants from damaging the paint.
▼
Many automatic car washes use abrasive brushes that can cause swirl marks and scratches. Touchless car washes are a safer alternative, but the best option is to hand-wash your car using the two-bucket method.
▼
Wash your car in the early morning or late afternoon when the sun is not at its strongest. Washing in direct sunlight can cause soap and water to dry quickly, leading to water spots and streaks.
▼
Water spots can be removed with a dedicated water spot remover or a mild polish. Apply the product to a microfiber towel and gently rub the affected area. Follow up with a coat of wax or sealant to protect the paint.
Conclusion
By following this comprehensive guide, you can confidently wash your car without worrying about scratches and swirl marks. Remember to use the right tools, prepare your car properly, and take your time during the washing and drying process. With a little care and attention, you can keep your car looking its best for years to come.


