Restore Headlights to Like-New Condition: Step-by-Step Guide with Before & After Photos
Restoring your car’s headlights involves a systematic process of cleaning, sanding, and polishing to remove oxidation and haziness, significantly improving visibility and aesthetic appeal, and extending the lifespan of the headlight assembly.
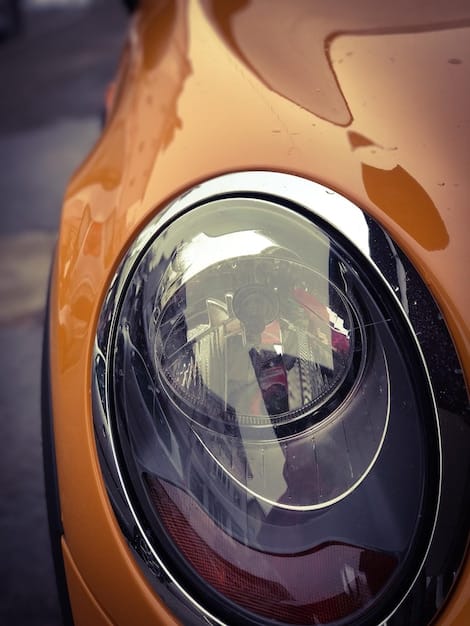
Dull, yellowed headlights are more than just an eyesore; they significantly compromise your nighttime visibility and overall driving safety. Over time, UV radiation and environmental elements degrade the protective clear coat on plastic headlight lenses, leading to oxidation, haziness, and reduced light output. Fortunately, you don’t need to replace your entire headlight assembly to regain that crystal-clear appearance. With a few readily available tools and a bit of patience, you can restore your headlights to like-new condition: a step-by-step guide with before & after photos, transforming your vehicle’s front end and enhancing your road safety.
Understanding Headlight Degradation: Why They Go Dull
Before diving into the restoration process, it’s crucial to grasp why headlights deteriorate. Most modern car headlights are made from polycarbonate plastic, a durable and lightweight material. While initially clear, this plastic is susceptible to damage from ultraviolet (UV) rays from the sun, just like human skin. Manufacturers apply a clear coat to protect against this degradation. However, over years of exposure to sunlight, harsh weather, road debris, and car washes, this protective layer breaks down.
Once the clear coat is compromised, the polycarbonate beneath begins to oxidize. This oxidation manifests as the familiar yellowing, cloudiness, or haziness that obstructs light transmission. Beyond aesthetics, this haziness drastically reduces the effectiveness of your headlights, making it harder to see the road, especially in adverse conditions, and reducing your vehicle’s conspicuity to other drivers.
The Science Behind the Haze
The yellowing and cloudiness you see are essentially micro-fractures and chemical changes within the polycarbonate. As UV radiation penetrates the compromised clear coat, it breaks down the molecular bonds in the plastic, leading to a phenomenon called photodegradation. This process causes the plastic to become brittle, opaque, and yellow. Environmental factors like humidity, temperature fluctuations, and chemical exposure (such as car wash soaps not designed for plastics) can accelerate this breakdown.
Understanding this degradation is the first step toward effective restoration. The goal of headlight restoration is to remove the damaged, oxidized layer of plastic and then apply a new, durable protective coating to prevent future deterioration, restoring both clarity and functionality.
Key factors contributing to headlight degradation:
- UV Radiation: The primary culprit, breaking down the clear coat.
- Environmental Exposure: Rain, snow, dirt, and road salt accelerate wear.
- Chemical Agents: Harsh cleaning products can strip protective layers.
- Abrasion: Small impacts from road debris and improper cleaning scratch the surface.
By effectively tackling these issues, a proper restoration not only improves appearance but also significantly enhances road safety by ensuring maximum light output from your vehicle’s lighting system.
Gathering Your Toolkit: What You’ll Need for Headlight Restoration
Successful headlight restoration hinges on having the right tools and materials. Most of what you need can be found at an automotive parts store or even a well-stocked hardware store. Avoid cutting corners here; using the correct abrasive grits and protective solutions is vital for achieving professional results and preventing further damage to your headlights.
Before you begin, ensure you have a dedicated workspace that is clean, dry, and well-lit. While many steps can be done outdoors, avoiding direct sunlight during the clear coat application is often recommended for better curing.
Essential Supplies for a Flawless Finish
Your shopping list for headlight restoration should include a variety of sanding discs, polishing compounds, and a protective sealant. Each plays a critical role in removing the old, damaged layer and preparing the surface for a fresh, long-lasting clear coat. Consider buying a complete headlight restoration kit, as these often bundle all necessary components and provide detailed instructions tailored to their specific products.
- Painter’s Tape: Crucial for protecting surrounding paint and trim from sanding and chemicals.
- Spray Bottle with Water: Essential for wet sanding, which minimizes friction and removes sanding residue.
- Microfiber Towels: For cleaning and buffing, ensuring a scratch-free finish.
- Automotive Degreaser or Rubbing Alcohol: For initial cleaning of the headlight surface.
- Sanding Discs (various grits): You’ll typically need a progression from coarse to fine, such as 400, 800, 1500, 2000, and sometimes even 3000 grit.
- Sanding Block or Drill Attachment: For even pressure during sanding.
- Polishing Compound: A specialized automotive polish designed for plastics or clear coats.
- Polishing Pad (foam or wool): For applying and buffing the polishing compound, often used with a drill.
- UV Protective Clear Coat/Sealant: This is arguably the most important step for long-term durability. Options include wipe-on solutions, spray-on clear coats, or even ceramic coatings.
Having these items ready before you start will streamline the process and prevent interruptions. Remember that quality materials often yield superior and more durable results, making the initial investment worthwhile for the longevity of your restoration.
Step-by-Step Restoration: From Hazy to Crystal Clear
Now that you have your supplies ready, it’s time to transform those dull, yellowed headlights into sparkling, like-new lamps. This process involves several distinct stages: preparation, sanding, polishing, and protection. Each step is vital and must be performed carefully for optimal results.
Patience is key at every stage. Rushing through the sanding or skipping a grit can leave visible scratches, while an uneven application of the clear coat can lead to drips or streaking. Take your time, pay attention to the details, and you’ll be rewarded with significantly improved visibility and a refreshed vehicle appearance.
Phase 1: Preparation is Paramount
Proper preparation lays the groundwork for a successful restoration. Begin by thoroughly cleaning your headlights with soap and water to remove surface dirt and grime. Follow this with an automotive degreaser or rubbing alcohol to eliminate any lingering oils or residues. This ensures that the sanding discs make direct contact with the oxidized plastic, not with surface contaminants.
Next, and critically, tape off the surrounding painted surfaces with high-quality painter’s tape. This protects your vehicle’s paint from accidental sanding marks or chemical exposure during the restoration process. Extend the tape generously, creating a protective barrier around the entire headlight assembly.
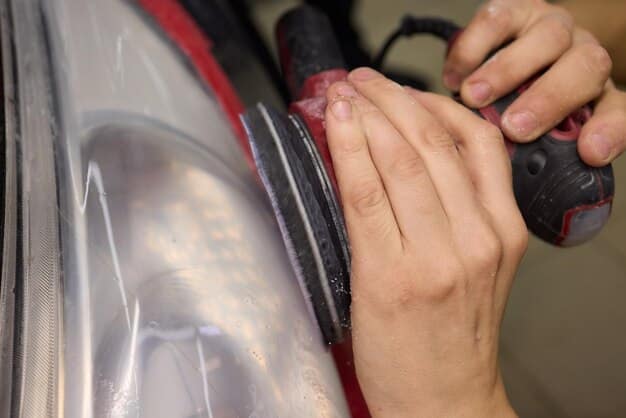
Phase 2: The Art of Sanding
Sanding is where the magic truly begins. You’ll start with a coarser grit to remove the thickest layers of oxidation and then progressively move to finer grits to refine the surface and eliminate sanding marks from the previous steps. Always use water (wet sanding) throughout this process to lubricate the surface, flush away debris, and prevent overheating.
Start with 400 or 600 grit sandpaper. Sand in consistent, overlapping strokes, applying even pressure. You’ll notice a milky, yellowish residue coming off—this is the oxidation. Continue until the entire lens has an even, matte finish, indicating that the damaged layer has been removed. Rinse frequently and wipe clean with a microfiber towel to inspect your progress. There should be no shiny spots or clear patches left.
Proceed to 800 grit, then 1500 grit, then 2000 grit, and finally 3000 grit if your kit includes it. With each successive grit, switch your sanding direction (e.g., vertical with 400, horizontal with 800) to help identify and remove scratches from the previous grit. The goal is to progressively smooth the surface until it feels almost completely smooth to the touch and appears uniformly hazy, without deep scratches.
Phase 3: Polishing for Clarity
After thorough sanding, your headlights will likely look opaque, but don’t despair! This is a good sign. Polishing will bring back the clarity. Apply a small amount of polishing compound to a foam polishing pad or a microfiber towel. If using a drill, ensure the pad is securely attached.
Work the polish into the headlight surface with moderate pressure, using circular or back-and-forth motions. The polishing compound contains micro-abrasives that will smooth out the microscopic scratches left by the fine-grit sandpaper, restoring the lens’s transparency. Continue polishing until the headlight becomes clear, rinsing and wiping away residue occasionally to check your progress. You might need to repeat this step a few times to achieve optimal clarity.
Phase 4: The All-Important Protection
This is the most critical step for the longevity of your restoration. Without a new protective clear coat, your headlights will re-oxidize rapidly, often within months. There are various types of protective coatings:
- Wipe-on coatings: Often included in kits, they are easy to apply but may offer less durability. Apply evenly with a clean applicator pad.
- Spray-on clear coats: Provide a more robust and uniform layer. Apply multiple thin coats, allowing proper flash-off time between each, following the product instructions carefully.
- Ceramic coatings: Offer the highest level of protection and durability, creating a hard, molecular bond. These typically require more careful application and curing.
Ensure the headlight surface is completely clean and dry before applying any protective coat. Once applied, allow the coating to cure fully according to the manufacturer’s instructions. This often takes several hours, and avoiding moisture or harsh chemicals during this period is essential. Once cured, your headlights will be restored to remarkably clear, like-new condition, ready to illuminate your path more effectively.
Before & After: Witnessing the Transformation
The most satisfying part of any headlight restoration project is undeniably the “before & after” comparison. This side-by-side view vividly illustrates the dramatic improvement in clarity, light output, and overall vehicle aesthetics. It’s not just a visual upgrade; it’s a testament to enhanced safety and renewed confidence on the road.
When documenting your own restoration, take clear photos of your headlights in their original, oxidized state. Then, after completing the entire process, including the application and curing of the protective coating, capture new photos from the same angles and lighting conditions. The difference will likely be astounding.

The Visual Impact
Oxidized headlights make any car, regardless of its make or model, look older and neglected. They detract significantly from the vehicle’s curb appeal and can even affect its resale value. A professional-looking headlight restoration dramatically reverses this aging effect, making the car appear cleaner, newer, and better maintained. The clarity achieved allows the internal reflectors and bulb to shine through brilliantly, just as they were designed to.
Consider the psychological impact as well. Driving a car with clear headlights simply feels safer and more enjoyable. It reflects a level of care from the owner that extends beyond mere functionality, touching upon pride of ownership. This transformation underscores the relatively small effort and cost involved in achieving such a significant visual and functional improvement.
Maintaining Your Restored Headlights: Long-Term Care
Restoring your headlights is an investment in your safety and your vehicle’s appearance. To ensure this investment lasts, proper ongoing maintenance is crucial. While the new clear coat provides significant protection, it’s not invincible. Continuous exposure to the elements will eventually begin to degrade it once more, albeit much more slowly than the original factory coating.
Tips for Extended Clarity and Protection
Implementing a few simple habits into your car care routine can significantly extend the life of your newly restored headlights. Think of it like taking care of your car’s paint; regular cleaning and protection are key to maintaining its pristine condition.
Regularly cleaning your headlights is the first line of defense. Use mild automotive soap and water, avoiding harsh chemicals, and always use a soft microfiber towel. This prevents the buildup of dirt and grime that can etch into the new clear coat and accelerate its breakdown.
Beyond basic cleaning, consider these practices:
- Apply UV Protectant: Periodically (every 3-6 months), apply a dedicated UV protectant spray or wax designed for clear plastics. Some car waxes and sealants also offer UV inhibitors that can be safely applied to headlight lenses.
- Park in Shade: Whenever possible, park your vehicle in a garage or under shade. Direct, prolonged exposure to sunlight is the number one enemy of headlight clarity.
- Avoid Harsh Chemicals: Be mindful of car wash solutions. Some automatic car washes use strong chemicals that can strip protective coatings. Opt for hand washing with pH-neutral car soaps.
- Re-apply Clear Coat as Needed: If you notice any signs of haziness returning in a few years, it might be time for a lighter re-sanding and re-application of the clear coat, catching the problem early before it becomes severe.
By adopting these simple maintenance routines, you can ensure your headlights remain crystal clear, providing optimal illumination and preserving the aesthetic appeal of your vehicle for years to come. This proactive approach saves you time and money by delaying the need for another full restoration.
Common Mistakes to Avoid During Headlight Restoration
While headlight restoration is largely a straightforward process, it’s easy to make a few common mistakes that can hinder your results or even damage your headlights. Being aware of these pitfalls beforehand can save you time, frustration, and potential rework.
Ensuring a Smooth and Effective Restoration
Every step of the process, from preparation to protection, requires attention to detail. Skipping steps or using the wrong techniques can lead to subpar results, such as incomplete haze removal, visible sanding marks, or a rapidly deteriorating clear coat.
One of the most frequent mistakes is inadequate preparation. Not properly cleaning the headlight surface before sanding means you’re sanding dirt and grime into the plastic, which can scratch it further. Similarly, failing to thoroughly tape off surrounding paint can lead to irreversible damage from abrasive materials. Always dedicate ample time to this initial, crucial step. Another common error is not using enough water during wet sanding; water acts as a lubricant and carries away sanding debris, preventing deep scratches.
Other pitfalls to avoid include:
- Skipping Sanding Grits: Jumping from a very coarse grit directly to a very fine one will leave deep scratches that the finer grits cannot fully remove, resulting in a hazy or scratched appearance even after polishing.
- Insufficient Polishing: Not spending enough time with the polishing compound means tiny sanding marks will remain, preventing the headlight from achieving its maximum clarity.
- Uneven Clear Coat Application: Applying the protective clear coat too thickly, too quickly, or in high humidity can lead to drips, runs, or streaking, requiring re-sanding and re-application.
- Ignoring Curing Times: Not allowing the clear coat to fully cure before exposing the headlights to moisture or dirt can compromise its durability and adhesion.
Heeding these warnings and committing to a meticulous approach will help you achieve outstanding results and ensure the longevity of your newly restored headlights, maximizing both the aesthetic and functional benefits.
When to Consider Professional Help or Replacement
While DIY headlight restoration is highly effective for most cases of oxidation and haziness, there are instances when professional intervention or even full headlight replacement might be the more practical or necessary solution. Understanding these limits can save you time, effort, and potential disappointment.
Beyond the DIY Scope: Cracks, Internal Damage, and Persisting Problems
The DIY methods discussed are designed to address surface-level oxidation and clear coat degradation. They are not effective for issues that extend beyond the outer layer of the headlight lens. If your headlights exhibit more severe or complex damage, a professional assessment is advisable.
If you notice deep cracks, significant chips, or punctures in the polycarbonate lens, no amount of sanding or polishing will repair these. Such damage compromises the structural integrity of the headlight, potentially allowing moisture to enter and affecting light distribution. Similarly, if the haziness appears to be on the inside of the headlight assembly, or if there’s significant condensation build-up inside, this indicates internal issues beyond the scope of external restoration. This often points to a failed seal or a ventilation problem, which typically requires disassembling the unit or replacing it entirely.
Other scenarios where professional help or replacement is prudent:
- Internal Discoloration: If the reflector inside the headlight has yellowed or flaked, external restoration won’t fix it.
- Broken Tabs or Mounts: Damage to the structural components holding the headlight in place cannot be repaired with restoration kits.
- Electrical Malfunctions: If bulbs are frequently burning out or the headlight assembly isn’t receiving power, this is an electrical issue, not a surface problem.
- Safety Regulations: In some regions, severely damaged headlights might fail safety inspections, requiring full replacement.
A professional auto detailer or mechanic can accurately diagnose the problem and recommend the best course of action, whether it’s an advanced restoration technique, internal repair, or ultimately, a new headlight assembly. While replacement is more costly, it provides a guaranteed solution for severe and internal damages, ensuring optimal safety and compliance.
| Key Aspect | Brief Description |
|---|---|
| 💡 Causes of Haze | UV light and environmental factors break down the headlight’s protective clear coat, leading to polycarbonate oxidation and haziness. |
| 🛠️ Essential Tools | Requires painter’s tape, varied grit sandpaper (400-3000), polishing compound, and new UV protective clear coat. |
| ✔️ Restoration Steps | Clean and tape, wet sand from coarse to fine, polish for clarity, then apply a durable UV protective clear coat. |
| upkeep | Regular cleaning, UV protectant application, and parking in shaded areas extend the restoration’s lifespan. |
Frequently Asked Questions About Headlight Restoration
The longevity of a headlight restoration largely depends on the quality of the protective clear coat applied. With a high-quality UV-resistant sealant or ceramic coating and proper maintenance, restored headlights can remain clear for 2 to 5 years, sometimes even longer. Direct sun exposure and harsh environmental conditions will reduce this lifespan.
For most cases of surface oxidation, a careful DIY restoration can yield results comparable to professional services. The key is using the right tools, following instructions meticulously, and especially applying a durable UV-protective clear coat. Professionals may have access to industrial-grade products or vapor-application methods for perhaps even longer-lasting results.
While toothpaste contains mild abrasives that can temporarily remove some surface haziness, it is not a long-term solution. It lacks the necessary range of grits for full oxidation removal and, crucially, provides no UV protection. Headlights cleaned with toothpaste will re-oxidize quickly, often within weeks, negating the effort.
The most common mistake is failing to apply a new, durable UV-protective clear coat after sanding and polishing. Without this crucial final step, the headlight lens will rapidly re-oxidize, often within a few months, making the entire restoration process short-lived and ineffective due to renewed exposure to UV radiation.
Absolutely. Oxidized headlights significantly reduce light output, sometimes by up to 80% or more. By restoring clarity, you allow your headlights to project light more effectively, increasing your visibility of the road ahead and making your vehicle more visible to other drivers, particularly during nighttime driving or in inclement weather.
Conclusion
Restoring your headlights to like-new condition is a practical, cost-effective project that yields immediate and tangible benefits. Beyond the aesthetic improvement that makes your vehicle appear years younger, the most significant gain is the dramatic enhancement in driving safety. Clear, bright headlights illuminate the road more effectively, allowing you to see obstacles sooner and react more safely, especially during nighttime or adverse weather conditions. By understanding the causes of degradation, gathering the right tools, diligently following the step-by-step process of sanding, polishing, and—most importantly—applying a durable UV-protective clear coat, you can prolong the life of your headlights and ensure optimal visibility for countless miles to come. This DIY task is a testament to how a small investment of time and effort can lead to a significant upgrade in both your vehicle’s appearance and your driving confidence.


")


