Save $50 This Year: DIY Car Waxing for a Showroom Shine
Achieving a professional-level car finish at home is entirely possible, saving you substantial money; this guide offers a step-by-step approach to DIY car waxing, ensuring a lasting showroom shine and protecting your vehicle’s paintwork, eliminating the need for expensive detailing services.
Are you tired of paying upwards of $50, $70, or even $100 for a professional car wax that seems to lose its luster all too quickly? What if you could achieve a superior, long-lasting finish right in your own driveway? This guide on Save $50 This Year: The Ultimate Guide to DIY Car Waxing for a Showroom Shine will empower you to transform your vehicle’s appearance and save significant money, all while enjoying the satisfaction of a job well done.
The True Value of Car Waxing: Beyond Just Shine
Many car owners view waxing as a purely aesthetic endeavor, a way to make their vehicle sparkle. While the dazzling shine is certainly a significant benefit, the true value of car waxing extends far beyond mere appearance. It’s a critical component of vehicle maintenance that offers protection, preserves resale value, and contributes to the overall health of your car’s exterior.
Proper waxing acts as a sacrificial layer between your car’s delicate clear coat and the harsh elements it encounters daily. This invisible barrier shields against a myriad of environmental threats, preventing damage that could otherwise lead to costly repairs down the line. Understanding these intrinsic benefits reinforces why DIY car waxing isn’t just a chore; it’s an investment in your vehicle.
Protecting Your Paint from the Elements
Your car’s paintwork is constantly assaulted by various environmental factors. From the sun’s intense UV rays to abrasive road grime and corrosive bird droppings, the clear coat faces a relentless battle. Wax creates a resilient shield that helps deflect these common adversaries, significantly reducing the potential for permanent damage.
- UV Ray Resistance: Wax helps filter harmful UV radiation, preventing paint oxidation and fading, which can make your car look dull and aged over time.
- Water Repellency: The hydrophobic properties of wax cause water to bead up and roll off the surface, taking dirt and contaminants with it. This “beading” also helps prevent water spots.
- Chemical Attack Defense: Acid rain, industrial fallout, and even some car wash detergents can be detrimental to your paint. A wax layer provides a buffer against these chemical attacks.
- Physical Barrier: While not impenetrable, wax adds a thin protective layer that can help mitigate minor abrasions and swirl marks caused by improper washing or light contact.
Without this protective layer, your car’s clear coat is left vulnerable, leading to accelerated wear and tear. Over time, this can result in a dull finish, permanent stains, and even clear coat failure, which is expensive to correct.
Enhancing and Preserving Resale Value
A well-maintained exterior is one of the first things potential buyers notice. A car with paint that looks faded, scratched, or dull suggests a lack of care, which can dramatically lower its perceived value. Regular waxing, especially when done meticulously as part of a DIY routine, ensures your car always presents its best face.
Think of car waxing as part of a comprehensive detailing regimen that signals to future owners that the vehicle has been cherished. When it comes time to sell or trade in your car, a pristine exterior can easily translate into hundreds, if not thousands, of dollars saved or gained. This makes the time and effort invested in DIY waxing a highly profitable endeavor, reinforcing the “Save $50 This Year” promise by preserving your asset’s worth.
Ultimately, waxing is not just about a temporary shine. It’s about proactive paint protection, extending the life of your vehicle’s finish, and ensuring it retains its value as a significant investment. By understanding and embracing these benefits, you’re not just waxing; you’re safeguarding your automotive asset.
Choosing the Right Wax: A Guide to Types and Preferences
The market for car waxes is vast and can be overwhelming, with numerous types promising different levels of shine, protection, and durability. Selecting the right wax is crucial for achieving your desired results and ensuring your efforts are not in vain. This section will demystify the different types of car waxes available, helping you make an informed decision based on your car’s needs, your personal preferences, and your budget.
Each type of wax has its unique characteristics, application methods, and longevity. Understanding these differences will enable you to choose a product that not only delivers a showroom shine but also provides the specific protection your vehicle requires.
Natural Carnauba Wax: The Traditional Choice
Carnauba wax is often considered the gold standard for achieving a deep, warm, and natural-looking shine. Derived from the leaves of the Copernicia prunifera palm in Brazil, it’s known for its hardness and high melting point, making it incredibly durable in its natural state. On your car, it translates to an impressive wet-look finish that enhances the paint’s color and depth.
- Pros: Unrivaled depth and warmth in shine, excellent water beading, natural product. Offers good protection against UV rays and environmental contaminants.
- Cons: Generally less durable than synthetic waxes, often requiring reapplication every 4-6 weeks. Can be more challenging to apply and buff off, especially in direct sunlight or humid conditions.
- Best For: Enthusiasts seeking the ultimate visual aesthetic, classic cars, or show cars where frequent reapplication is part of the routine. It’s also ideal for darker paint colors, which particularly benefit from its depth-enhancing qualities.
When purchasing carnauba wax, look for products with a high percentage of pure carnauba. While 100% carnauba is rare and difficult to work with, many high-quality blends offer excellent results by combining carnauba with other solvents and oils for easier application.
Synthetic Polymer Sealants: Modern, Durable Protection
In contrast to natural carnauba, synthetic polymer sealants are man-made formulations designed for maximum durability and long-term protection. These products use advanced polymer technology to create a strong, clear bond with your car’s clear coat, forming a barrier that can last much longer than traditional waxes. While they might not offer the same “wet look” as carnauba, they provide a very clean, crisp shine.
- Pros: Superior durability, often lasting 3-6 months or even longer. Excellent protection against harsh chemicals, UV rays, and road grime. Easier application and removal compared to some carnauba waxes.
- Cons: May not provide the same deep, warm glow as carnauba. Can sometimes feel slicker rather than looking “wet.”
- Best For: Daily drivers, vehicles exposed to harsh weather conditions, or car owners who prefer less frequent waxing. Great for all paint colors, providing robust protection without constant reapplication.
Many modern synthetic sealants are incredibly easy to use, often available as spray-on, wipe-off formulas, making them a popular choice for DIY enthusiasts looking for efficiency and robust protection.
Hybrid Waxes (Carnauba-Polymer Blends): The Best of Both Worlds
For those seeking a balance between the aesthetic appeal of carnauba and the durability of synthetic sealants, hybrid waxes offer an excellent compromise. These products combine natural carnauba with synthetic polymers, aiming to deliver a deep shine and extended protection in one convenient formula. This blend often enhances both the ease of application and the longevity of the finish.
- Pros: Offers a beautiful shine with good depth, combined with enhanced durability compared to pure carnauba. Easier to apply than traditional carnauba.
- Cons: May not excel in one area as much as a dedicated pure carnauba or synthetic sealant would.
- Best For: Car owners who want a significant upgrade from basic protection but don’t want to sacrifice durability or spend excessive time on frequent applications.
Choosing the right wax ultimately comes down to your priorities: do you value the deepest, warmest shine above all, or is long-lasting protection your primary concern? Perhaps a balanced hybrid solution suits your needs best. Experimenting with different types can help you discover your preferred product to achieve that perfect showroom shine.
The Essential Prep: Cleaning for a Flawless Finish
Achieving a genuine showroom shine from your DIY car waxing efforts is fundamentally dependent on one critical step: thorough preparation. Skipping or rushing this stage is a common mistake that can compromise the final results, leading to a dull finish, uneven wax application, and potentially even paint damage. Proper cleaning isn’t just about removing visible dirt; it’s about creating a pristine surface that allows the wax to bond effectively and deliver its full potential.
Think of it this way: waxing over a dirty or contaminated surface is like painting a wall without primer. The results will be subpar, and the finish won’t last. The investment of time and effort in preparing your car’s surface is indispensable for a truly professional outcome.
Deep Cleaning: Washing and Decontaminating Your Car
Before any wax touches your car’s paint, a meticulous wash is absolutely essential. This goes beyond a quick rinse; it requires attention to detail to remove all loose dirt, grime, and debris. Use a quality car wash soap (not dish soap, which can strip existing wax and oils) and the two-bucket method to prevent scratching. One bucket contains soapy water, the other clean rinse water for your wash mitt, effectively separating dirty water from clean to minimize swirl marks.
However, washing alone isn’t enough. Your car’s paint accumulates stubborn contaminants that a simple wash can’t remove. These include industrial fallout, tree sap, road tar, and brake dust, which can feel like tiny bumps on the paint surface even after washing. This is where clay bar treatment comes in handily. A clay bar effectively pulls these embedded contaminants from the clear coat, leaving a silky-smooth surface ready for waxing.
To use a clay bar:
- Ensure the car is clean and wet, or use a clay lubricant.
- Spray a small section with lubricant.
- Gently rub the clay bar over the lubricated surface in straight lines, not circles.
- Fold the clay to expose a clean surface as it picks up contaminants.
- Repeat until the entire car feels smooth to the touch.
This decontamination step is crucial because leftover contaminants will prevent the wax from bonding properly, reducing its durability and shine. It’s the secret weapon of professional detailers for achieving that glass-like smoothness.
Addressing Paint Imperfections: Swirls and Scratches
Once your car is immaculately clean and decontaminated, inspect the paint for any imperfections such as swirl marks, light scratches, or oxidation. Wax can hide very minor blemishes, but it won’t fix them. In fact, waxing over deeper swirls can sometimes make them more noticeable in certain lighting conditions.
For a true showroom finish, addressing these imperfections before waxing is highly recommended. This usually involves polishing. Polishing uses abrasives to gently remove a microscopic layer of clear coat, leveling the surface and effectively removing swirls and scratches. This step is more advanced and requires care to avoid damaging the paint.
- Light Swirls: Can often be corrected with a “one-step” polish/cleaner wax or a fine-cut polish applied with a dual-action polisher or by hand with a foam applicator.
- Moderate Scratches: May require a more aggressive compound followed by a polish. For deep scratches, professional help might be necessary, as they might penetrate the clear coat completely.
- Oxidation: Appears as a dull, chalky film on the paint. This can often be removed with an abrasive cleaner or polish, restoring the paint’s original color and gloss.
If you’re not comfortable with polishing, even just the thorough cleaning and decontamination will provide a significantly better surface for waxing than simply washing. However, for that truly flawless, mirror-like finish, correcting paint imperfections is a key step that elevates your DIY efforts to a professional level. Remember, the goal of preparation is to present the wax with the cleanest, smoothest, and most uniform surface possible, maximizing its effectiveness and your car’s ultimate shine.
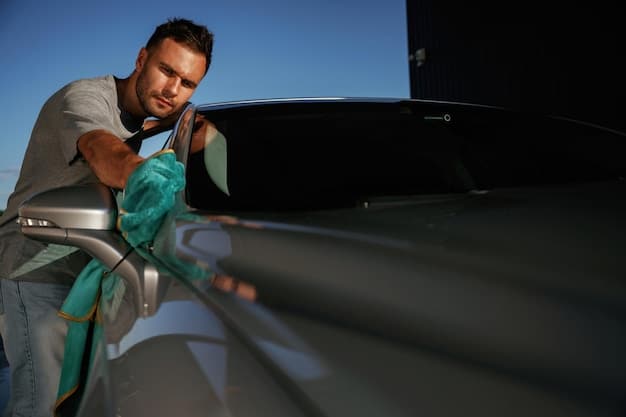
Application Techniques: Mastering the Art of Waxing
With your car meticulously cleaned and decontaminated, you’re now ready for the main event: applying the wax. While it might seem straightforward, mastering the right application techniques is paramount for achieving an even, streak-free, and durable finish. A professional-looking result depends not only on the quality of your wax but also on how it’s applied and removed.
This section will guide you through the process, offering practical tips and best practices to ensure your DIY car waxing efforts yield a stunning showroom shine every single time. Patience and attention to detail are your best allies here.
Step-by-Step Application for Optimal Results
The fundamental principle of wax application is to apply a thin, even layer, allow it to cure, and then buff it off. Sound simple? The nuances lie in the “how.”
- Work in Sections: Never wax the entire car at once. Break the vehicle down into manageable sections (e.g., hood, a single door, fender). This prevents the wax from drying out too much before you can buff it, making removal difficult and potentially leaving streaks.
- Use the Right Applicator: For most paste or liquid waxes, a foam applicator pad is ideal. It helps spread the wax thinly and evenly. For spray waxes, a clean microfiber towel works best.
- Apply a Thin, Even Coat: Less is more when it comes to wax. A thick layer doesn’t offer more protection; it just makes it harder to buff off and can lead to residue. Apply a thin, uniform coat to each section, overlapping slightly to ensure full coverage. Use light, circular motions for carnauba, and straight lines for synthetic sealants, as recommended by the product manufacturer.
- Allow Curing Time: This is crucial. Wax needs time to “haze over” or “cure” before removal. The exact time varies by product and environmental conditions (temperature, humidity). Read your wax’s instructions carefully. A common test for carnauba is the “swipe test”: swipe your finger across the hazy wax; if it streaks cleanly, it’s ready to buff. If it smears, it needs more time.
- Buff Off with Microfiber Towels: Use a clean, high-quality microfiber towel for removal. Start with light pressure and then increase slightly as needed. Rotate frequently to a clean section of the towel to avoid re-depositing wax. For the best finish, use two towels: one for initial breakdown of the haze, and a second, fresh towel for a final, gentle buff to a high gloss.
Avoiding direct sunlight during application is also critical. Wax applied in direct sun can dry too quickly, making it difficult to remove and potentially causing streaking or hazing.
Common Mistakes to Avoid for a Streak-Free Finish
Even with the best intentions, mistakes can happen. Being aware of these common pitfalls can help you avoid frustration and ensure a flawless final product.
- Applying Too Much Wax: As mentioned, this is probably the most frequent mistake. A heavy layer won’t buff off cleanly and will often leave a streaky, hazy finish that can be tough to correct.
- Working in Direct Sunlight or on a Hot Surface: Heat causes wax to dry too quickly, making it difficult to spread evenly and excruciatingly hard to remove. Always work in the shade or in a cool garage, and ensure your car’s surface is cool to the touch.
- Not Curing Long Enough (or Curing Too Long): Follow the product instructions. Insufficient curing means the wax hasn’t properly bonded, leading to poor durability. Curing too long, especially with some carnauba waxes, can make removal exceptionally challenging.
- Using Low-Quality or Dirty Microfiber Towels: Cheap towels can scratch your paint, and dirty towels will redeposit grime, defeating the purpose of waxing. Always use clean, edgeless, high-quality microfiber towels specifically designed for detailing. Wash them separately from other laundry, without fabric softener, to maintain their absorbency.
- Missing Spots: It’s easy to miss small areas, especially around intricate body lines or under mirrors. Take your time and inspect each section from different angles to ensure complete coverage and thorough buffing.
By understanding these techniques and actively avoiding common errors, you’ll elevate your DIY car waxing skills. The result will be a gleaming, protected vehicle that clearly reflects the care and effort you’ve invested, delivering that satisfying showroom shine and proving that saving $50 this year can look absolutely fantastic.
Long-Term Maintenance: Keeping That Showroom Shine Intact
Achieving a dazzling showroom shine through meticulous DIY car waxing is incredibly satisfying. However, the work doesn’t stop once the last buffing cloth is put away. Maintaining that pristine finish over time requires ongoing care and a sensible washing routine. Neglecting post-wax maintenance can quickly diminish the wax’s protective properties and dull its brilliant luster, undoing all your hard work.
This section focuses on the strategies and habits that will help you preserve your car’s freshly waxed appearance and extend the life of the protective layer, ensuring your “Save $50 This Year” efforts continue to pay off in spades.
Washing Your Waxed Car Properly
The way you wash your car after waxing is paramount to maintaining the finish. Aggressive washing techniques, harsh detergents, or automatic car washes can strip away the wax layer prematurely, leaving your paint vulnerable once again. The goal is to clean gently while preserving the protective barrier.
- Use pH-Neutral Car Wash Soap: Opt for a car wash solution specifically labeled as “pH-neutral” or “wax-safe.” These soaps clean effectively without compromising the wax layer. Avoid dish soap or harsh household cleaners, as they are designed to cut through grease and will strip your wax almost instantly.
- Employ the Two-Bucket Method: Reinforce this best practice even after waxing. One bucket for soapy water, one for rinsing your wash mitt. This significantly reduces the chances of dragging abrasive dirt particles across your waxed surface, preventing new swirl marks.
- Use Quality Wash Media: A plush microfiber wash mitt or a natural sea sponge is gentle on the paint. Avoid stiff brushes, which can scratch.
- Wash Gently and in Sections: Work from top to bottom, washing one section at a time. Rinse each section thoroughly before moving to the next to prevent soap from drying on the paint.
- Dry Immediately and Carefully: Water spots can form quickly, especially in the sun. Use a large, super-absorbent microfiber drying towel or a car dryer/blower to remove water spots. Blot, don’t rub, to avoid friction and potential scratching.
Frequent, gentle washing is better than infrequent, aggressive washing for maintaining a waxed finish. The more often you remove contaminants, the less time they have to bond with and penetrate the wax layer.
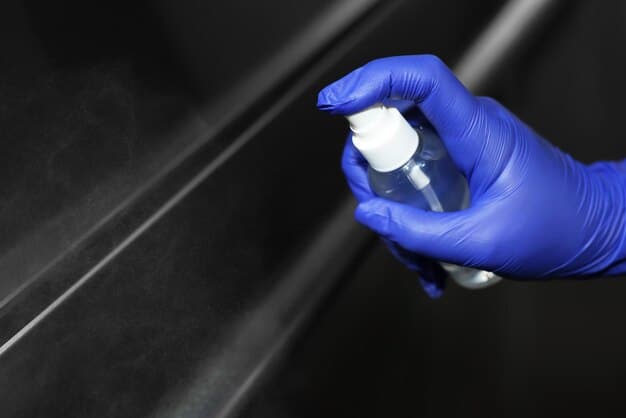
Booster Sprays and Quick Detailers: Extending Wax Life
Between full waxing sessions, booster sprays and quick detailers are invaluable tools for maintaining gloss and extending the life of your wax. These products are designed to clean light dust and fingerprints, add a layer of sacrificial protection, and rejuvenate the shine without requiring a full wash or re-waxing.
- Quick Detailers (QDs): Primarily used for light cleaning and adding a temporary shine. They are excellent for removing dust, bird droppings (when caught early), and fingerprints between washes. Many QDs contain mild polymers that offer a slight boost to your existing wax.
- Wax Boosters/Sprays: These are essentially sprayable versions of a wax or sealant, often containing similar ingredients but in a more diluted, easier-to-apply formula. They are designed to be used after a wash to fortify the existing wax layer, enhancing its shine and water repellency. Regular use of a wax booster can significantly extend the time between full waxing applications.
To use these products:
- Ensure the car is relatively clean (only light dust for QDs).
- Spray a small section (e.g., one panel) with the product.
- Immediately wipe down with a clean, soft microfiber towel.
- Use a second clean microfiber towel for a final buff to a streak-free shine.
Regularly incorporating these maintenance steps will dramatically extend the period your car maintains its showroom shine and protective wax layer. Instead of thinking of waxing as a one-off task, view it as part of an ongoing, rewarding process that keeps your vehicle looking its best and keeps that extra $50 in your pocket.
Troubleshooting Common Waxing Issues
Even with the best intentions and meticulous preparation, DIY car waxing can sometimes present a few challenges. Streaks, haze, and uneven finishes are common frustrations that can make a professional-looking shine seem elusive. Don’t despair! Most waxing issues are solvable and often stem from simple mistakes in technique or environmental conditions. Understanding how to troubleshoot these problems can save you stress and ensure your car ultimately achieves that desired showroom gleam.
This section will walk you through the most frequent waxing dilemmas and provide practical solutions, empowering you to correct any imperfections and achieve a flawless finish every time.
Dealing with Streaks and Haze
Streaks and haze are perhaps the most common waxing complaints. They manifest as an unappealing cloudy appearance or visible lines across the paint, diminishing the crispness of your shine. Several factors can contribute to these issues:
- Too Much Wax: The number one culprit. Applying an excessive amount of wax makes it incredibly difficult to buff off cleanly, leaving residue that looks like streaks or haze.
- Insufficient Curing Time: If the wax isn’t allowed to cure or “haze over” fully before buffing, it won’t bond properly, resulting in a smeary finish that resists complete removal.
- Buffing Too Soon: Similar to insufficient curing, if you buff off the wax before it’s ready, you’re essentially just moving liquid wax around, leading to streaks.
- Buffing Too Late: Conversely, if the wax dries completely and hardens (especially with some carnauba waxes), it becomes exceedingly difficult to remove, often leaving behind stubborn haze.
- Working in Direct Sunlight or Heat: High temperatures accelerate the drying process, making wax unworkable and prone to streaking.
- Using Dirty or Saturated Microfiber Towels: A towel laden with old wax residue or dirt will only spread impurities, creating more streaks rather than removing them effectively.
Solutions for Streaks and Haze:
For immediate correction on fresh streaks, try re-wiping the affected area with a very lightly dampened (with water or quick detailer) clean microfiber towel. If that doesn’t work, apply a fresh, minuscule amount of wax over the streaky area and immediately buff off with a clean, dry microfiber towel. The new wax can reactivate the old, dried wax, allowing for a cleaner removal. For more stubborn haze, a quick detailer spray or a dedicated wax remover/cleaner wax might be necessary. In severe cases, a very light polish may be required.
Addressing Uneven Application and Residue
Uneven application can lead to patchy protection and differing levels of gloss across your car’s panels. Residue, particularly in panel gaps, emblems, and trim, is unsightly and can be difficult to remove.
- Causes of Uneven Application: Not spreading the wax evenly with the applicator, missing spots, or applying vastly different thicknesses of wax across the surface.
- Causes of Residue: Over-application, not buffing thoroughly enough, or wax getting trapped in crevices and trim.
Solutions for Uneven Application and Residue:
To prevent uneven application, always work in small, manageable sections and overlap your strokes. Use adequate lighting to ensure you see where you’ve applied the wax. If you notice a thin patch after buffing, you can carefully re-wax that specific area, ensuring it blends seamlessly with the surrounding waxed paint.
For residue in cracks and crevices, a soft detailing brush (like a toothbrush for tight spots) or a cotton swab can be invaluable. Wrap a microfiber towel around your finger for tighter access. Many modern waxes are “trim-safe,” meaning they won’t stain black plastic or rubber trim. However, if your wax does leave white residue, a dedicated trim restorer or an all-purpose cleaner (diluted) on a microfiber towel can help carefully clean the affected areas. Always test on an inconspicuous spot first.
Remember, patience and practice are key. With each DIY waxing session, you’ll become more adept at application and removal, minimizing these common issues. Don’t be discouraged by initial problems; view them as learning opportunities to refine your technique and achieve an even more impressive showroom shine next time. By mastering these troubleshooting techniques, you’ll not only save money but also gain immense satisfaction from expertly caring for your vehicle.
Advanced Tips and Tricks for the DIY Waxer
Once you’ve mastered the basics of DIY car waxing and are consistently achieving a brilliant showroom shine, you might be ready to explore some advanced techniques and complementary products. These extra steps can elevate your results, offer even more robust protection, and make your detailing routine more efficient and enjoyable. Moving beyond the standard wax application allows you to fine-tune your finish and truly stand out.
This section is for the enthusiast looking to push their DIY game to the next level, offering insights into layering, choosing specialized waxes, and incorporating paint protection films (PPF) or ceramic coatings for the ultimate defense.
Layering Waxes and Sealants for Enhanced Protection
The concept of layering refers to applying multiple coats of wax or combining different types of products (e.g., a sealant followed by a carnauba wax) to achieve a deeper shine and extend durability. While a single, well-applied coat of quality wax provides significant protection, layering can offer marginal but noticeable benefits.
- Sealant First, Then Carnauba: A popular strategy is to apply a durable synthetic sealant first. This creates a strong, long-lasting protective base. Once the sealant has fully cured (typically 12-24 hours), you can then apply a coat of carnauba wax on top. The carnauba will enhance the depth and warmth of the shine, leveraging the sealant’s durability. This gives you the “best of both worlds.”
- Multiple Wax Layers: Applying two thin coats of the same wax, allowing adequate curing time between each, can also slightly boost durability and depth. However, there are diminishing returns; three or more layers rarely offer significant additional benefit over two. The key is thin, even layers each time.
The main advantage of layering is increased longevity of protection and a more pronounced “wet look” or depth to the paint. Ensure each layer is applied thinly to avoid product buildup and ease of removal.
Seasonal Waxing and Specialized Products
Adapting your waxing routine and product choices to the seasons can provide optimal protection against specific environmental challenges. Different times of the year present unique threats to your car’s paint.
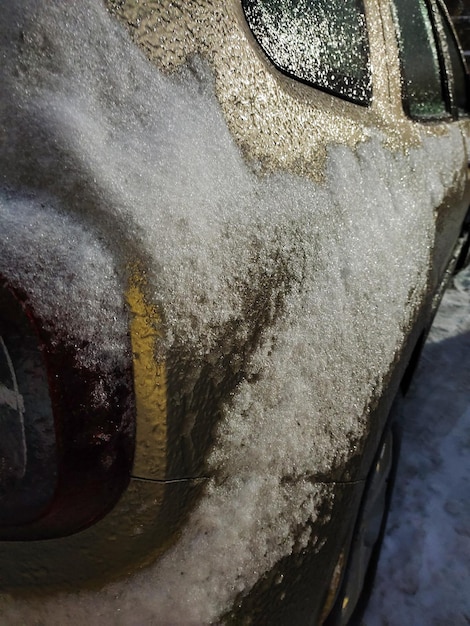
- Winter Protection: During winter, your car faces snow, road salt, de-icing chemicals, and harsh abrasive elements. Opt for a highly durable synthetic sealant or a dedicated winter wax that offers robust chemical resistance and long-lasting protection. Reapply more frequently, perhaps every 2-3 months, to combat the severe conditions.
- Summer Protection: Intense UV radiation, tree sap, and bug splatter are common summer foes. A high-quality carnauba wax can provide excellent UV protection and a deep, sun-drenched shine. Alternatively, a hybrid wax offering both UV blockers and good durability is an excellent choice.
- A Quick Detailer for Every Season: Keep a quick detailer spray handy year-round for immediate cleanup of bird droppings or bug guts, which can rapidly etch into paint if left untreated.
Beyond traditional waxes, consider specialized products:
- Paint Cleaners/Pre-Wax Cleansers: These non-abrasive products remove old wax, light oxidation, and surface contaminants not caught by claying, providing a perfectly clean canvas for your fresh wax.
- Glazes: Designed purely for aesthetic enhancement, glazes contain fillers that temporarily hide minor swirls and create a very wet, reflective look. They offer no protection and should be applied before wax.
By tailoring your waxing approach to the season and exploring specialized products, you can ensure your car receives optimal care year-round. These advanced tips not only enhance your vehicle’s appearance but also reinforce your commitment to maintaining its condition, making your $50 savings feel like a true victory.
| Key Point | Brief Description |
|---|---|
| 🛡️ Protect Your Investment | Waxing safeguards paint from UV rays, contaminants, and preserves resale value. |
| ✨ Choose the Right Wax | Carnauba for deep shine, synthetics for durability, or hybrids for balance. |
| 🧼 Prep is Key | Thorough washing and clay bar treatment are vital for a flawless finish. |
| 🔧 Master Application | Apply thin coats, allow proper curing, and buff with clean microfiber for best results. |
Frequently Asked Questions About DIY Car Waxing
The frequency depends on the type of wax and your environmental conditions. Carnauba waxes typically last 4-6 weeks, while synthetic sealants can protect for 3-6 months. If water no longer beads on your paint, it’s a good indicator that re-waxing is needed, usually every 1-3 months for most car owners.
While wax can temporarily fill in very minor imperfections, it won’t permanently remove swirl marks or scratches. For a true showroom finish, it’s best to correct these imperfections with polishing before waxing. Waxing over significant swirls can sometimes make them more noticeable.
No, it’s highly recommended to wax your car in shade or a cool garage. Direct sunlight and heat can cause the wax to dry too quickly, making it difficult to apply evenly, challenging to buff off, and often leading to streaks or haze on the paint surface.
Car wax, typically carnauba-based, offers a deep, warm shine but less durability (weeks). Car sealants are synthetic polymers, providing longer-lasting protection (months) and excellent chemical resistance, often with a crisp, reflective shine. Many modern products are hybrids blending both for balanced benefits.
Clay bar treatment removes embedded contaminants like industrial fallout, tree sap, and road tar that regular washing can’t. These contaminants create a rough surface. Claying ensures the paint is perfectly smooth, allowing the wax to bond properly, enhancing durability, and maximizing gloss for a truly flawless finish.
Conclusion
Embarking on the journey of DIY car waxing is more than just a cost-saving measure; it’s an empowering step towards understanding and preserving your vehicle’s aesthetic and structural integrity. By meticulously following the steps outlined in this guide – from choosing the right wax to preparing your surface, mastering application techniques, and committing to long-term maintenance – you are doing more than just saving $50 this year. You are investing in the longevity of your car’s paint, enhancing its resale value, and enjoying the immense satisfaction of a job expertly done by your own hands. The showroom shine you achieve will be a testament to your dedication, proving that professional results are well within reach for the diligent DIY enthusiast. Your car deserves this level of care, and your wallet will thank you for it.


")