Stop Rust Now: DIY Undercoating Guide for Winter Car Protection
Stop rust now this winter by undercoating your car with our ultimate DIY guide, providing step-by-step instructions, necessary materials, and expert tips to protect your vehicle from corrosive elements and extend its lifespan.
Winter weather can be brutal on your car, especially when it comes to rust. That’s where a good undercoating comes in. This Stop Rust Now: The Ultimate DIY Guide to Undercoating Your Car This Winter will walk you through the entire process, saving you money and giving you the satisfaction of protecting your vehicle yourself.
Why Undercoating Your Car Is Essential This Winter
Undercoating is a protective layer applied to the undercarriage of your vehicle, shielding it from the harsh elements that can cause rust and corrosion. This is especially crucial during winter, when road salt, snow, and moisture combine to create a highly corrosive environment.
Think of undercoating as a barrier between your car’s metal components and the outside world. It helps prevent rust from forming, extending the life of your vehicle and maintaining its value. Without it, you’re essentially leaving your car vulnerable to accelerated decay.
The Hidden Dangers of Winter Road Salt
Road salt is incredibly effective at melting ice and snow, making winter driving safer. However, it’s also a major culprit in causing rust. The salt clings to your car’s undercarriage, trapping moisture and accelerating the corrosion process.
Moisture and Rust: A Destructive Combination
Moisture is the other key ingredient in the rust equation. When water comes into contact with metal, especially in the presence of salt, it creates an electrochemical reaction that leads to rust formation. Undercoating helps prevent this contact, keeping your car’s undercarriage dry and protected.
- Protects against road salt: Undercoating provides a barrier against the corrosive effects of road salt.
- Prevents moisture damage: It seals the undercarriage, preventing water from reaching vulnerable metal parts.
- Extends vehicle lifespan: By preventing rust, undercoating can significantly increase the lifespan of your car.
In conclusion, undercoating is a vital investment in your car’s long-term health, especially in regions with harsh winters. It’s a preventative measure that can save you money and headaches down the road.
Choosing the Right Undercoating Material
Selecting the appropriate undercoating material is crucial for effective rust protection. There are several types available, each with its own advantages and disadvantages. Understanding the differences will help you make the best choice for your vehicle and driving conditions.
Factors to consider include the material’s durability, resistance to abrasion, ease of application, and price. You’ll also want to think about the specific environmental conditions your car will be exposed to.
Different Types of Undercoating
There are several types of undercoating materials available on the market, each with its own unique properties. Some of the most common include: rubberized undercoating, asphalt-based undercoating, and lanolin-based undercoating.
Comparing Durability and Resistance
Consider the durability and resistance to abrasion of the undercoating material. Some materials are more resistant to chipping, scratching, and impact damage than others, ensuring long-lasting protection.
- Rubberized Undercoating: Durable, provides sound deadening, but can trap moisture if not applied correctly.
- Asphalt-Based Undercoating: Highly resistant to abrasion, but can become brittle in cold weather.
- Lanolin-Based Undercoating: Eco-friendly, self-healing, but may require reapplication more frequently.
In conclusion, choosing the right undercoating material depends on your specific needs and priorities. Research different options, compare their features, and select the material that offers the best combination of protection, durability, and ease of application.
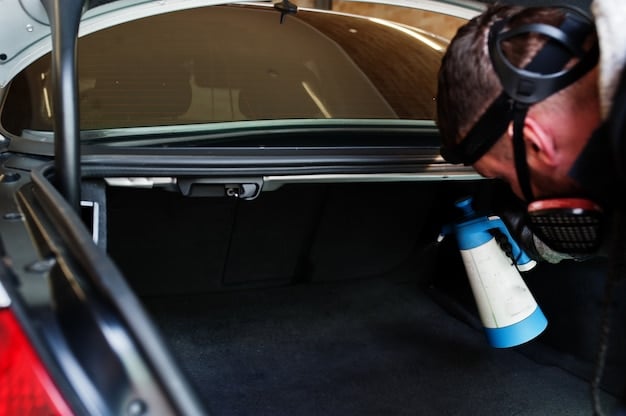
Essential Tools and Safety Gear for DIY Undercoating
Before you start undercoating your car, it’s important to gather the necessary tools and safety equipment. Having the right tools will make the job easier and more efficient, while safety gear will protect you from potential hazards.
Preparation is key to a successful DIY undercoating project. Make sure you have everything you need before you begin to avoid interruptions and ensure a safe working environment.
Tools You’ll Need
You’ll need a variety of tools to properly undercoat your car, including safety gear. These tools will help with the prep, application and finishing stages of undercoating.
Prioritizing Safety During Application
Wear safety glasses, gloves, and a respirator to avoid inhaling fumes or getting chemicals on your skin. Work in a well-ventilated area to minimize exposure to harmful vapors.
- Safety Glasses: Protect your eyes from debris and chemical splashes.
- Gloves: Prevent skin contact with undercoating materials.
- Respirator: Protect your lungs from harmful fumes and particles.
In conclusion, gathering the right tools and safety gear is essential for a safe and effective DIY undercoating project. Take the time to prepare properly to ensure a smooth and successful experience.
Step-by-Step Guide to Undercoating Your Car
Now that you have your materials and tools, it’s time to get to work. This step-by-step guide will walk you through the entire undercoating process, from preparation to application and cleanup.
Follow these instructions carefully to achieve a durable and long-lasting undercoating that protects your car from rust and corrosion.
Preparing the Undercarriage
Before applying the undercoating, it’s crucial to thoroughly clean the undercarriage of your car. Remove any dirt, rust, or debris that could interfere with the adhesion of the undercoating material. Use a wire brush to scrape off loose rust and grime, and then wash the area with soap and water.
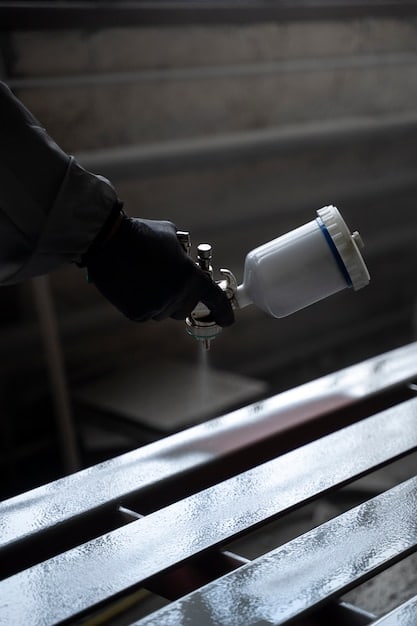
Applying the Undercoating Material
Apply an even coat of undercoating to the entire undercarriage, paying special attention to areas that are prone to rust, such as seams, joints, and wheel wells. Use a spray gun or brush to apply the material, following the manufacturer’s instructions for application thickness and drying time.
- Cleaning: Thoroughly clean the undercarriage to ensure proper adhesion.
- Application: Apply an even coat of undercoating to all vulnerable areas.
- Drying: Allow the undercoating to dry completely before exposing it to the elements.
In conclusion, following these step-by-step instructions will help you achieve a professional-quality undercoating that protects your car from rust and corrosion. Take your time, be thorough, and enjoy the satisfaction of knowing you’ve taken a proactive step to protect your investment.
Best Practices for Long-Lasting Rust Protection
Undercoating is a great start, but it’s not a one-time fix. To ensure long-lasting rust protection, you need to follow some best practices and maintain your car’s undercarriage regularly.
These practices will help extend the life of your undercoating and keep your car protected from the elements for years to come.
Regular Washing and Inspection
Wash your car regularly, especially during the winter months, to remove road salt and other corrosive materials. Pay special attention to the undercarriage, using a pressure washer or garden hose to rinse away any accumulated debris. Inspect the undercoating periodically for signs of damage or wear, and touch up any areas as needed.
Addressing Rust Spots Promptly
If you notice any rust spots forming on your car’s undercarriage, address them promptly to prevent them from spreading. Use a wire brush to remove the rust, and then apply a rust converter or primer to protect the metal. Follow up with a fresh coat of undercoating to seal the area and prevent further corrosion.
- Regular Washing: Remove road salt and debris to prevent corrosion.
- Inspect Regularly: Check for signs of damage or wear to the undercoating.
- Address Rust Promptly: Treat rust spots to prevent them from spreading.
In conclusion, following these best practices will help you maintain a long-lasting rust protection system for your car. Regular maintenance and prompt attention to any issues will ensure that your undercoating continues to protect your vehicle from the damaging effects of winter weather.
Cost-Benefit Analysis: DIY vs. Professional Undercoating
One of the biggest questions when considering undercoating is whether to do it yourself or hire a professional. Both options have their advantages and disadvantages, and the best choice depends on your budget, skills, and time constraints.
A cost-benefit analysis can help you weigh the pros and cons of each option and make an informed decision.
Comparing Costs and Time Investment
DIY undercoating generally has a lower upfront cost because you’re only paying for the materials. However, it requires a significant time investment and some level of skill. Professional undercoating, on the other hand, is more expensive but saves you time and effort.
Weighing the Pros and Cons of Each Approach
DIY undercoating allows you to customize the process and ensure that the job is done to your satisfaction. However, it can be messy and time-consuming. Professional undercoating offers convenience and expertise, but it can be more expensive and you may not have as much control over the process.
- DIY: Lower cost, more control, but requires time and skill.
- Professional: Higher cost, less time, but offers expertise and convenience.
In conclusion, the decision to DIY or hire a professional for undercoating depends on your individual circumstances. Consider your budget, skills, and time constraints, and weigh the pros and cons of each option before making a choice. The cost of DIY is obviously lower, however if one does the job poorly, they may need to hire a professional later anyway!
| Key Point | Brief Description |
|---|---|
| 🛡️ Rust Prevention | Undercoating protects your car from corrosion caused by road salt and moisture. |
| DIY Savings 💰 | Undercoating your car yourself can save you money compared to professional services. |
| 🛠️ Essential Tools | Gather safety glasses, gloves, a respirator, and cleaning supplies before starting. |
| 🚗 Regular Care | Wash your car regularly and inspect the undercoating for damage to ensure long-lasting protection. |
Frequently Asked Questions
▼
The frequency depends on your driving conditions. In areas with heavy road salt use, annual undercoating or inspections are recommended. Otherwise, every 2-3 years may suffice.
▼
Yes, but you must remove the existing rust first. Use a wire brush or rust remover to clean the surface before applying the undercoating, ensuring a better bond.
▼
Yes, it can be. Proper preparation, including covering surrounding areas and wearing protective gear, is essential to minimize the mess and protect yourself.
▼
The best time is before winter begins, typically in the fall. This allows the undercoating to protect your car throughout the harshest months when road salt is most prevalent.
▼
It depends on the warranty terms. Some warranties may be voided if aftermarket undercoating is applied. Check with your dealer or warranty provider before proceeding with DIY undercoating.
Conclusion
Undercoating your car is a proactive step in protecting it from the damaging effects of winter weather, particularly the corrosive nature of road salt. Whether you choose to tackle the project yourself or hire a professional, the benefits of rust prevention and extending your vehicle’s lifespan are well worth the investment.


")

